Maintenance
Checking for Loose Blades or
Damaged Spring Disc Washers
1.
Place a wrench on the blade bolt and torque to
35-65 ft-lb (47-88 N-m).
2.
With the wrench still on the blade bolt, hold
the blade spindle stationary and using a rag or
thickly padded glove, try to rotate the blade. If the
blade rotates relative to the spindle guard without
further tightening the blade bolt, the spring
disc washer has been flattened or damaged and
the bolt and washer assembly must be replaced
(Figure 62). Refer to
Removing the Blades
and
Installing the Blades
.
3.
Once the blade has been removed, inspect the
spring disc washer. If the washer appears to be
damaged (the washer surface has been marred)
or flattened, the bolt and washer assembly must
be replaced.
Removing the Blades
The blades must be replaced if a solid object is hit, if
the blade is out of balance, or the blade is bent. To
ensure optimum performance and continued safety
conformance of the machine, use genuine Exmark
replacement blades. Replacement blades made by
other manufacturers may result in an unsafe machine.
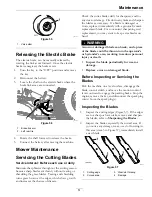
Hold the blade end using a rag or thickly-padded
glove. Remove the blade bolt, curved washer, and
blade from the spindle shaft (Figure 62).
g014975
Figure 62
1.
Sail area of blade
3.
Curved washer
2.
Blade
4.
Blade bolt
Sharpening the Blades
1.
Use a file to sharpen the cutting edge at both ends
of the blade (Figure 63). Maintain the original
angle. The blade retains its balance if the same
amount of material is removed from both cutting
edges.
g007276
Figure 63
1.
Sharpen at original angle
2.
Check the balance of the blade by putting it on a
blade balancer (Figure 64). If the blade stays in a
horizontal position, the blade is balanced and can
be used. If the blade is not balanced, file some
metal off the end of the sail area only (Figure 64).
Repeat this procedure until the blade is balanced.
g007201
Figure 64
1.
Blade
2.
Balancer
Installing the Blades
1.
Install the blade onto the spindle shaft (Figure 62).
Important:
The curved part of the blade
must be pointing upward toward the inside of
the mower to ensure proper cutting.
2.
Hold the blade end using a rag or thickly-padded
glove (or place a wrench on the top sheave nut).
Install the washer with the cupped side towards
the blade and blade bolt.
3.
Torque the blade bolt to 60-80 ft-lb (81-108 N-m).
WARNING
Incorrect installation of the blade or
components used to retain the blade cause
the blade to come loose and could seriously
injure or kill you or bystanders.
Always install the original Exmark blades,
washers and blade bolts as shown.
53
Summary of Contents for QUEST 346
Page 1: ...QUEST For Serial Nos 408 644 346 Higher Part No 4505 333 Rev A ...
Page 65: ...Schematics Schematics Electrical Logic Schematic g330623 65 ...
Page 67: ...Notes 67 ...
Page 68: ...Notes 68 ...
Page 69: ...Service Record Date Description of Work Done Service Done By 69 ...
Page 70: ...70 ...

