


SECTION 2
Connecting your Exede WiFi Modem
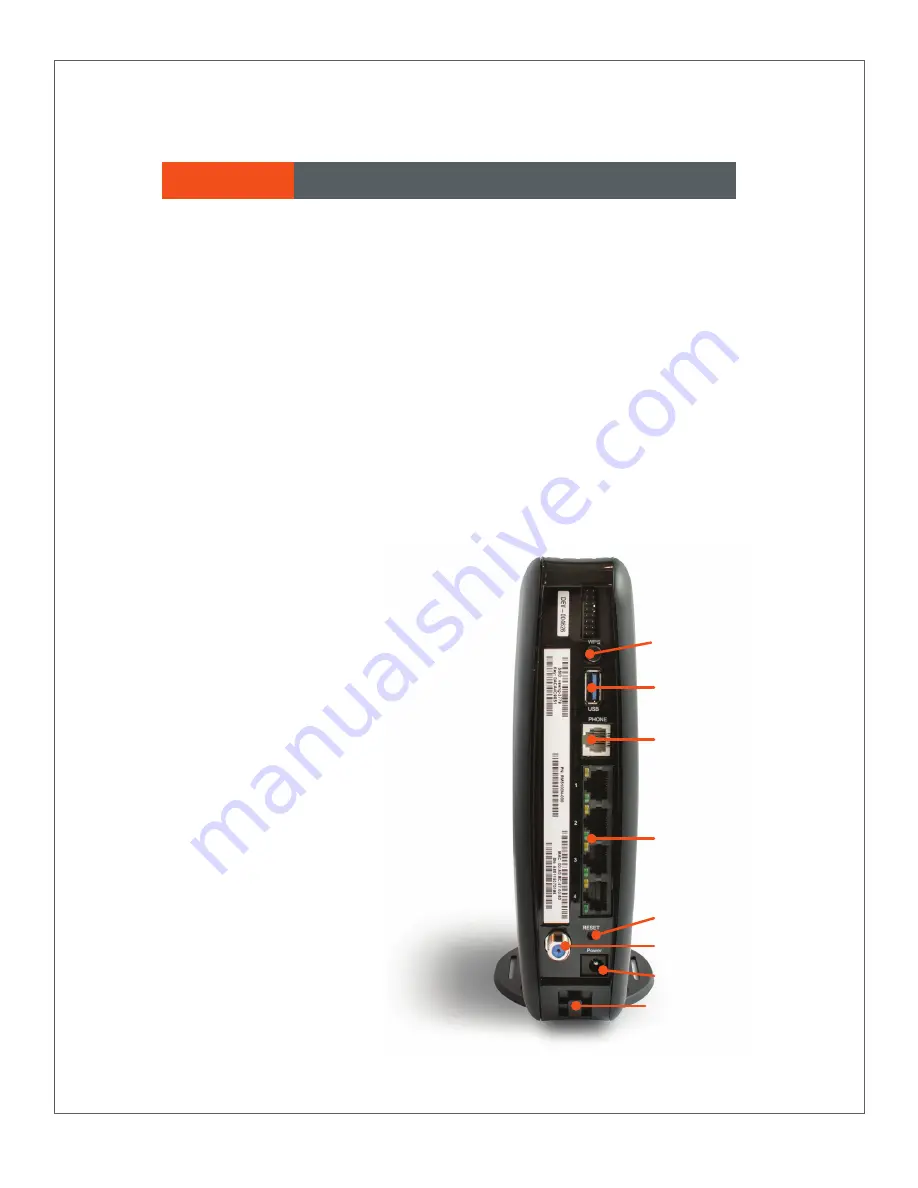
Wi-Fi protected setup
(WPS) button
USB connector
Phone port
Ethernet (LAN) ports
Reset button
Coax cable connector
Power connector
Power cord retention clip
1
Attach connector and stand to modem as directed in diagram.
2
Place your Exede WiFi Modem near your computer. Make sure the modem stands
upright, and isn’t crowded by other objects. You should also avoid keeping the modem
inside an enclosed cabinet, as this can reduce the quality of your signal.
It’s normal for your modem to get warm during use. For the best experience, keep it
out of direct sunlight and away from other sources of heat.
3
Connect the coax cable running from your dish to the modem via the connector.
Finger tighten the connector.
4
Connect one end of the Ethernet cable to the back of the modem and the other to
the Ethernet jack on your computer. The Exede WiFi Modem includes four Ethernet
connections so that multiple devices may be connected if needed.
5
If you are using Exede Voice, connect your home phone to the standard RJ11 phone
jack on the back of your modem. Refer to
Section 6 for more information about setting
up Exede Voice.
6
Attach the power cord to the back of your
Exede WiFi Modem, and then plug the
cord into a standard AC power source. Be
sure to run the cord through the power
cable retention clip just below the power
connector.
Warning:
Do not use the power adapter
from an old modem with your new
Exede WiFi Modem! It will result in poor
performance of your service.
7
Follow the instructions provided in the box
to “provision” your new modem so you may
begin using your service.


