background image

24 

Before proceeding to the following configuration please check that the charge 
of the battery is at least 50%. 
1.  Turn off Wi-Fi and turn off the tablet. 
2.  Insert the SIM card in the SIM slot and turn on the tablet. 

Note

: it is recommended to disable the PIN code request (if enabled) of 

the SIM card using a mobile phone or smartphone before insertion. 

3.  For the first connection, make sure to be in an area with good coverage of 

the 3G signal. 

Note

: you can check the coverage with a last generation mobile phone or 

smartphone (3G symbol should appear on display). 

4.  After switching on the tablet, wait about 2 minutes to allow the device to 

recognize and configure the SIM card. 

5.  In the top right of the screen the 3G icon will appear to indicate the signal 

strength. 

6.  Enter the "Settings" screen and under "Wireless & Networks" tap on 

Data 

usage

 item. 

7.  In the "Data usage" screen touch the tab with the name of mobile operator 

then tap on 

Cellular data

 to enable the mobile data connection. 

8.  Now press the back button to return to “Settings” screen and select 

More 

and then 

Cellular networks

9.  In the "Cellular networks settings” screen you can view the list of APNs 

(Access Point Name) by touching the item 

Access Point Names

10.  Check the correct APN contacting your mobile operator then select the 

desired APN and wait a few seconds. 

11. Exit the current screen and verify that the Internet access through the 

"Browser" app. 

 
These settings are to be made only at the first insertion of the SIM card. On 
subsequent reboots of the device it will be configured automatically. 
 
Before performing this procedure please contact the customer service of your 
mobile network operator to check the correct APN and the compatibility of the 
SIM for 3G network connection. 
 
Sometimes it may be useful to reset the tablet to factory settings. For the 
recovery process, please refer to the “Backup & reset” section of this manual. 


Summary of Contents for ZELIG PAD 470G

Page 1: ...ZELIG PAD 470G 7 MULTI TOUCH QUAD CORE 3G TABLET PC USER MANUAL XZPAD470G www hamletcom com...

Page 2: ...1 489 1 V1 9 2 EN 301 489 3 V1 6 1 EN 301 489 7 V1 3 1 EN 301 489 17 V2 2 1 EN 301 489 24 V1 5 1 EN 300 328 V1 8 1 EN 301 511 V9 0 2 EN 301 908 1 V6 2 1 EN 301 908 2 V5 4 1 EN 300 440 1 V1 6 1 EN 300...

Page 3: ...ssional users with VAT The warranty excludes the accessories such as power supply connecting cables etc and consumable parts such as batteries Support To obtain technical information or assistance ple...

Page 4: ...e to zero or tablet connected to the power supply electrical interference may make the tablet touch screen inaccurate Full functionality is restored charging the batteries or disconnecting the power s...

Page 5: ...o your device Photos Q What type of photo files can I view on my device A JPEG BMP GIF PNG Q How do I add photo files to my device A Copy the photos from your PC Micro SD card or USB storage device Vi...

Page 6: ...ery charging The tablet is equipped with a built in rechargeable Lithium battery It is suggested to fully charge the battery before use To charge the proceed as follows 1 Connect the micro USB cable t...

Page 7: ...s 6 Power button Turn on off tablet 7 Reset button 8 Headphone socket 3 5 mm standard earphone jack 9 Back camera 10 LED flash 11 Micro USB port Use this port to recharge the tablet Connect to PC for...

Page 8: ...ory card are located under the cover of the back camera on the rear side To install a SIM or Micro SD card follow these steps 1 Carefully remove the cover that protect the back camera 2 Insert the SIM...

Page 9: ...n the tablet Off When the tablet is ON press and hold the power button for around 3 seconds and the system will popup out power off option tap on Power off to turn the tablet off Remarks When battery...

Page 10: ...Wizard will guide you through the setup process Select your language and follow the onscreen instructions to select date and time setup Wi Fi network sync accounts etc If you have another Android dev...

Page 11: ...button and release In this way the tablet is locked and the display is turned off Wake up your tablet and unlock the screen To wake up the tablet from stand by and turn on display do as follows 1 Pres...

Page 12: ...oftware applications You can customize the main screen by changing the arrangement of app icons adding new apps or deleting the unused one Status bar The status bar is located on the top of the screen...

Page 13: ...uetooth activation To change a setting simply tap on its icon From this screen you can also access the full screen of the device settings by tapping the gear icon in the upper right shown in the pictu...

Page 14: ...t left or right Favorites tray At the bottom of the screen you can also find the favorites tray It is another quick way to get to your apps At the center of the favorites tray you can find the All App...

Page 15: ...widgets the small dynamic applications that allow you to quickly view information such as weather forecast calendar events or the latest news To add an app icon to a Home screen 1 Touch the All Apps i...

Page 16: ...Touch hold the app you want to remove then slide it over the X symbol on the top left of the screen and lift your finger Add a widget to the Home screen 1 Touch hold the background of the screen for...

Page 17: ...17 2 Touch the Widget icon to view the list of available widgets 3 Touch hold the thumbnail of the desired widget then drag it into an available area of the Home screen...

Page 18: ...f the screen for a few seconds until the below screen appears 2 Touch Wallpapers icon to view the available background images 3 Touch the thumbnail of the desired image and then touch Set wallpaper it...

Page 19: ...plug it into a free USB port on your computer 2 The tablet is automatically recognized by the computer and connected as a multimedia device By sliding down the status bar to expand the notification a...

Page 20: ...he window that contains all of the device settings The settings screen is organized into four sections each containing settings related to similar topics To open the setting that you want to change si...

Page 21: ...ire a password tap Connect to start the connection If the Wi Fi network requires a password then input the password and tap Connect to establish the connection If the connection to the Wi Fi network i...

Page 22: ...l Bluetooth Select this option to turn on off Bluetooth function The tablet will automatically scan all available Bluetooth devices and list them l SIM cards Select this item to access SIM cards setti...

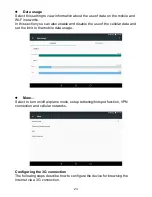
Page 23: ...o enable and disable the use of the cellular data and set the limit to the mobile data usage l More Select to turn on off airplane mode setup tethering hotspot function VPN connection and cellular net...

Page 24: ...n the Data usage screen touch the tab with the name of mobile operator then tap on Cellular data to enable the mobile data connection 8 Now press the back button to return to Settings screen and selec...

Page 25: ...llpaper sleep time font size and content auto rotation l Sound notification Use this screen to manage settings of volume ringtone vibrate and apps notifications You can also check or uncheck the optio...

Page 26: ...From the App info screen you can also remove the app from the tablet by tapping on the Uninstall button l Storage USB This section displays information about internal storage Micro SD card or external...

Page 27: ...less than the total internal storage because the operating system and default applications take a portion of the internal memory l Battery Access this setting to know the battery usage information l...

Page 28: ...28 l Users You can use this section to manage user s settings...

Page 29: ...ion In this section you can enable the location service and its operation mode l Security Use this section to manage settings for security options such as screen lock encryption SIM card lock password...

Page 30: ...allows you to configure and manage accounts Tap the name of the account to view account details or tap Add account to enter a new account l Google Manage settings for Google apps and services on your...

Page 31: ...board text to speech output voice control and pointer speed l Backup reset Option of for backup restore erase personal data Warning once you perform the Factory data reset it will erase all personal d...

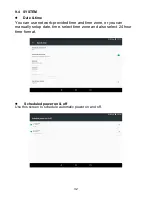
Page 32: ...time You can use network provided time and time zone or you can manually setup date time select time zone and also select 24 hour time format l Scheduled power on off Use this screen to schedule autom...

Page 33: ...ssword manage the options of text to speech output and much more l Printing Android allows you to print the contents of some screens such as web pages with a printer connected to the same Wi Fi networ...

Page 34: ...34 l About tablet Displays additional information about the tablet...

Page 35: ...ures may differ from those shown here and change without notice l Browser After connecting your tablet to Wi Fi network tap the Browser icon in the favorites tray on the screen to open the web browser...

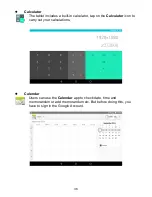
Page 36: ...built in calculator tap on the Calculator icon to carry out your calculations l Calendar Users can use the Calendar app to check date time and memorandum or add memorandum etc But before doing this y...

Page 37: ...rs of the screen you can find the icons to change the shooting mode and to access the camera settings In the top right side of the interface is also available the icon to switch from rear to front fac...

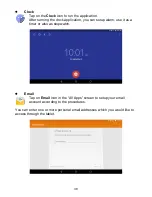
Page 38: ...k application you can setup alarm use it as a timer or also as stopwatch l Email Tap on Email icon in the All Apps screen to setup your email account according to the procedures You can enter one or m...

Page 39: ...ry devices Internal MICROSD or USB to see the folders and files inside Tap hold a file for few seconds to select it the item become highlighted then use the menu on the top right of the screen for Cop...

Page 40: ...40 l Google Search It allows you to run fast online searches In the Google search app you can perform researches either by typing text or by using voice recognition...

Page 41: ...n the red circle icon to start recording Tap on the white square icon to stop recording Once you stopped the recording system will prompt Discard and Save Tap on Discard to discard the recording tap o...

Page 42: ...t least 6 hours before you start to use the device The rechargeable battery is designed and manufactured to be used and recharged frequently As same with all of lithium batteries the capacity of the b...

Page 43: ...damage the LCD screen Do not use any sharp objects to touch the LCD screen as this will scratch the screen Only use the AC adapter included with the device Using any other power adapters will damage...

Page 44: ......

Reviews: