Design and function
TIG welding
099-000118-EW501
24.11.2017
55
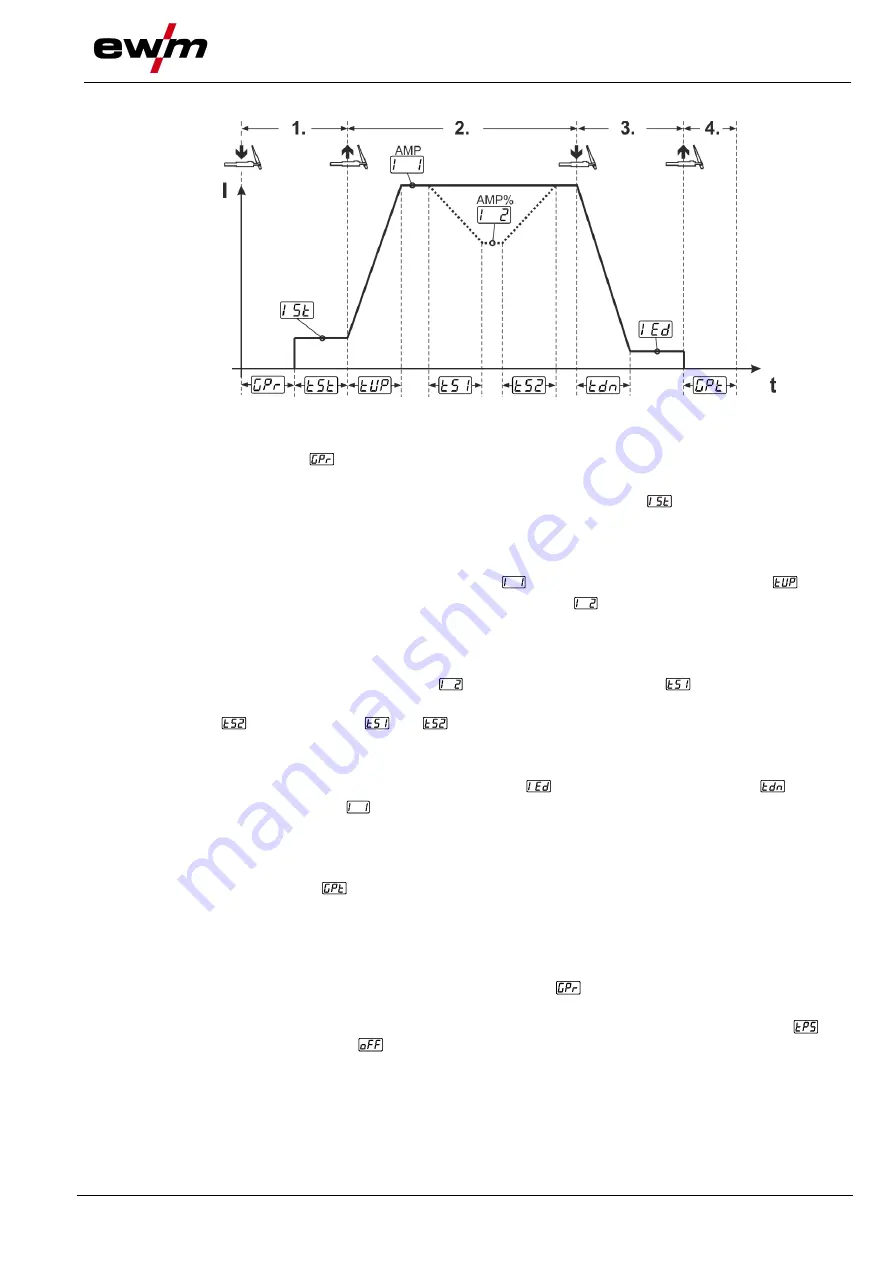
Sequence
Figure 5-35
1
st
cycle
• Press torch trigger 1
, the gas pre-flow time elapses.
• HF start pulses jump from the electrode to the workpiece. The arc ignites.
• Welding current flows and immediately assumes the set ignition current
(search arc at minimum
setting). HF switches off.
2
nd
cycle
• Release torch trigger 1.
• The welding current ramps up to the main current
(AMP) in the selected up-slope time
.
Switching from the main current AMP to secondary current
(AMP%):
• Press torch trigger 2 or
• Tap torch trigger 1 (torch modes 1–6).
If torch trigger 2 is pressed together with torch trigger 1 during the main current phase, the welding
current decreases to the secondary current
(AMP%) in the set slope time
.
Once torch trigger 2 is released, the welding current increases again to the main current AMP in the set
slope time
. The parameters
and
can be set in the Expert menu (TIG)
> see 5.9.16 chapter
.
3
rd
cycle
• Press torch trigger 1.
• The main current decreases to the end-crater current
within the set down-slope time
.
Once the main current phase
AMP has been reached, you can shorten the welding sequence by
tapping torch trigger 1 (third cycle will be omitted).
4
th
cycle
• Release torch trigger 1; arc is extinguished.
• Set gas post-flow time
runs.
When the foot-operated remote control is connected, the machine switches automatically to non-latched
operation. The up- and down-slopes are switched off.
Alternative welding start (tapping start):
For the alternative welding start, the durations of the first and second cycle are defined by the set process
times only (tapping the torch trigger in the gas pre-low phase
).
To activate this function, set a two-digit torch mode (11-1x) at the machine control. This function can also
be deactivated completely when required (welding stop by tapping remains active). To do so, the
parameter must be switched to
in the machine configuration menu
> see 5.18 chapter
.


