


Quick Reference Guide
8
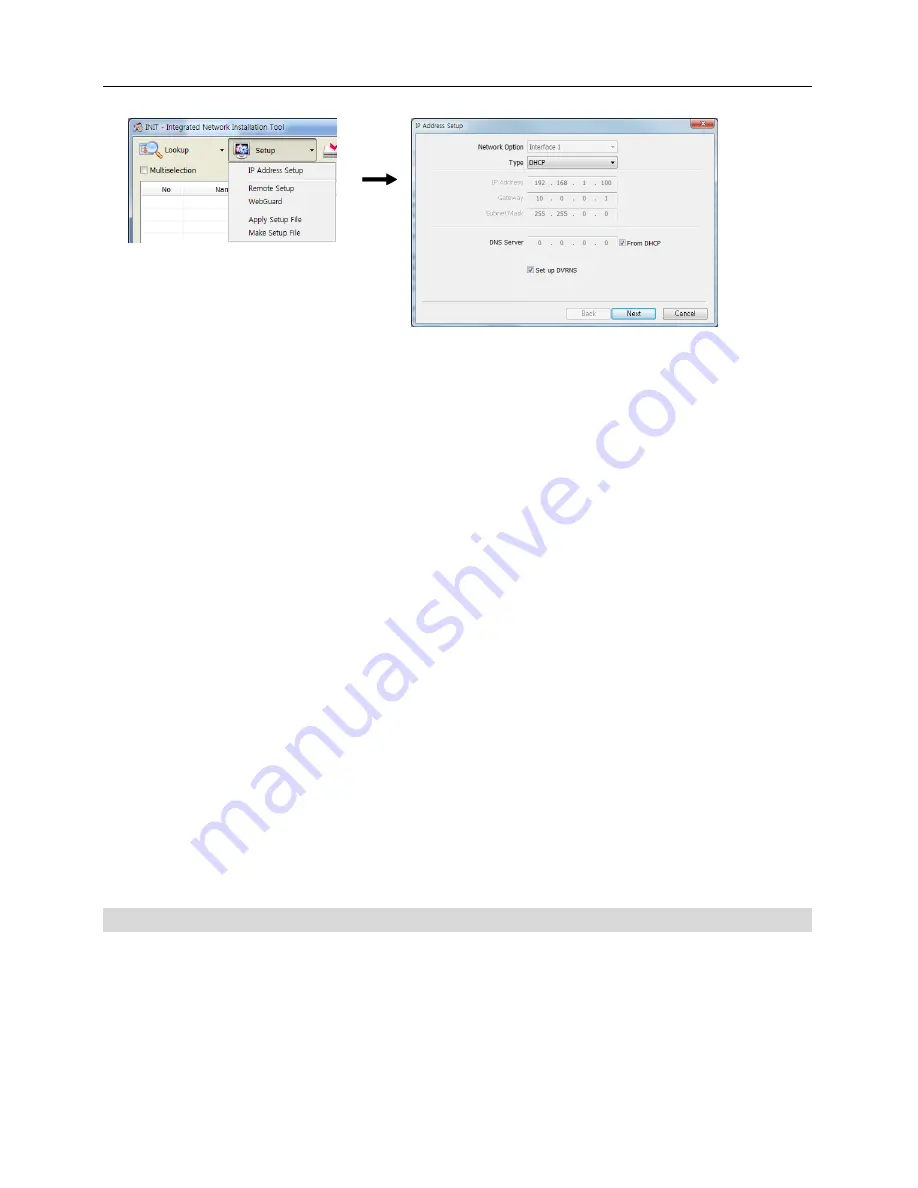
Type
: Select
Manual
,
ADSL (with PPPoE)
or
DHCP
depending on the network connection
type. If you select
Manual
, you need to acquire the IP address, gateway and subnet mask from
your network administrator or Internet service provider. The ADSL connection requires ID
and password.
DNS Server
: Enter the IP address of the DNS server. If you selected
DHCP
for the network
connection type, selecting
From DHCP
automatically assigns the IP address of the DNS server.
Set up DVRNS
: Enable the option by checking the box. When you check the box, the
Next
button at the bottom changes to
Next
. Click the
Next
button and enable the
Use DVRNS
option
by checking the box. Set up the DVRNS function referring to the
DVRNS Setup
section below.
3.
Set up the UPnP function in the NAT (Network Address Translation) device and the network
camera. See the NAT device User’s Manual for details about setting in the NAT device. See
the
UPnP Function Setup in Network Camera
section below for details about setting the in
the network camera.
NOTE:
If the NAT device does not support the UPnP function, you have to set up port forwarding
manually. Also, if more than one network camera is connected to the NAT device, the port
numbers of each network camera should be different. See the NAT device User’s Manual
for details about
setting port forward in the NAT device. See the explanation of procedures
from 1 to 3 in the
UPnP Function Setup in Network Camera
section below for details about
changing port numbers of the network camera.
4.
Run a remote program on a remote PC and register the network camera on the remote program
with the name registered on the DVRNS server.
NOTE:
Check that firewall is disabled in the router or NAT device. If firewall is enabled, you
may not connect to the network camera. Ask your network administrator for details or see the
NAT device User’s Manual.
DVRNS Setup
Run the INIT program on the local PC
→
Select the network camera
→
Click the
Setup
icon
→
Select
IP Address Setup
→
Set up the network connection information and check the
Set up
DVRNS
box
→
Click the
Next
button
→
Check the
Use DVRNS
box
→
Enter the DVRNS server
information.


