


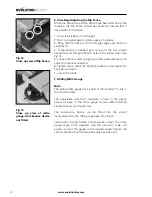


Fig 31
Use of pushstick.
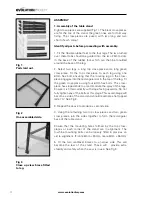
Fig 32
View of machine set for
bevel rip cutting.
21
www.evolutionfury.com
Note
Check that the rip fence is locked in position and is parallel to
the saw blade.
Check that the riving knife is properly aligned with the saw
blade.
When ripping small section material a push stick should be
used to feed/guide the final 300mm of the material past the
blade. A push stick should always be used when making cuts
of less than 300mm. See Fig 31.
When ripping long boards or large panels always use a work
support.
Feed the workpiece through the saw keeping it indexed
against the rip fence. Use smooth, steady pressure and
employ a push stick if necessary.
When the ripping width is greater than 300mm, and with care,
both hands can be used to guide/feed the material through the
saw. The operators left hand will be to the LH side of the saw
blade. The operators right hand will be close to the rip fence
on the RH side of the sawblade. Hands should never be in line
with the blade.
7. Bevel ripping
When bevel ripping material 150mm or narrower use the rip
fence on the RH side of the blade only.
See Fig 32.
MAINTENANCE
Warning
Ensure that the machine is disconnected from the mains
supply before any maintenance tasks or adjustments are
attempted.
Changing the Blade
Note
We recommend that the operator considers wearing protective
gloves when handling or changing the machines blade.