7800EMR-HYDRA2
User Manual
Page-12
Revision 1.0
Setting up Calrec’s Test Rack
Secondary SFP should configured same as Primary SFP only difference will be control and router SFP
location (Use Secondary SFP location)
1.
Calrec rack IP address is set to 192.1.1.0, to change this please refer to Calrec’s initial setup for
Evertz document or the label on top of the chassis. Set your test pc’s 2
nd
network adaptor IP
address to 192.1.134.0 and Netmask 255.255.0.0 and MAC address to 000D07FF8600 (also called
the locally administered address).
2.
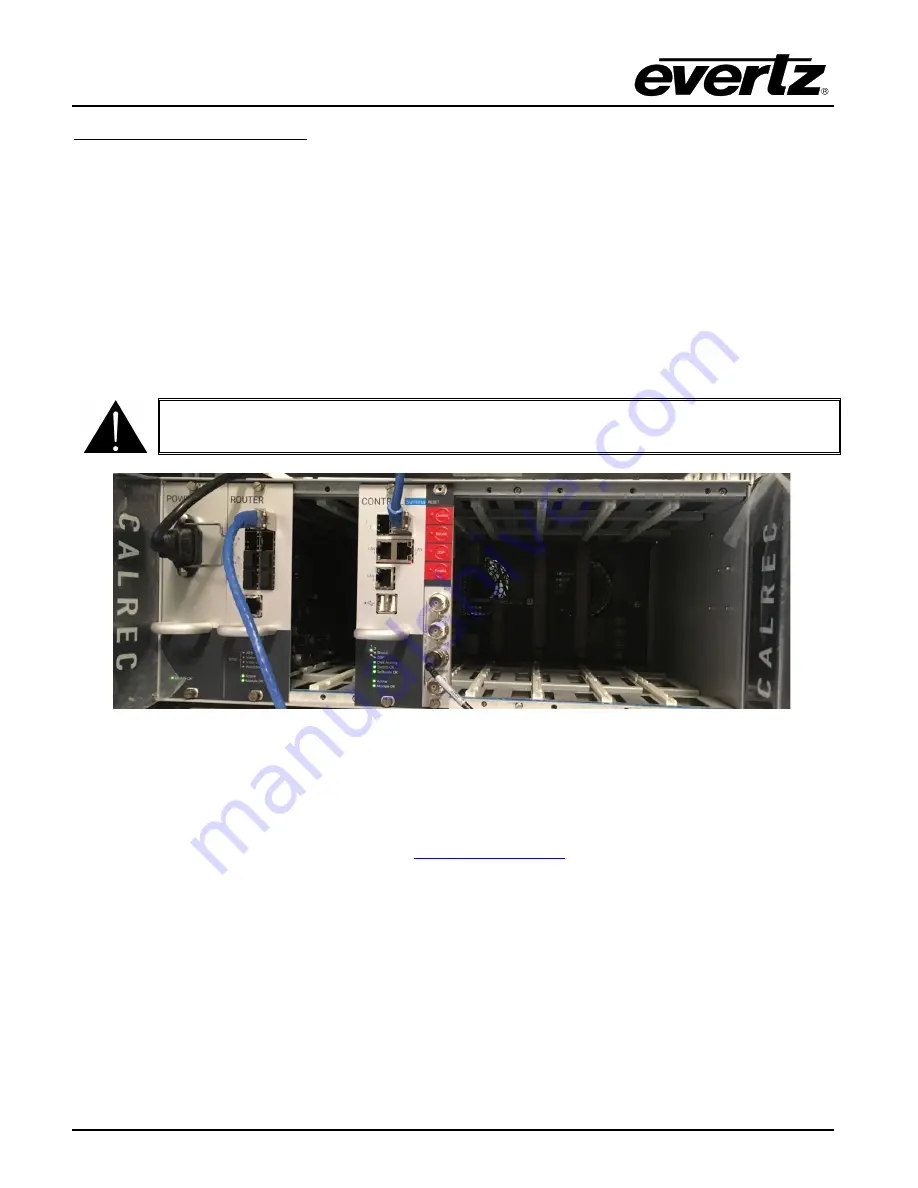
Insert the two Eoptolink Copper SFP’s provided, one into the CONTROL card’s Surface port 1 or 2
and the other into any of the ROUTER card’s Hydra2 ports. Also plug a PAL/NTSC video reference
into Video 2 Sync input on the central RESET card – see picture below.
CAUTION:
Do not hot plug SFPs into the Calrec Rack
Figure 4-6 : Carlec Setup
3. Plug the Control CAT5 cable into the test pc’s 2
nd
network connection and power cycle the Calrec
Rack. Wait 30 seconds until Active and Module OK leds both on for CONTROL and ROUTER cards.
Confirm that you can ping 192.1.1.0.
Open Chrome and type in the following URL
This will be up the login screen for
Calrec’s H2O interface. Log in with the following:
Username = admin
Password = admin1
Once logged in you should see the following tabs below:
Summary of Contents for 7800EMR-HYDRA2
Page 2: ...This page left intentionally blank ...
Page 6: ...7800EMR HYDRA2 User Manual Page ii Revision 1 0 ii This page left intentionally blank ...
Page 12: ...7800EMR HYDRA2 User Manual Page 4 Revision 1 0 This page left intentionally blank ...
Page 16: ...7800EMR HYDRA2 User Manual Page 8 Revision 1 0 This page left intentionally blank ...
Page 24: ...7800EMR HYDRA2 User Manual Page 16 Revision 1 0 This page left intentionally blank ...
Page 26: ...7800EMR HYDRA2 User Manual Page 18 Revision 1 0 This page left intentionally blank ...
Page 30: ...7800EMR HYDRA2 User Manual Page 22 Revision 1 0 Figure 7 2 Sample FTP Upgrade Window ...


