attention
Class B Disclaimer:
This equipment has been tested and found to comply with the limits for a Class B digital device, pursuant to Part 15 of the FCC Rules. These limits
are designed to provide reasonable protection against harmful interference in a residential installation. This equipment generates, uses and can radiate radio frequency
energy and, if not installed and used in accordance with the instructions, may cause harmful interference to radio communications. However, there is no guarantee that
interference will not occur in a particular installation. If this equipment does cause harmful interference to radio or television reception, which can be determined by
turning the equipment off and on, the user is encouraged to try to correct the interference by one or more of the following measures:
• Reorient or relocate the receiving antenna.
• Increase the separation between the equipment and receiver.
• Connect the equipment into an outlet on
a circuit different from that to which
the receiver is connected.
• Consult the dealer or an experienced radio/television technician for help.
Please note that changes or modifications of this product not expressly approved by the party responsible for compliance could void the user's authority to operate the equipment.
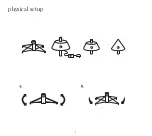
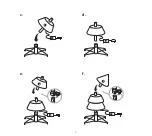
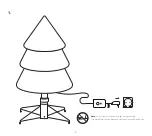
Set up the tree according to the number tag sequence attached to each tree section from the bottom to the top.
Section #1 from the bottom on the tree stand, followed by Section #2 on top, and so on. Random setup will result in electrical malfunction.
WARNING!
1. This product may potentially trigger seizures for people with photosensitive epilepsy when using the motion effect light modes.
2. The light source of this luminaire is not replaceable; when the light source reaches its end of life the whole luminaire shall be replaced.
3. Do not connect the chain to the supply while it is in the packing.
4. The lamps are not replaceable.
5. Do not interconnect parts of this lighting chain with parts of another manufacturer's lighting chain.
6. Interconnection shall be made only by the use of the supplied connectors. Any open ends must be sealed-off before use.
7. The controller and remote controller (if included) can only be used with this product.
CAUTION! For indoor use only.
The crossed-out wheeled bin symbol indicates that the item should be disposed of separately from household waste. The item should be handed in for recycling
in accordance with local environmental regulations for waste disposal.
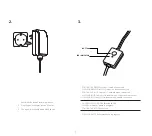
Power supply: see label
Technical Specifications
When using electrical products, basic precautions should always be followed including the following:
READ AND FOLLOW ALL SAFETY INSTRUCTIONS.
a) Do not use seasonal products outdoors unless marked suitable for indoor and outdoor use. When products are used in outdoor applications, connect the product to
a Ground Fault Circuit Interrupting (GFCI) outlet. If one is not provided, contact a qualified electrician for proper installation.
b) This seasonal use product is not intended for permanent installation or use.
c) Do not mount or place near gas or electric heaters, fireplaces, candles or other similar sources of heat.
d) Do not secure the wiring of the product with staples or nails, or place on sharp hooks or nails.
e) Do not let lamps rest on the supply cord or on any wire.
f) Unplug the product when leaving the house, or when retiring for the night, or if left unattended.
g) This is an electric product – not a toy! To avoid risk of fire, burns, personal injury and electric shock it should not be played with or placed where small children can reach it.
h) Do not use this product for other than its intended use.
i) Do not hang ornaments or other objects from cord, wire, or light string.
j) Do not close doors or windows on the product or extension cords as this may damage the wire insulation.
k) Do not cover the product with cloth, paper or any material not part of the product when in use.
l ) The lamps of this product are not replaceable. Do not attempt to change or modify the lamps.
m) Read and follow all instructions that are on the product or provided with the product.
SAVE THESE INSTRUCTIONS.
IMPORTANT SAFETY INSTRUCTIONS
This equipment complies with FCC radiation exposure limits set forth for an uncontrolled environment.
This equipment should be installed and operated with a minimum distance of 20 cm between the radiator and your body.
This transmitter must not be co-located or operating in conjunction with any other antenna or transmitter.
3
Summary of Contents for twinkly pre-lit tree
Page 1: ...pre lit tree INSTRUCTIONS GUIDE ...
Page 2: ......
Page 4: ...physical setup 1 2 3 4 ...
Page 5: ...c d e f 1 2 3 5 ...
Page 17: ...RED 3 17 ...
Page 19: ......


