


4
3.
Installation
3.1
EZN2550-SG
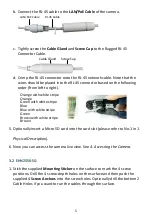
1.
Drill three holes on the surface according to the screw positions on the
Camera Base. Push the supplied 3
Screw Anchors
into the holes. Drill another
hole in the middle within the 3 screw holes if you wish to run the wires into
the surface. Screw the camera to surface using the supplied 3
Screws
.
Mounting Screws
Screw Anchors
2.
Adjust the pan/tilt/rotate angles of the camera by loosen the Pan/Tilt screws
using the supplied
Hexagon Wrench
.
Tilt Screw
Pan Screw
3.
Connect the camera to power. You can either connect the camera to a 12VDC
power source or to a PoE switch using the PoE cable.
4.
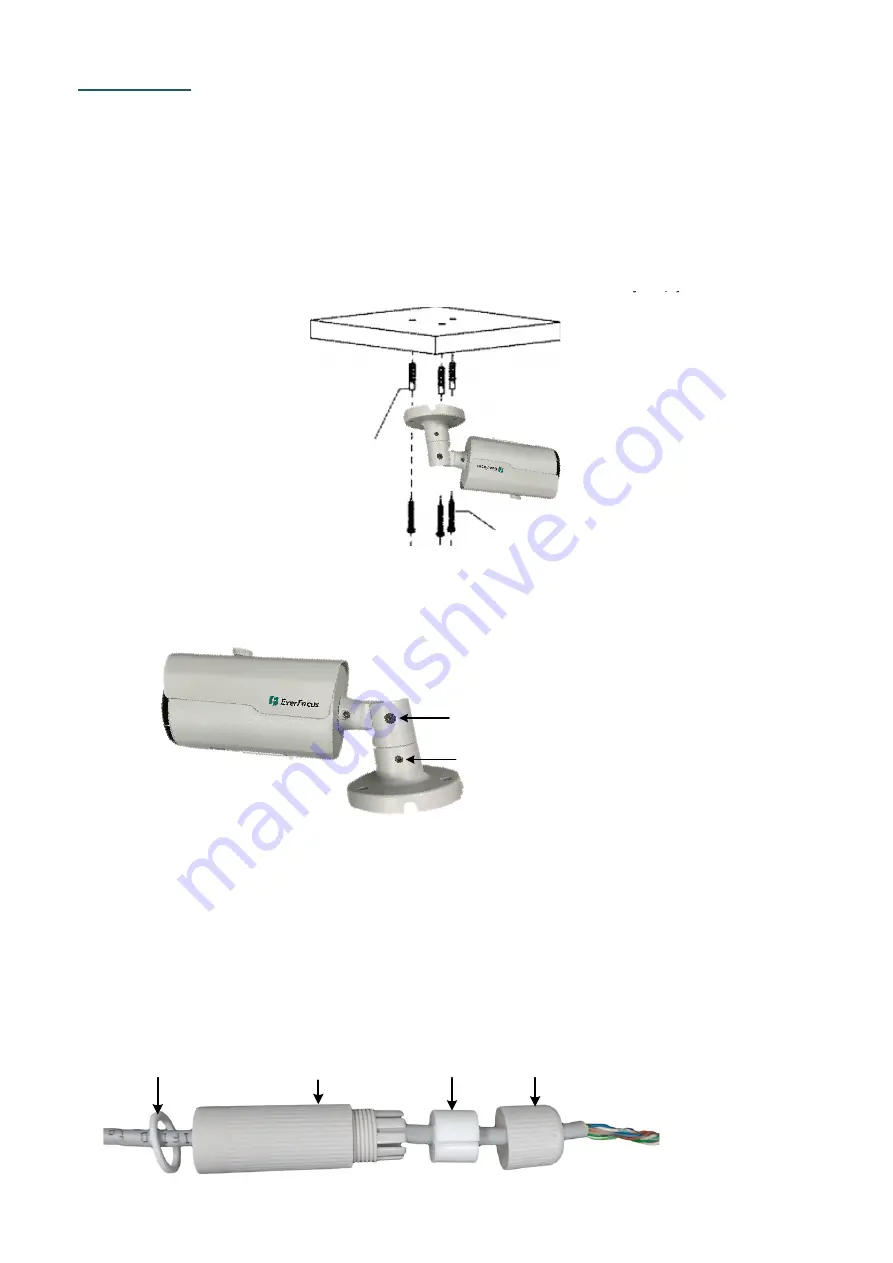
Connect the camera to the network using the supplied
Cable Gland Kit
.
a.
Insert a RJ-45 network cable (without the RJ-45 connector on the one end)
through the supplied
Waterproof Ring
,
Cable Gland
,
Stopper
and
Screw
Cap
accordingly.
Waterproof Ring
Cable Gland
Stopper Screw Cap


