


ECOR960 4F2 / 8F2 / 16F2
15
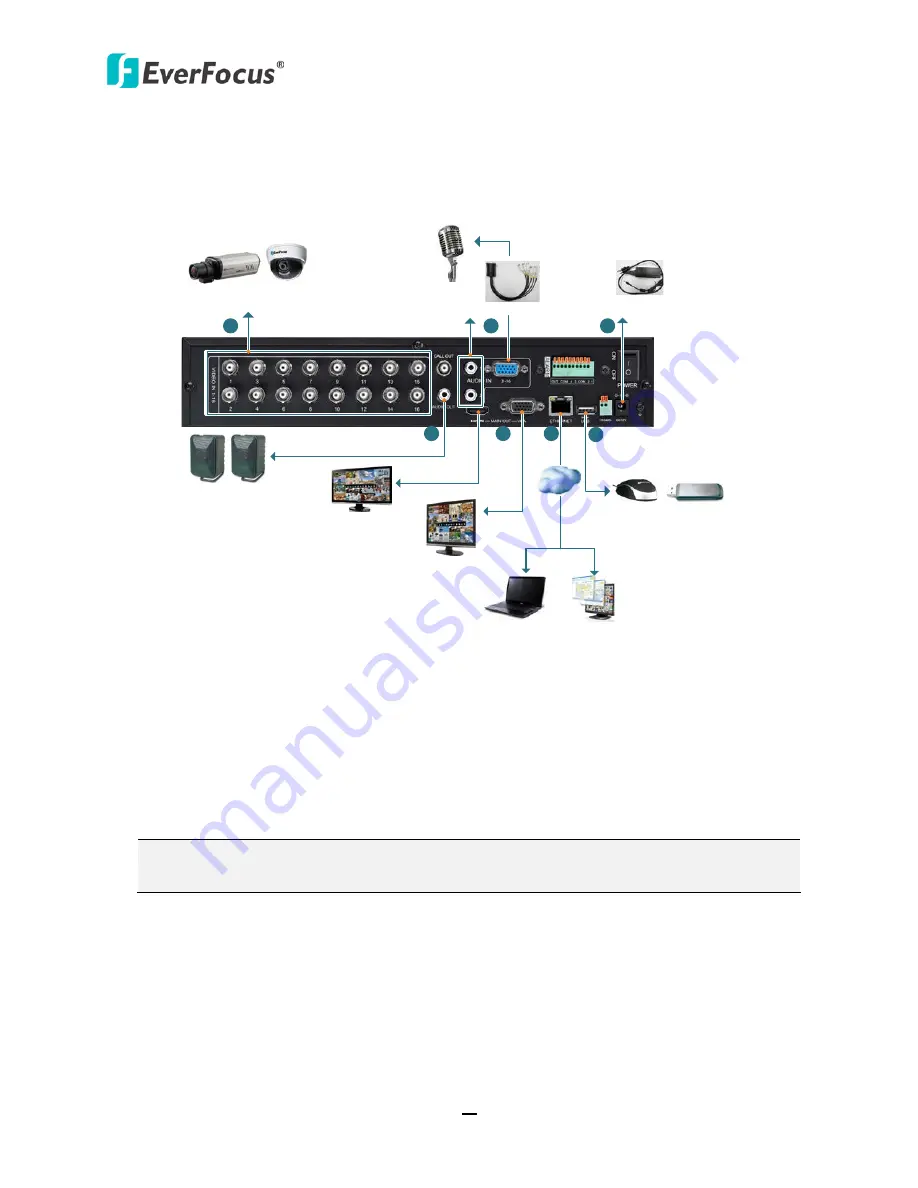
2.2
Basic Connection
The instructions below the figure describe the basic connection for the ECOR960 4F2 / 8F2 /16F2
DVR. (This figure uses ECOR960 16F2 DVR as an example).
Analog Camera
Line Level
Audio Out
Line Level
Audio In
Main Monitor
(HDMI)
Web Remote Client
PowerVideo
Plus (CMS)
Mouse / USB Memory Stick
Line Level
Audio Out
Main Monitor
(VGA)
Power Supply
RS-485 Device
Audio Cable
Network
1
2
3
4
5
6
7
Figure 2-11
1.
Connect the cameras to the DVR using the coaxial cables. 700TVL cameras are recommended.
2.
Connect the line level audio input devices to the Audio-in 1 and 2 RCA sockets of the DVR.
Connect the line level audio input devices to the Audio-in 3~16 VGA port using the supplied
Audio Cable. Note that the audio input devices, such as microphones, are required to have a
(built-in) amplifier and external power supply. Please refer to
1.5 Rear Panel
.
3.
Using the supplied Power Cord, connect one end to the DC 12V port on the DVR and the
other end to the DC 12V power outlet
.
4.
To listen to audio of video source, connect speakers to the Audio-out BNC port using the BNC to
RCA connector. Note that speakers with a (built-in) amplifier and external power are required
.
5.
To view videos and control OSD settings, connect a monitor to the HDMI or VGA port using
the HDMI or VGA cable supplied by the monitor manufacturer.
6.
To manage the DVR over network, use a standard RJ-45 cable to connect the DVR to the
network.
7.
Optionally connect a mouse to the DVR to control the system. You can also control the
system using the supplied IR Remote Control or the control keys on the front panel.
Note:
Please ensure to connect the internal power cables to the internal HDDs before
powering on the DVR.


