MAINTENANCE AND CLEANING
The product does not require any maintenance and should never be disassembled
for any reason.
Please use a soft, dry, clean cloth for cleaning.
Do not use aggressive detergents as these can cause discoloration of the case.
DISPOSAL
Electronic devices are recyclable waste materials and must not be disposed
of in the household waste!
Please dispose of the product, when it is no longer of use, according to the
current statutory requirements.
DECLARATION OF CONFORMITY (DOC)
The manufacturer hereby declares that this product conforms to the fundamental
requirements and the other relevant regulations of Directive 1999/5/EC.
You can fi nd the declaration of conformity for this product at
www.conrad.com
TECHNICAL DATA
Operating voltage: .............................. 1.2 V/DC
Rechargeable battery: ....................... 1.2 V/800 mAh (NiMH permanently installed)
Battery life: .......................................... approx. 1 year (rechargeable battery full/
at darkness)
Measuring range thermometer: ...... -25 to +65°C
Thermometer resolution: .................. 0.1°C
Dimensions: ......................................... 300 x 190 x 27 mm
Weight: .................................................. 565 g
MAKING A DCF RECEPTION ATTEMPT
-
To perform a manual search for the DCF signal (e.g., if you have mounted the
radio wall clock in a different location), press the °C/°F (5) button for three
seconds.
This will start a new reception attempt. Then, as described above, wait several
minutes until the correct time is displayed.
-
To cancel the reception attempt und turn off the DCF function, press and hold
the °C/°F button (5) for eight seconds.
SETTING THE TIME MANUALLY
If no DCF reception is possible, the time setting may also be performed manually.
However, the clock keeps searching for the DCF signal several times a day, and auto-
matically adjusts to the DCF time after a successful reception.
If you want to operate the clock permanently outside the DCF reception
range, we recommend to deactivate the DCF function. This will place less
load on the rechargeable battery. For that purpose, press the °C/°F button
(5) for eight seconds until the reception symbol on the display goes out.
-
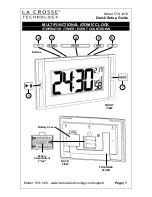
Press and hold the SET button (3) until the hour display fl ashes.
-
Set the hours with the ADJUST button (4).
-
Press the SET button (3) again and set the minutes with the ADJUST button (4).
-
Proceed as described above to set the seconds, the display format (12/24h), the
year, month and date.
-
After completion of the settings press the SET button (3) or wait 30 seconds to
save the settings.
CHANGING THE TEMPERATURE UNIT
-
Briefl y press the °C/°F (5) key, to select the unit for the temperature.
CHANGING FROM SUMMER TO WINTER TIME
-
The switching between summer and winter time takes place automatically via
the DCF signal.
-
During summer time, DST is shown on the display(
D
aylight
S
aving
T
ime).
CHARGING TIMES
Charging duration for
Environment
1 day
Complete recharge
Indoor areas, normal brightness
>8h
---
Indoor areas, bright
>2.5h
---
Fluorescent lamp (distance 30-40 cm)
>1h
>360h
Daylight, cloudy
>7min
>100h
Daylight, strong sun
>4min
>65h
In order to recharge the inbuilt rechargeable battery as quick as possible,
the clock should be placed under bright sunlight, if possible. The ON/OFF
switch (7) should be turned off for this, so that the clock does not reduce the
generated solar energy by its own consumption.
Do not place the clock under hot light bulbs or spotlights because it may
overheat and get damaged.
These operating instructions are a publication by Conrad Electronic SE, Klaus-Conrad-Str. 1,
D-92240 Hirschau (www.conrad.com). All rights including translation reserved. Reproduction by
any method, e.g. photocopy, microfi lming, or the capture in electronic data processing systems
require the prior written approval by the editor. Reprinting, also in part, is prohibited. These ope-
rating instructions represent the technical status at the time of printing. Changes in technology
and equipment reserved.
© Copyright 2011 by Conrad Electronic SE.


