9. Starting to sew
You can start to sew using either the power cord with the foot control or insert
batteries into the battery compartment and use the controls on the sewing machine.
1.
Raise the needle to its highest position by turning the hand wheel counter
clockwise and lift the presser foot.
2.
Place both the upper and lower threads behind the presser foot. The threads
should be approximately 4-inches long.
3.
Place the fabric to be sewn under the presser foot. (Fig. 1) Lower the needle
by turning the hand wheel counter clockwise and then lower the presser foot.
(Fig. 2)
4.
Press the “
►
/
█”
On/Off button to the “On” position and begin sewing. Do not
pull the fabric. Gently guide the fabric to keep the seam straight. (Fig. 3)
5.
After finishing sewing, press the “
►
/
█”
On/Off button to the “Off” position to
stop sewing. (Fig. 3)
6.
Turn the hand wheel counter clockwise to raise the needle to its highest
position. (Fig. 4) Lift the presser foot and pull out the thread tension release
bar. Then gently remove the fabric away from the sewing machine.
7.
Cut the thread using the thread cutter.
Important:
Do not touch the tension dial during sewing because it may cause the
machine to jam.
Fig. 1
Fig. 2
Fig. 3
Fig. 4
7. Setting the sewing speed
This sewing machine has two sewing speeds. Press the “
” button in for a faster
sewing speed or press “
” button to the “out” position for a slower sewing speed.
8. Work light
If additional light is needed, press the light switch “ “ in to turn the light “On”.
Press it again if you wish to turn it “Off”.
9
10. Sewing sleeves
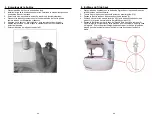
This sewing machine has been designed to sew sleeves or any narrow openings in
a garment.
1.
Lift the presser foot.
2.
Position the garment over the sewing arm.
3.
Lower the presser foot and follow the regular instructions.
10


