N58
Series
Quick
Installation
Guide
www.etrovision.com
+886-2-2655-1518
Technical Support: [email protected]
Sales Contact: [email protected]
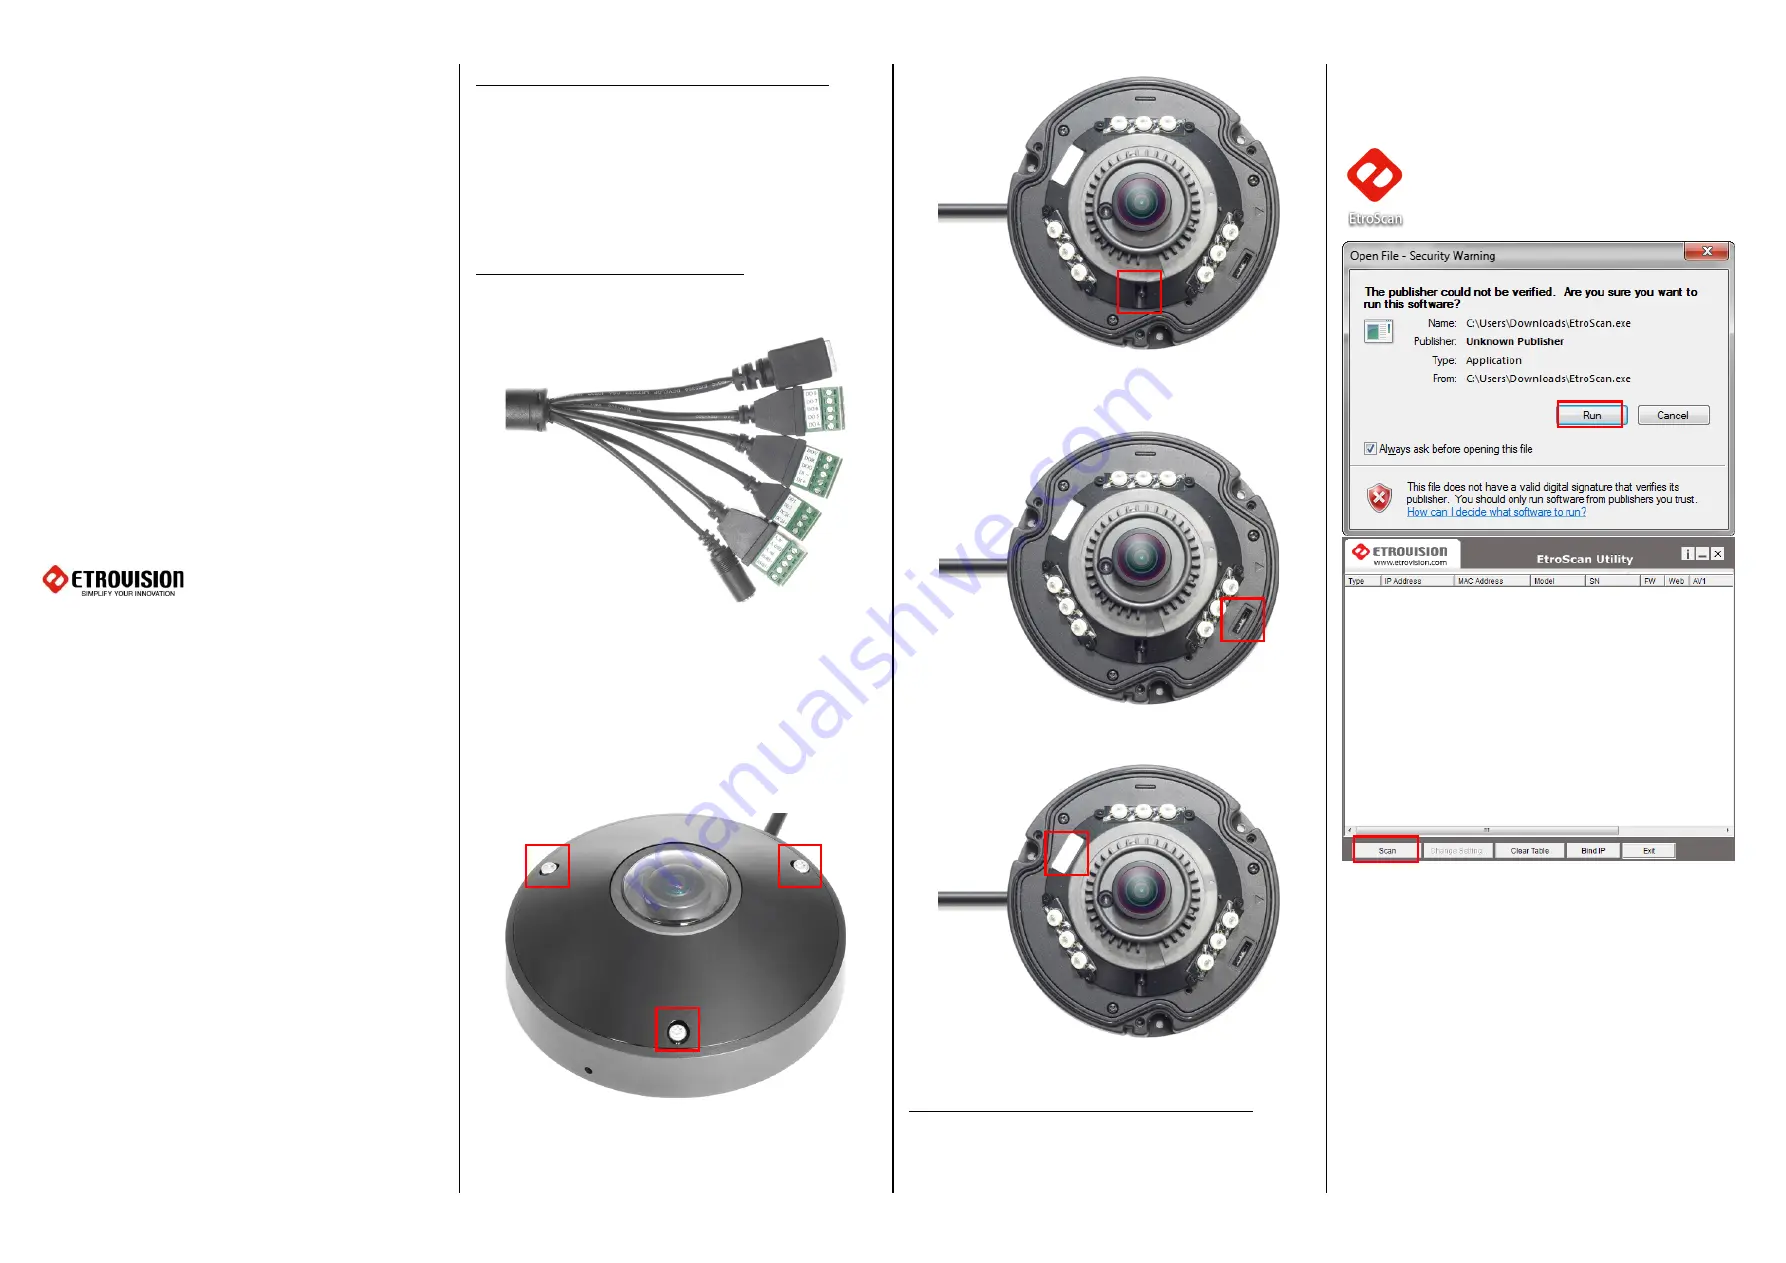
Install EtroScan on a Windows PC
EtroScan™ is a utility is used to configure network settings
for cameras & video servers. EtroScan™ is available on the
CD-ROM or can be downloaded from the Tools section at
www.etrovision.com/Support. Run Setup.exe to install
EtroScan.
Basic Physical Installation
1.
The N58 cable has the DC input jack (12Vdc), RJ-45
network cable input and 4 terminal blocks.
The terminal block connections are:
-
5-pin: audio in/out and RS485
-
5-pin: DI (Digital Input) and DO 1 (Digital Output)
-
4-pin: 24Vdc output (max 120mA), DO 2, DO 3
-
5-pin: DO 4 – DO 8
2.
Loosen the screws securing the cover to remove the
cover.
3.
To adjust the camera angle and lens focus, loosen the
screw locks and adjust as needed.
4.
A micro SD card can be inserted if the camera will
record video or snapshots to an SD card.
5.
Insert a desiccant stick to prevent condensation.
Configure the Network Settings
After connecting the camera to the local network and
powering the camera on, the camera will obtain network
configuration via DHCP.
To determine the IP address of a camera, use the EtroScan
utility to identify the camera. Once EtroScan has been
installed, click the EtroScan icon to launch the application.
A listing of available devices will be displayed in the window.
The MAC address and/or serial number can be used to
uniquely identify a device.


