


40E650HD-17
Installation
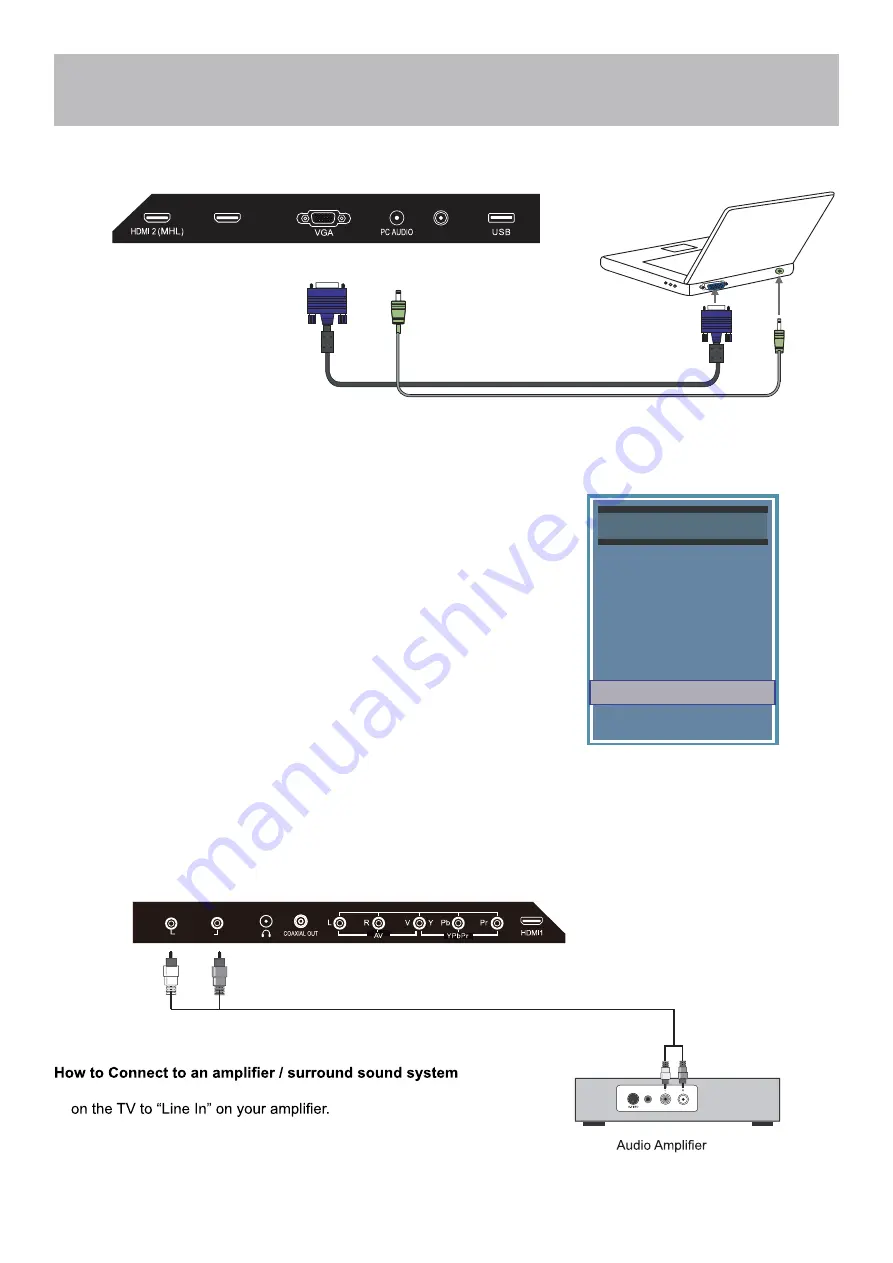
Connection to a Personal Computer
Connecting a PC or laptop
Connecting to an amplifer or home theater system
Recommended computer display resolution:1366x768@60 Hz
How to Connect a PC
•
Connect using a male to male VGA cable (not included) from your PC to
the “VGA” on the TV’s panel.
How to Connect Audio Sound
•
Connect a 3.5mm audio cable (not included) from the computer’s mini
audio output jack to the audio input on the TV’s panel.
How to Use
•
Press the
INPUT
button on the remote control. Use the buttons
qp
to
highlight
VGA
. Press
ENTER
.
NOTE: If your PC uses a standard signal mode, the screen will adjust
automatically.
Audio Cable (not included)
•
Match and insert the red and white audio cables from “Audio Out”
NOTE: The TV’s speakers will still output audio. You can turn the
TV’s speaker volume to 0 to prevent echoing.
VGA & Audio Cable (not included)
HDMI 3 (ARC)
CABLE - ANTENNA
Source Select
AV
TV
Media
HDMI1
HDMI2
HDMI3
Component
PC
AUDIO OUT
L
R
Summary of Contents for 40E650HD
Page 10: ...40E650HD 9 Remote Control Overview ...
Page 38: ...40E650HD 37 This Page is Intentionally Left Blank ...
Page 40: ......


