


Change the Boot Order of the Drives from BIOS
Migrate Your Data
Power on your computer.(You may also see a message prompting
you to update your system's configuration settings. Refer to your
owner's manual for instructions.)
While the computer is booting, press a special key such as ESC, F1,
or DELETE to enter the BIOS menu. Check your computer manufacturer’s
documentation for the correct key(s).
Go to the Boot or Startup screen and change the boot order so that
the KLEVV NVMe M.2 SSD appears before your old storage device.
Save the settings and exit the BIOS setup menu.
Restart the computer.
Now your computer boots to your KLEVV NVMe M.2 SSD.
1.
3.
4.
5.
6.
2.
Please make sure that you have installed the Migration Tool.
1.
Install the KLEVV NVMe M.2 SSD to the USB to NVMe M.2 2280 adaptor.
(You may need to consult the user manual of your USB to
NVMe M.2 2280 adaptor)
2.
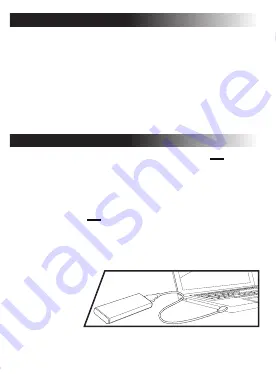
Connect the KLEVV NVMe M.2 SSD to your laptop using the USB to
NVMe M.2 2280 adaptor.
3.
Run the Migration Tool,
and follow the
instructions to
migrate your
operating system
and data to the
new KLEVV NVMe M.2 SSD.
4.
Safely remove your KLEVV NVMe M.2 SSD from USB when done.
5.
Disconnect your KLEVV NVMe M.2 SSD from the USB to NVMe M.2 2280 adaptor.
6.
If your KLEVV NVMe M.2 SSD provides Migration Tool (Acronis True Image 2018),
Please download the software and its user’s manual from the following
KLEVV website. (www.essencore.com or www.klevv.com)
1.
Follow the instructions to install the Migration Tool to your laptop.
2.
* You may also use your own software for the data migration.
Laptop Installation
* Please skip this step if you don’t need to migrate your data.
Install Migration Tool - Acronis True Image 2018


