page 2
Contents:
1. Introduction
page 2
2. Safety Instructions
page 2
3. Usage in Accordance with Requirements
page 3
4. Initiation
page 3
5. Accumulatos changing
page 4
6. Malfunctions
page 4
7. Technical Data
page 4
These instructions relate ONLY to this product and contain important information for
using the product for the first time. Please keep these instructions for later reference
and should always accompany the product in the event of transference to a new user.
1. Introduction
Dear Costumer,
Thank you for purchasing the solar light. With this solar light you purchased a product manu-
factured according to the current state of technology.
This product fulfils all requirements of the valid European and national regulations.
The conformity was proved. The relevant declarations and documentation are deposi-
ted with the manufacturer.
To maintain this state and guarantee a safe operation, you as the user will have to follow this
operating manual!
2. Safety Instructions
- In case of damages caused by not following this operating
manual, the warranty rights will expire! We exclude
liability for any consequential damages!
- We exclude liability for property or personal damages
caused by inappropriate handling or not following the
safety instructions.
- In these cases any guarantee rights will expire.
Due to safety and admission reasons (CE) it is not allowed to arbitrarily reconstruct and/or
change the solar light.
Therefore, please keep to the operating manual.
The accident prevention rules of the association of the industrial trade cooperative associa-
tion for electric plants and working material are to be considered in industrial environments.
!
These instructions relate ONLY to this product and contain important infor-
mation for using the product for the first time. Please keep these instructions
for later reference and should always accompany the product in the event of
transference to a new user.
page 3
4. Initiation
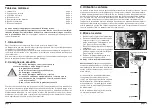
1. Please take all parts out of the package.
2. Unscrew the illuminant from the upper
part (illustration 1) and switch on the
lamp via the slide switch (illustration 2)
(ON). Screw the illuminant onto the
upper part.
3. Connect the stainless steel pipe and
insert the plastic spit. Now, attach the
lamp onto the pole.
4. Insert the lamp firmly into the ground at a
sunny place.
The solar light is now activated.
Note:
The lamp is equipped with a motion
detector. At darkness a weaker light is swit-
ched on and the lamp serves as orientation
light in power save mode.
If the integrated motion sensor detects any
change of heat in its range (120°) an extre-
mely bright light-emitting diode is automati-
cally switched-on. This diode shines for
approximately one minute after the last
detection of any motion (heat change).
Thus, the lamp may perfectly be used for
paths or for the illumination of stairs.
3. Usage in Accordance with Requirements
The solar module installed in the upper part transforms sunlight into electric current. The
integrated accumulators are recharged with the produced energy. At darkness, a weak light
is automatically switched on. As soon as a heat change is detected the installed motion
detector switches on an extremely bright light-emitting diode for approximately one minute
and will thus illuminate your way with a stronger intensity of light. At brightness or in case
of a discharged accumulator, the lamp is switched off completely. The solar lamp is suitable
for exterior use. The duration of the illumination at night strongly depends on the insolation
and the insolation angle to the solar cell during the day. The maximum performance is
achieved in case of a vertical insolation to the solar module. The solar lamp is no toy.
1.
Plastic spit
steel pipe
steel pipe
motion detector
2.


