Page 4
Kata2-MS Assembly
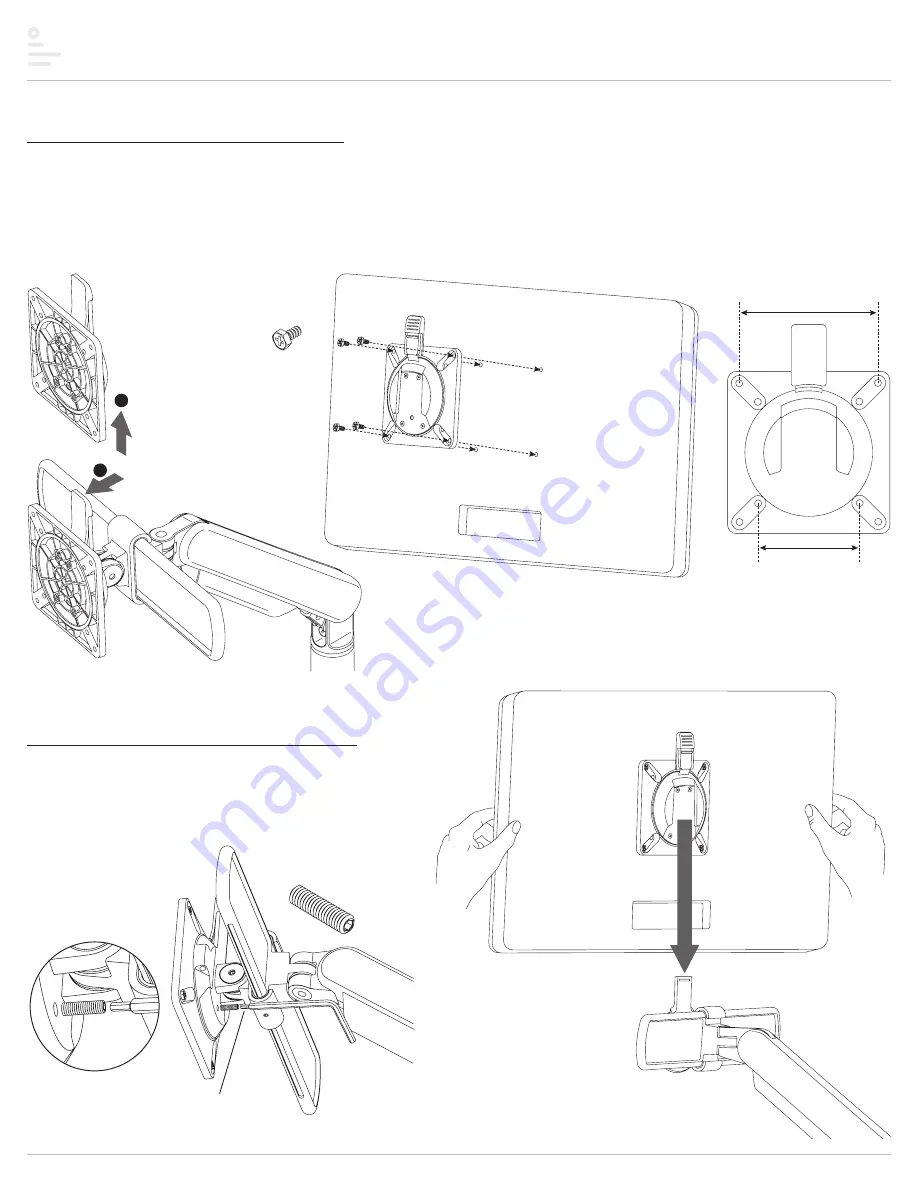
Step #3: attach VESA plates to monitors
• Remove each VESA plate from its VESA mount by pushing forward the tab at the top and lifting upward.
— TIP: Practice re-installing the VESA plate before attaching it to the monitor. This will make step 3 easier.
• Place each monitor face down on a flat surface. Align the VESA plate holes with the holes on the back of the monitors. Attach the VESA plates using the four VESA plate
screws per monitor.
— There are two sets of four holes on the VESA plates. One set has holes 3.9" (100mm) apart, the other set has holes 3" (7f) apart. Use the set that matches the holes
on the rear of each monitor.
lift off VESA plate
VESA plate screw
VESA
plate
monitor
(face down)
top
3.9"
(100mm)
3"
(75mm)
2
push tab forward
1
Step #4: attach monitors to VESA mounts
• Slide each VESA plate (with monitor attached) back onto its VESA mount.
— Make sure the VESA plates click securely in place.
• OPTIONAL: Secure each VESA plate to the VESA mount using the M4x15
VESA locking screw, as shown below.
attach
monitor
VESA
mount
VESA
plate
2mm Allen key
VESA locking screw
M4x15


