background image


Thank you for purchasing an Escali digital scale. 

Please read the following opera-

tion information to ensure the proper function of your new scale. 
 

BATTERY INSTALLATION


1.  Turn the entire scale upside down and set it securely on a firm, flat surface. 
2.  Remove the battery cover from the base plate. 
3.  Install one 9V battery into the battery compartment, ensuring that the positive/

negative side is in the direction as shown in the cabinet. 

4.  Place the battery cover back onto the base plate. 

 
HOW TO WEIGH 

1.  Press the 


key to power the scale on. 

2.  Press the 

MODE 

key to select a measuring unit (kg or lb). 

3.  Place item slowly on the platform. 


HOW TO USE THE TARE FEATURE 

This feature allows you to obtain the exact weight of an item in a 
container, by subtracting the weight of the container. 
1.  Place the container without the item onto the platform. 

2.  Press the 

TARE/ZERO 

key to zero out the display. 

3.  Slowly add the item to the container. The display will show the weight of the item 

only. 

 
COUNTING MODE


1.  Power the scale on 

2.  Press and hold the 

PCS 

key while in weighing mode for about 3 seconds to start 

selecting your sample size. 

3.  Press 

MODE 

to select your sample size in the sequence of: 

25 → 50 → 75 → 100. 

4.  Once you have determined your sample size, place the exact amount of pieces 

onto the platform to match the sample size on your display. 

5.  Press the 

PCS 

key to confirm. 

6.  You can now add or subtract pieces from the platform. Press 

MODE 

to return to 

weighing mode. 

 
NOTE: Once the scale is powered off and restarted, the counting mode will recall the 

last sample size used by pressing the 

PCS 

key. 


INSTALLATION OF MOUNT BRACKET AND REMOTE UNIT 

1.  Place the mount bracket on the wall and use a pencil/pen to mark the holes 

position. 

2.  Drill a 4 mm hole on the marked position. Put the plastic socket on the wall. 
3.  Fasten the mount bracket on the wall with the screws. 
4.  Slide the remote unit onto the mounted bracket. 
 

Summary of Contents for Granda 120S

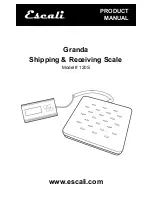
Page 1: ...Granda Shipping Receiving Scale Model 120S www escali com PRODUCT MANUAL...

Page 2: ...TARE ZERO key to zero out the display 3 Slowly add the item to the container The display will show the weight of the item only COUNTING MODE 1 Power the scale on 2 Press and hold the PCS key while in...

Page 3: ...a damp cloth Do not submerge in liquid the scale is not waterproof For best results use alkaline batteries Install only new batteries of the same type in your product Failure to insert batteries in t...

Page 4: ...ort 1 800 467 6408 2 YEAR PROFESSIONAL GUARANTEE This scale is guaranteed to be free of defects in materials and workmanship For more details visit www escali com warranties Escali s liability is limi...

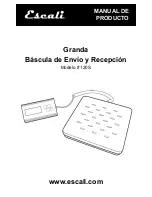
Page 5: ...Granda B scula de Env o y Recepci n Modelo 120S www escali com MANUAL DE PRODUCTO...

Page 6: ...one la tecla TARE ZERO hasta que la pantalla marque cero 3 Lentamente agregue el elemento en el recipiente La pantalla solo le mostrar el peso neto del elemento MODO DE CONTEO 1 Encienda la b scula 2...

Page 7: ...rant a Limpie la b scula con jab n y un pa o h medo No la sumerja en l quidos la b scula no es impermeable Para mejores resultados utilice bater as alcalinas Instale s lo bater as nuevas del mismo tip...

Page 8: ...800 467 6408 2 A OS DE GARANT A PROFESIONAL Esta b scula tiene garant a de estar libre de defectos en materiales y mano de obra Para m s detalles visite www escali com warranties La responsabilidad d...

Page 9: ...Granda Balance d Exp dition de R ception Model 120S www escali com PRODUCT MANUAL...

Page 10: ...ez sur la touche TARE ZERO pour mettre l cran z ro 3 Ajouter lentement l l ment dans le conteneur L cran af fichera le poids de l l ment seulement MODE DE COMPTAGE 1 Allumer la balance 2 Appuyez et ma...

Page 11: ...arantie Nettoyez la balance avec du savon vaisselle et un chiffon humide Ne pas plonger dans un liquide la balance n est pas tanche Pour de meilleurs r sultats utilisez des piles alcalines Installez u...

Page 12: ...800 467 6408 GARANTIE PROFESSIONNELLE DE 2 ANS Cette chelle est garantie contre tout d faut de mat riaux et de fabrication Pour plus de d tails visitez www escali com warranties La responsabilit d Esc...

Reviews: