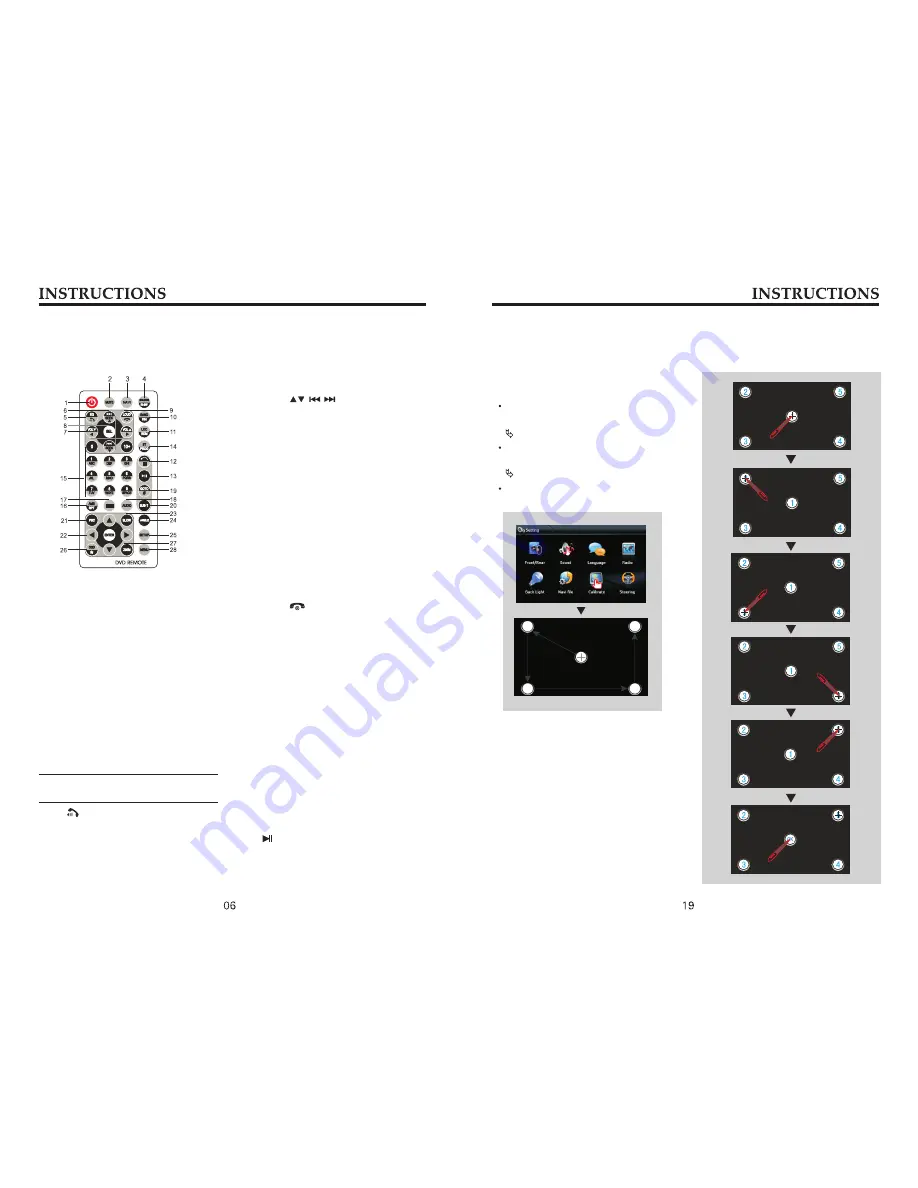
1.PWR
Press the button to turn the power
on/off.
2.MUTE
Press the button to turn the volume
output on/off, repress it to resume
previous volume level.
3.NAVI
Press the button to enter/exit the
navigation interface.
4.SOURCE/IR-SW---mode switch
Short press the button to switch the
mode.
Long press the button to switch between
foreground/background controls for the
remote controller.
Remote Controller Operation
Only effective when the background
mode is enabled.
6. SEEK
In playback mode, short press the button
to select the previous/next file; long press
the button to fast forward/backward play.
In radio mode, short press the button to
fine-tune and search station manually;
long press the button to scan station
automatically.
Under analog TV status, short press the
button to fine-tune and search station
manually; long press the button to scan
channel automatically.
7.VOL
Press the button to increase/reduce the
volume.
8.SEL---sound feature
Press the button to select sound feature.
9.LOUD/ ---equal loudness
compensation/hang up
Press the button to turn the LOUD
function on/off.
When the unit supports bluetooth
function, press the button to hang up
a call after the call is completed.
10.BAND/P/N
in radio mode, press the button to
switch the band. Under playback and
TV status, press the button to switch
the system.
11.LOC/RDM
In radio mode, press the button to switch
between local/distant. In playback mode,
press the button to start random play.
12.STOP
Press the button once to pause, press it
twice to completely stop.
13
. ---
Play/pause
Press the button to switch between play
and pause; under stop status, press the
button to start playback.
5.EQ/ preset equalizer select/answer
Press the button to select different
sound effect mode.
When the unit supports bluetooth
function, press the button can answer
a call.
Basic Operation
If errors occur in touch position, you
can calibrate touch coordinates.
Touch [Setup] icon in the main
interface.
Enter into setup interface.
Switch page, touch [Touch
Calibration] icon.
Enter touch calibration interface.
Perform calibration with a touch pen.
Touch Screen Calibration
Touch method:
Use a touch pen to click the central area
of symbol “+”, calibrate the screen in
the moving sequence of the central area
of “+”. After calibration is completed,
system will automatically save data and
exit the screen.
Basic operation of setup menu


