background image

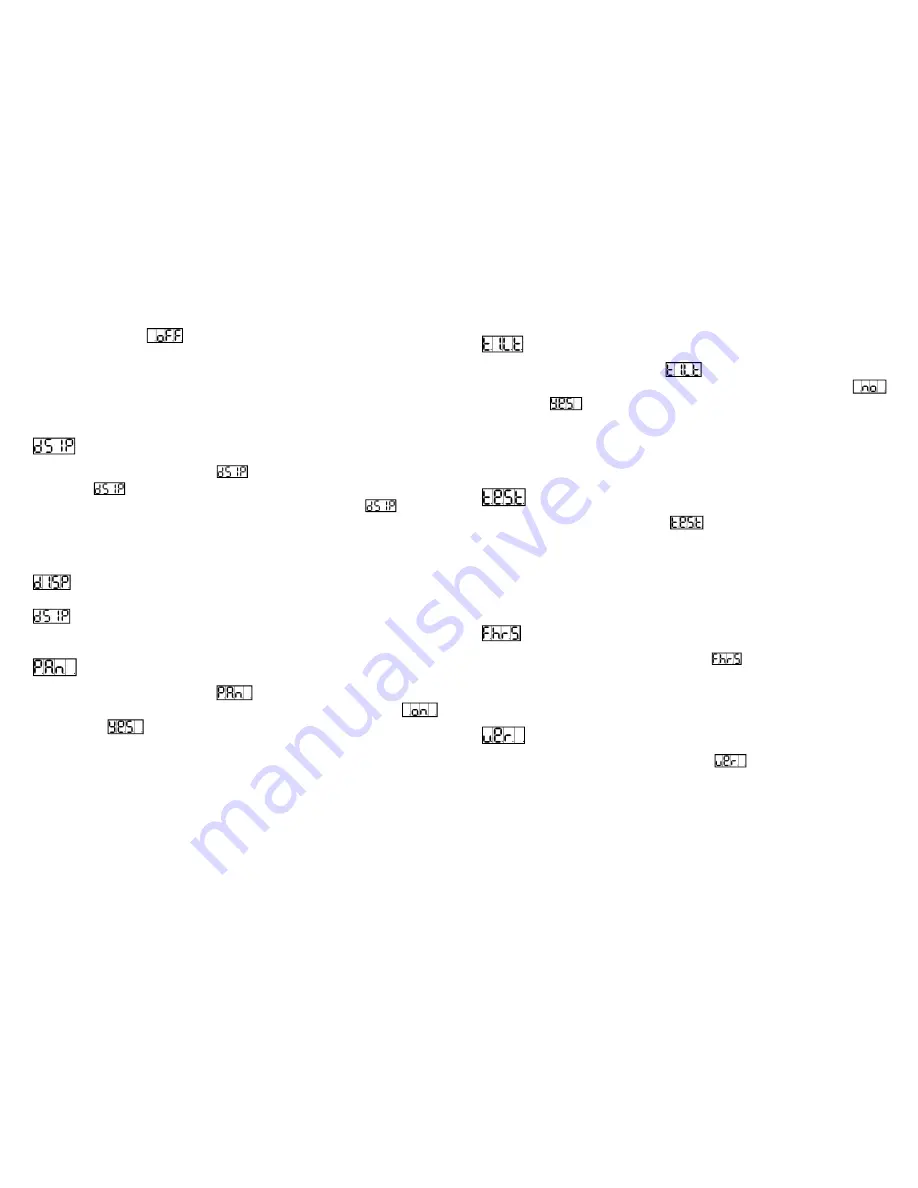
(Led display on) or

(Led display off) mode. Once the mode has

been selected, press the ENTER button to confirm. To go back to the
functions without any changes press the MENU button again. Press and
hold the MENU button for one second or wait for one minute to go back to
the main menu.

Display Inversion

Press the MENU button to select

. Press the ENTER button to change

the mode

(display normal), it will be automatically saved after 8

seconds. Press the ENTER button again to select the mode

(display

inversion). To go back to the functions press the MENU button. Press and
hold the MENU button for one second or wait for one minute to go back to
the main menu.

Display normal mode is for floor standing the unit.

Display inversion mode is for hanging the unit upside down.

Pan Inversion

Press the MENU button to select

. Press the ENTER button and the

display will blink. Use the DOWN and UP buttons to select the
(normal) or

(pan inversion) mode. Once the mode has been

selected, press the ENTER button to confirm. To go back to the functions
without any changes press the MENU button again. Press and hold the
MENU button for one second or wait for one minute to go back to the main
menu.

Tilt Inversion

Press the MENU button to select

. Press the ENTER button and the

display will blink. Use the DOWN and UP buttons to select the
(normal) or

(tilt inversion) mode. Once the mode has been selected,

press the ENTER button to confirm. To go back to the functions without
any change press the MENU button again. Press and hold the MENU
button for one second or wait for one minute to go back to the main menu.

Auto-Test

Press the MENU button to select

. Press the ENTER button and the

unit will run a self-test with its built-in programs. To go back to the functions
without any changes press the MENU button again. Press and hold the
MENU button for one second or wait for one minute to go back to the main
menu.

Fixture Hours

Press the MENU button up to when the

is showing on the display.

Press the ENTER button and the display will show the number of working
hours of the unit. To go back to the functions press the MENU button.

Software version

Press the MENU button up to when the

is showing on the display.

Press the ENTER button and the display will show the version of software of
the unit. To go back to the functions press the MENU button.

Summary of Contents for EQLED020

Page 1: ...EQUINOX SLENDER BEAM BAR QUAD User Manual EQLED020 Contents 1 Safety Instructions 2 Features Specifications 3 How To Set The Unit 4 Troubleshooting 5 Fixture Cleaning...

Page 2: ...ical assistance center Always use the same type spare parts Do not touch any power cables during operation as the high voltage may cause an electric shock Warning To prevent or reduce the risk of elec...

Page 3: ...where the required function is showing on the display Select the function by pressing the ENTER button and the display will blink Use the DOWN and UP buttons to change the mode Once the required mode...

Page 4: ...nd hold the MENU button for one second or wait for one minute to go back to the main menu Show Mode Press the MENU button to select Press the ENTER button and the display will blink Use the DOWN and U...

Page 5: ...NU button again Press and hold the MENU button for one second or wait for one minute to go back to the main menu Tilt Inversion Press the MENU button to select Press the ENTER button and the display w...

Page 6: ...t show you can set Slave 2 on the second unit to get contrast movement to each other even if you have two units only 4 2 CA 8 Controller Your Slender Beam Quad Bar can be controlled using the optional...

Page 7: ...nt 11 173 187 Movement 12 188 202 Movement 13 203 217 Movement 14 218 232 Movement 15 233 247 Movement 16 248 255 Sound active 6CHANNEL MODE Channel Function Value 1 Dimmer 0 255 Dimmer 0 100 2 Strobe...

Page 8: ...08 123 R W 124 140 G B 141 156 G W 157 173 B W 174 189 R G B 190 206 R G W 207 222 R B W 223 239 G B W 240 255 R G B W 7 Pan3 000 255 Pan 0 540 8 Tilt3 000 255 Tilt 0 270 9 Color3 000 007 Blackout 008...

Page 9: ...074 W 075 090 R G 091 107 R B 108 123 R W 124 140 G B 141 156 G W 157 173 B W 174 189 R G B 190 206 R G W 207 222 R B W 223 239 G B W 240 255 R G B W 9 Pan3 000 255 Pan 0 540 10 Tilt3 000 255 Tilt 0 2...

Page 10: ...Tilt 0 270 12 Tilt fine 2 000 255 13 Pan Tilt speed2 000 255 fast to slow 14 Color2 000 007 Blackout 008 024 R 025 041 G 042 057 B 058 074 W 075 090 R G 091 107 R B 108 123 R W 124 140 G B 141 156 G...

Page 11: ...heck DMX cables to see if linked correctly 2 If the DMX address is showing but no response to the controller check the address settings and DMX polarity 3 Try another DMX controller C No response to t...

Reviews: