background image

3.

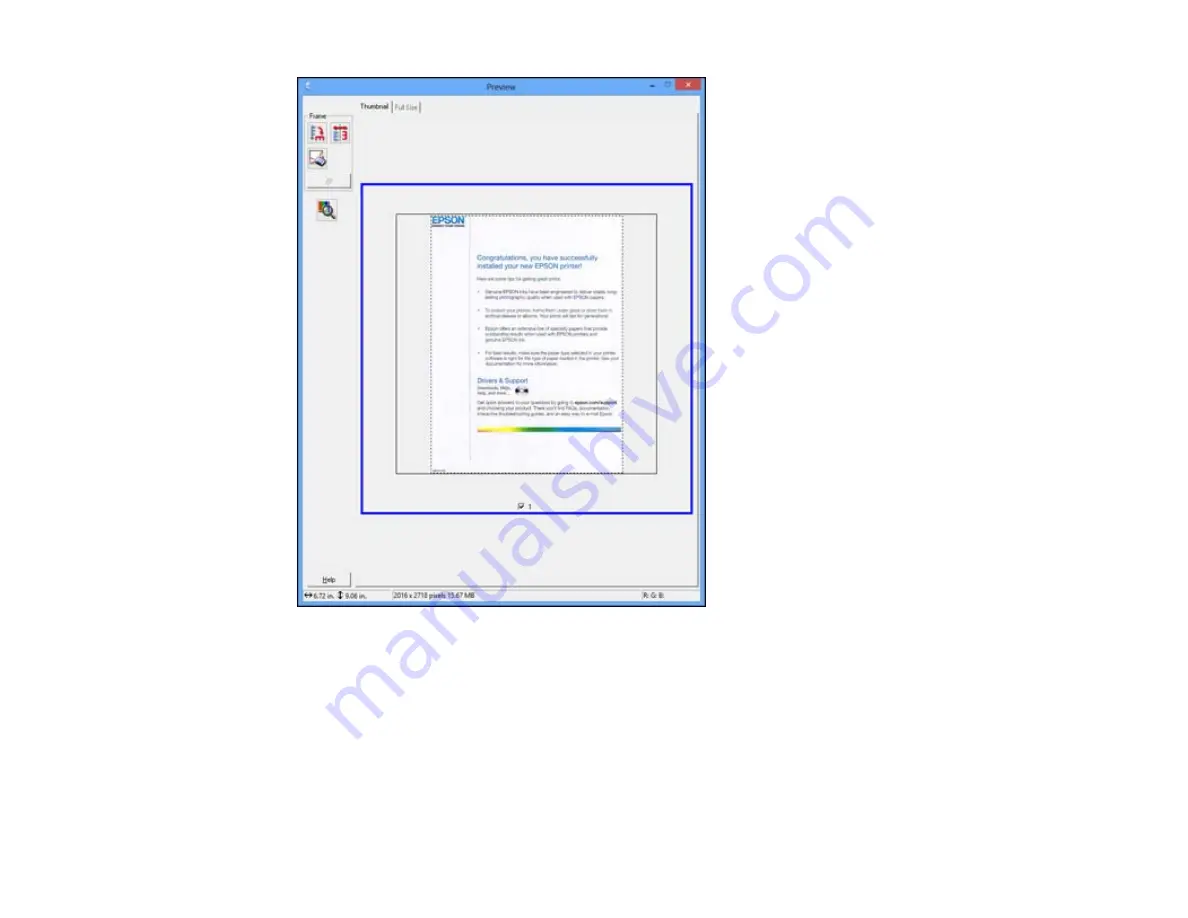
Do the following, as necessary, to work with the selected scan area:

• To move the marquee, click inside the scan area and drag the marquee where you want it.

• To resize the scan area, place your cursor over the edge or corner of the marquee, then click and

drag the edge where you want it.

Note:

Manually adjusting the marquee will not change the target size of the scanned file. The

marquee only indicates the area of the image that will be scanned.

98

Summary of Contents for XP-211

Page 1: ...XP 211 XP 214 User s Guide ...

Page 2: ......

Page 3: ...n Connect Solutions for Smartphones Tablets and More 19 Using the Epson iPrint Mobile App 19 Wi Fi Networking 20 Wi Fi Infrastructure Mode Setup 20 Wi Fi Protected Setup WPS 21 Using WPS to Connect to a Network 21 Printing a Network Status Sheet 22 Changing or Updating Network Connections 22 Changing a USB Connection to a Wi Fi Connection 22 Connecting to a New Wi Fi Router 22 Loading Paper 24 Loa...

Page 4: ... Your Document or Photo Windows 48 Checking Print Status Windows 49 Selecting Default Print Settings Windows 50 Changing the Language of the Printer Software Screens 51 Changing Automatic Update Options 53 Printing with Mac OS X 53 Selecting Basic Print Settings Mac OS X 54 Print Quality Settings Mac OS X 57 Print Options Mac OS X 58 Selecting Page Setup Settings Mac OS X 58 Selecting Print Layout...

Page 5: ...Mode 82 Scanning in Office Mode 84 Selecting a Scan Area Office Mode 86 Available Image Adjustments Office Mode 88 Scanning in Professional Mode 89 Available Image Types Professional Mode 92 Selecting a Scan Area Professional Mode 92 Available Image Adjustments Professional Mode 95 Selecting a Scan Size Professional Mode 97 Image Preview Guidelines 100 Scan Resolution Guidelines 100 Selecting Scan...

Page 6: ...ow Black Ink with Windows 124 Adjusting Print Quality 125 Print Head Maintenance 125 Print Head Nozzle Check 125 Checking the Nozzles Using the Product Buttons 125 Checking the Nozzles Using a Computer Utility 126 Print Head Cleaning 128 Cleaning the Print Head Using the Product Buttons 129 Cleaning the Print Head Using a Computer Utility 129 Print Head Alignment 131 Aligning the Print Head Using ...

Page 7: ...Paper Feeding Problems 148 Paper Jam Problems 148 Paper Ejection Problems 149 Solving Problems Printing from a Computer 150 Nothing Prints 150 Product Icon Does Not Appear in Windows Taskbar 151 Error After Cartridge Replacement 152 Printing is Slow 152 Solving Page Layout and Content Problems 153 Inverted Image 153 Too Many Copies Print 154 Blank Pages Print 154 Incorrect Margins on Printout 154 ...

Page 8: ...rns Appear in an Image 165 Image is Scanned Upside Down 165 Scanned Image Colors Do Not Match Original Colors 166 Scan Area is Not Adjustable in Thumbnail Preview 166 Scanned Image Edges are Cropped 166 When to Uninstall Your Product Software 167 Uninstalling Product Software Windows 167 Uninstalling Product Software Mac OS X 168 Where to Get Help 169 Technical Specifications 171 Windows System Re...

Page 9: ...nstructions 179 Ink Cartridge Safety Instructions 181 Wireless Connection Safety Instructions 181 Software Notice 182 Trademarks 185 Copyright Notice 185 libTIFF Software Acknowledgment 186 A Note Concerning Responsible Use of Copyrighted Materials 186 Default Delay Times for Power Management for Epson Products 187 Copyright Attribution 187 9 ...

Page 10: ......

Page 11: ...XP 211 XP 214 User s Guide Welcome to the XP 211 XP 214 User s Guide 11 ...

Page 12: ...d Sleep Timers Epson Connect Solutions for Smartphones Tablets and More Product Parts Locations See these sections to identify the parts on your product Control Panel Buttons and Lights Product Parts Top Product Parts Inside Product Parts Back Parent topic Product Basics Control Panel Buttons and Lights 1 The WiFi light 2 The power button and power light 3 The Wi Fi button 12 ...

Page 13: ... copy button 7 The stop button 8 Scan by pressing the B W copy button and the color copy button simultaneously 9 The paper light 10 The ink light Parent topic Product Parts Locations Product Parts Top 1 Sheet feeder 2 Paper support 3 Output tray 4 Feeder guard 13 ...

Page 14: ...5 Edge guide 1 Document cover 2 Scanner glass 3 Control panel Parent topic Product Parts Locations 14 ...

Page 15: ...Product Parts Inside 1 Scanner unit 2 Ink cartridge holder in home position 3 Scanner unit support Parent topic Product Parts Locations 15 ...

Page 16: ...8 3 11 7 inches 210 297 mm make sure the product is turned off then hold down the color copy button and press the power button to turn the product on When the product turns on release both buttons To change the default paper size to Letter 8 5 11 inches 216 279 mm make sure the product is turned off then hold down the B W copy button and press the power button to turn the product on When the produ...

Page 17: ...ttings Mac OS X Parent topic Product Basics Changing the Power Off and Sleep Timer Settings Windows You can use the printer software to change the time period before the printer enters sleep mode or turns off automatically 1 Right click the product icon in the Windows taskbar and select Printer Settings 2 Click the Maintenance tab 3 Click the Printer and Option Information button You see this wind...

Page 18: ... off automatically 1 Do one of the following Mac OS X 10 6 10 7 10 8 In the Apple menu or the Dock select System Preferences Select Print Fax or Print Scan select your product and select Options Supplies Select Utility and select Open Printer Utility Mac OS X 10 5 In the Apple menu or the Dock select System Preferences Select Print Fax select your product and select Open Print Queue or Print Queue...

Page 19: ...Epson networked products The Epson iPrint Mobile App lets you print PDFs Microsoft Office documents photos and web pages over a wireless network You can even scan and save a file on your device send it as an email or upload it to an online service such as Box Dropbox Evernote or Google Drive 1 Set up your product for network printing as described on the Start Here sheet 2 Visit www latin epson com...

Page 20: ...Changing or Updating Network Connections Wi Fi Infrastructure Mode Setup You can set up your product to communicate with your computer using a wireless router or access point The wireless router or access point can be connected to your computer over a wireless or wired network 1 Epson product 2 Wireless router or access point 3 Computer with a wireless interface 20 ...

Page 21: ...i Fi Networking Using WPS to Connect to a Network If you have a WPS enabled router or access point you can use Wi Fi Protected Setup WPS to connect your device to the network Note To check if your router is WPS enabled look for a button labeled WPS on your router or access point If there is no hardware button there may be a virtual WPS button in the software for the device Check your network produ...

Page 22: ...n If you have already connected your product to your computer using a USB connection you can change to a Wi Fi connection or add a Wi Fi connection to print wirelessly 1 Do one of the following If you want to use only a Wi Fi connection disconnect the USB cable from your product With Windows also uninstall your product software If you want to add a Wi Fi connection in addition to a USB connection ...

Page 23: ...he next step 2 Download your product software from the Epson website or install it from the CD that came with your product using the instructions on the Start Here sheet Parent topic Changing or Updating Network Connections Related concepts When to Uninstall Your Product Software 23 ...

Page 24: ...Paper for Photos Loading Envelopes Paper Loading Capacity Available Epson Papers Borderless Paper Type Compatibility Paper or Media Type Settings Loading Paper for Documents You can print documents on a variety of paper types and sizes 1 Flip the feeder guard forward 2 Pull up the paper support and its extension 24 ...

Page 25: ...3 Pull out the output tray 4 Slide the edge guide left 25 ...

Page 26: ...ot too tightly 7 Flip the feeder guard back Always follow these paper loading guidelines Load only the recommended number of sheets Load paper short edge first no matter which way your document faces Load letterhead or pre printed paper top edge first Do not load paper above the arrow mark inside the edge guide Check the paper package for any additional loading instructions Parent topic Loading Pa...

Page 27: ...Loading Paper for Photos You can print photos on a variety of paper types and sizes 1 Flip the feeder guard forward 2 Pull up the paper support and its extension 3 Pull out the output tray 27 ...

Page 28: ... even the edges 6 Slide the edge guide against the paper but not too tightly 7 Flip the feeder guard back Always follow these paper loading guidelines Load only the recommended number of sheets Load paper short edge first no matter which way your photo faces Do not load paper above the arrow mark inside the edge guide Check the paper package for any additional loading instructions Parent topic Loa...

Page 29: ...Loading Capacity Loading Envelopes You can print on plain paper envelopes in this size No 10 4 1 9 5 inches 105 241 mm 1 Flip the feeder guard forward 2 Pull up the paper support and its extension 3 Pull out the output tray 29 ...

Page 30: ...ide the edge guide against the envelopes but not too tightly 7 Flip the feeder guard back Always follow these envelope loading guidelines If you have trouble loading a stack of envelopes press each envelope flat before loading it or load one envelope at a time Do not load envelopes above the arrow mark inside the edge guide 30 ...

Page 31: ...Epson High Quality Ink Jet Paper Epson Premium Presentation Paper Matte 20 sheets Epson Photo Paper Glossy 10 sheets Epson Premium Photo Paper Glossy Epson Ultra Premium Photo Paper Glossy Epson Premium Photo Paper Semi gloss Plain paper Legal 8 5 14 inches 1 sheet 216 357 mm User defined paper size of any type Based on paper weight of 17 lb 64 g m2 to 24 lb 75 g m2 Do not load paper above the arr...

Page 32: ... Letter 8 5 11 inches S041586 500 216 279 mm Epson High Quality Ink Jet Paper Letter 8 5 11 inches S041111 100 216 279 mm Epson Photo Paper Glossy 4 6 inches S041809 20 20 102 152 mm S041809 50 S042038 100 Letter 8 5 11 inches S041141 20 216 279 mm S041649 50 S041271 100 A4 8 3 11 7 inches S041140 20 210 297 mm Epson Premium Photo Paper Glossy 4 6 inches S041808 40 102 152 mm S041727 100 5 7 inche...

Page 33: ...20 216 279 mm Epson Presentation Paper Matte Letter 8 5 11 inches S041062 100 216 279 mm Legal 8 5 14 inches S041067 100 216 357 mm Epson Premium Presentation Paper 8 10 inches S041467 50 Matte 203 254 mm Letter 8 5 11 inches S041257 50 216 279 mm S042180 100 Note Paper media availability varies by country Parent topic Loading Paper Borderless Paper Type Compatibility You can print borderless phot...

Page 34: ...ype or Media Type setting Plain paper Plain Paper Bright White Paper Epson Bright White Paper Epson Presentation Paper Matte Epson High Quality Ink Jet Paper Epson Ultra Premium Photo Paper Glossy Ultra Premium Photo Paper Glossy Epson Premium Photo Paper Glossy Premium Photo Paper Glossy Epson Photo Paper Glossy Photo Paper Glossy Epson Premium Photo Paper Semi gloss Premium Photo Paper Semi Glos...

Page 35: ...it Placing Originals on the Scanner Glass Placing Originals on the Scanner Glass You can place originals up to this size on the scanner glass Letter 8 5 11 inches 216 279 mm or A4 8 3 11 7 inches 210 297 mm 1 Open the document cover 2 Place your original facedown on the scanner glass with the top facing as shown Slide the original to the edges of the indicated corner Note You can place multiple or...

Page 36: ...3 Close the document cover gently to keep your original in place Parent topic Placing Originals on the Product Related tasks Copying Documents or Photos Related topics Scanning 36 ...

Page 37: ...to start copying To copy a black and white document or photo press the B W copy button To copy a color document or photo press the color copy button To copy a black and white or color original in draft mode hold the B W copy button or the color copy button for 3 seconds To make 20 black and white or color copies press and hold the B W copy button or the color copy button then press the stop button...

Page 38: ...h Windows Printing with Mac OS X Cancelling Printing Using a Product Button Related tasks Checking for Software Updates Printing with Windows You can print with your product using any Windows printing program as described in these sections Selecting Basic Print Settings Windows Selecting Advanced Print Settings Windows Selecting Print Layout Options Windows Selecting a Printing Preset Windows Prin...

Page 39: ...rint option in the File menu or another command See your application s help utility for details 3 If necessary select your product name as the printer you want to use Note You may also need to select Properties or Preferences to view your print settings You see the Main tab of your printer settings window 39 ...

Page 40: ... compatible borderless paper type and size to print without borders Check the borderless paper compatibility list for details If you are printing a document or a photo with borders select Borders 8 Select the orientation of your document or photo as shown in the printer settings window Note If you are printing an envelope select Landscape 9 Select any of the available print options Note If you nee...

Page 41: ...ant to turn off Fix Photo to retain the special color effects Fix Red Eye Reduces or removes red eye in photos Reverse Order Prints multi page print jobs last page first Print Preview Displays a preview of your printout before printing Black Grayscale Prints text and graphics in black or shades of gray Quiet Mode Lessens noise during printing when you select Plain Paper Bright White Paper as the p...

Page 42: ... your printout Select the type of paper you loaded Note Check the paper type settings list for details Select the print quality setting you want to use Note Check the print quality settings list for details Select the size of the paper you loaded 42 ...

Page 43: ...nt Advanced Print Quality Settings Windows Advanced Print Options Windows Color Management Options Windows Parent topic Printing with Windows Related references Borderless Paper Type Compatibility Paper or Media Type Settings Related tasks Printing Your Document or Photo Windows Advanced Print Quality Settings Windows You can select any of the print quality settings to fine tune the quality of you...

Page 44: ...resolution images such as screen captures or images from the Web Print Preview Displays a preview of your printout before printing Black Grayscale Prints text and graphics in black or shades of gray Quiet Mode Lessens noise during printing when you select Plain Paper Bright White Paper as the paper Type or Media Type setting Parent topic Selecting Advanced Print Settings Windows Color Management O...

Page 45: ...h an intentional color cast such as a statue you may want to turn off Fix Photo to retain the special color effects ICM Lets you turn off color management in your printer software using the Off No Color Adjustment option You can then manage color using only your application software Parent topic Selecting Advanced Print Settings Windows Selecting Print Layout Options Windows You can select a varie...

Page 46: ... sided printing options Note Your product software will prompt you to reinsert your paper when it is time to print on the reverse side To print multiple pages on one sheet of paper or print one image on multiple sheets of paper select the Multi Page checkbox and select the options you want To print multiple copies and arrange their print order select the Copies options 46 ...

Page 47: ...may see white borders on your printed photo To print the borderless image at its actual size without scaling select Retain Size as the Enlargement Method setting To add a watermark to your printout select Watermark settings To rotate or flip the printed image select the Rotate 180 or Mirror Image checkboxes Parent topic Printing with Windows Selecting a Printing Preset Windows For quick access to ...

Page 48: ...rol your printing presets 4 To choose an option for printing select it 5 Click OK Parent topic Printing with Windows Printing Your Document or Photo Windows Once you have selected your print settings you are ready to save your settings and print 1 Click OK to save your settings You see your application s Print window such as this one 48 ...

Page 49: ... Checking Print Status Windows Parent topic Printing with Windows Checking Print Status Windows During printing you see this window showing the progress of your print job It allows you to control printing and check ink cartridge status 49 ...

Page 50: ...ting Default Print Settings Windows When you change your print settings in a program the changes apply only while you are printing in that program session If you want to change the print settings you use in all your Windows programs you can select new default print settings 1 Right click the product icon in the Windows taskbar 2 Select Printer Settings You see the printer settings window 50 ...

Page 51: ...nting You can still change them as needed for printing in any program session Changing the Language of the Printer Software Screens Parent topic Printing with Windows Changing the Language of the Printer Software Screens You can change the language used on the Windows printer software screens 1 Right click the product icon in the Windows taskbar 51 ...

Page 52: ...ou see the maintenance options 4 Select the language you want to use as the Language setting 5 Click OK to close the printer software window The printer software screens appear in the language you selected the next time you access them Parent topic Selecting Default Print Settings Windows 52 ...

Page 53: ... window 3 Do one of the following To change how often the software checks for updates select a setting in the Check every menu To disable the automatic update feature select the Never option 4 Click OK to exit Note If you choose to disable the automatic update feature you can check for updates manually Parent topic Printing with Windows Related tasks Checking for Software Updates Printing with Mac...

Page 54: ... settings for the document or photo you want to print 1 Open a photo or document for printing 2 Select the print command in your application Note You may need to select a print icon on your screen the Print option in the File menu or another command See your application s help utility for details 3 Select your product as the Printer setting 4 If necessary click the arrow next to the Printer settin...

Page 55: ...necessary Note If you do not see these settings in the print window check for them in your application before printing 6 Select the page setup options Paper Size and Orientation Note If you do not see these settings in the print window check for them in your application before printing They may be accessible by selecting Page Setup from the File menu 55 ...

Page 56: ...Select any application specific settings that appear on the screen such as those shown in the image above for the Preview application 8 Select Print Settings from the pop up menu You see these settings 56 ...

Page 57: ...u can select any of the print quality settings to fine tune the quality of your print Some settings may be unavailable depending on the paper type and border setting you have chosen Fast Economy For the fastest printing with draft quality Economy For fast printing with reduced quality Normal For everyday text and image printing Fine For text and graphics with good quality and print speed Super Fin...

Page 58: ...electing Basic Print Settings Mac OS X Selecting Page Setup Settings Mac OS X Depending on your application you may be able to select the paper size and orientation settings from the print window Note If you do not see these settings in the print window check for them in your application before printing They may be accessible by selecting Page Setup from the File menu 1 Select the size of the pape...

Page 59: ...ility Selecting Print Layout Options Mac OS X You can select a variety of layout options for your document or photo by selecting Layout from the pop up menu on the print window To print multiple pages on one sheet of paper select the number of pages in the Pages per Sheet pop up menu To arrange the print order of the pages select a Layout Direction setting To print borders around each page on the ...

Page 60: ...t in your printer software 1 Select Color Matching from the pop up menu in the print window 2 Select one of the available options 3 Select Color Options from the pop up menu in the print window Note The available settings on the Color Options menu depend on the option you selected on the Color Matching menu 4 Select one of the available options Color Matching and Color Options Mac OS X 60 ...

Page 61: ...educe or remove red eye in photos Depending on the selected color mode you can also adjust the midtone density using the Gamma setting Fix Photo Improves the color contrast and sharpness of flawed photos Click the arrow next to Advanced Settings and select the Fix Red Eye setting to reduce or remove red eye in photos Note Fix Photo uses a sophisticated face recognition technology to optimize photo...

Page 62: ...g with Mac OS X Printing Preferences Mac OS X You can select from these settings on the Driver tab Skip Blank Page Ensures that your product does not print pages that contain no text or images Quiet Mode Lessens noise during printing when you select Plain Paper Bright White Paper as the paper Type or Media Type setting Permit temporary black printing Allows you to print using black ink when a colo...

Page 63: ...ion Allows the product to communicate with the computer Do not change the default setting On unless you experience issues when using a shared printing pool Parent topic Selecting Printing Preferences Mac OS X Printing Your Document or Photo Mac OS X Once you have selected your print settings you are ready to print Click Print at the bottom of the print window Checking Print Status Mac OS X Parent ...

Page 64: ...cel printing click the print job and click the Delete icon To pause a print job click the print job and click the Hold icon To resume a print job click the print job marked Hold and click the Resume icon To pause printing for all queued print jobs click the Pause Printer icon To check ink status click the Supply Levels icon Mac OS X 10 8 To cancel printing click the button next to the print job To...

Page 65: ...heck ink status click the Settings icon then click the Supply Levels tab Parent topic Printing Your Document or Photo Mac OS X Cancelling Printing Using a Product Button If you need to cancel printing press the stop button on your product Parent topic Printing From a Computer 65 ...

Page 66: ...age and save it as a PDF using your product s control panel buttons 1 Make sure you installed the product software and connected the product to your computer Note You must connect your product with a USB cable to scan using the buttons 2 Press the B W copy button and the color copy button at the same time Your original is scanned and saved as a PDF on your computer Changing Default Scan Button Set...

Page 67: ...ct the scan button settings you want to view or change 5 Change the settings as necessary 6 Click OK 7 Click Close to close the Event Manager window Parent topic Starting a Scan Using the Product Buttons Starting a Scan Using the Epson Scan Icon You can start the Epson Scan program to select scan settings scan and save the scanned image to a file Windows Double click the EPSON Scan icon on your co...

Page 68: ...Parent topic Starting a Scan Related tasks Scanning with Mac OS X 10 6 10 7 10 8 Using Image Capture Related topics Selecting Epson Scan Settings 68 ...

Page 69: ...program and select its scanning option See your scanning program help for instructions 2 Select your product Note In certain programs you may need to select your product as the source first If you see a Select Source option choose it and select your product With Windows do not select a WIA option for your product it will not work correctly You see an Epson Scan window like this 69 ...

Page 70: ... program s scan window instead of the Epson Scan window Select scanning options as necessary Parent topic Starting a Scan Related tasks Scanning with Mac OS X 10 6 10 7 10 8 Using Image Capture Related topics Selecting Epson Scan Settings 70 ...

Page 71: ...gs for it and saves your scanned image You can also select various image adjustment options Home Mode You can select setting groups based on the type of content you are scanning You can also select various image adjustment options and preview and size your scanned image Office Mode You can quickly scan text documents and adjust them on a preview screen You can also select various image adjustment ...

Page 72: ...en you scan in Full Auto Mode Epson Scan automatically saves your scanned file in JPEG format in your operating system s Pictures or My Pictures folder or opens it in your scanning program You can change the scanned file settings and select various image adjustment options before you scan if necessary 1 Start Epson Scan and select Full Auto Mode as the Mode setting You see this window 72 ...

Page 73: ...73 ...

Page 74: ...ge the scanned file settings click File Save Settings 3 Click Scan Epson Scan scans your original and saves the file in the selected folder or opens it in your scanning program If the file was saved directly to your computer you see the file in the Windows Explorer or Mac OS X Finder where you can view and print the image if desired Available Image Adjustments Full Auto Mode Parent topic Selecting...

Page 75: ...e sky and other features and then correctly rotates the photo when it is scanned if necessary If your photo is not oriented correctly using this option deselect this option and scan again Parent topic Scanning in Full Auto Mode Scanning in Home Mode When you scan in Home Mode Epson Scan automatically saves your scanned file in JPEG format in your operating system s Pictures or My Pictures folder o...

Page 76: ...2 Select the Document Type setting that matches your original such as Photograph or Text Line Art 3 Select the Image Type setting that matches your original 76 ...

Page 77: ...area in your preview image that you want to scan scan area 8 Select any of the image adjustment settings you want to use Before making adjustments click the image or scan area in the Preview window 9 If you want to reduce or enlarge your image as you scan select the Target Size setting you want to use 10 Click Scan You see the File Save Settings window 11 Change any of the necessary file save sett...

Page 78: ...y You can also use the scan area to select specific Image Adjustments settings for a scanned image Just be sure to click inside the scan area before selecting the settings 1 Do one of the following to select your scan area in the Preview image Thumbnail preview Your scan area is selected automatically but you can change it Place your cursor in one corner of the desired scan area then click and dra...

Page 79: ... Normal preview Click the Auto Locate icon to create a marquee dotted line on the preview image 79 ...

Page 80: ...step To move the marquee click inside the scan area and drag the marquee where you want it To resize the scan area place your cursor over the edge or corner of the marquee then click and drag the edges where you want them Hold down the Shift key as you resize the marquee to retain the same width height proportions 80 ...

Page 81: ...ts Home Mode You can select these Image Adjustments options in Epson Scan Home Mode Note Select the Image Option checkbox if you need to set any of the grayed out image adjustments Not all adjustment settings may be available depending on the Document Type and Image Type setting Click the Brightness button to access additional settings Descreening Removes the ripple pattern that might appear in su...

Page 82: ...n in OCR Optical Character Recognition programs Parent topic Scanning in Home Mode Selecting a Scan Size Home Mode You can reduce or enlarge the size of your image as you scan You can also select a specific scan size such as a common photo size like 4 6 inches 102 152 mm This places a scan area of that size on the preview image so you can use it to help crop the image in the correct proportions 1 ...

Page 83: ...rag the marquee where you want it To resize the scan area place your cursor over the edge or corner of the marquee then click and drag the edge where you want it Note Manually adjusting the marquee will not change the target size of the scanned file The marquee only indicates the area of the image that will be scanned 83 ...

Page 84: ...ortioned for your custom scan size Parent topic Scanning in Home Mode Scanning in Office Mode When you scan in Office Mode Epson Scan automatically saves your scanned file in JPEG format in your operating system s Pictures or My Pictures folder or opens it in your scanning program You can select settings preview and change the scanned file settings as necessary 1 Start Epson Scan and select Office...

Page 85: ...r original 3 Select the Document Source setting indicating where you placed your original 4 Select the Size and Orientation settings that match your original 5 Select the Resolution setting you want to use for your scan 6 Click the Preview button 85 ...

Page 86: ... you see the file in the Windows Explorer or Mac OS X Finder where you can view and print the image if desired Selecting a Scan Area Office Mode Available Image Adjustments Office Mode Parent topic Selecting Epson Scan Settings Related concepts Scan Resolution Guidelines Image Preview Guidelines Related tasks Selecting Scan File Settings Selecting a Scan Area Office Mode You can select a specific ...

Page 87: ...eate a marquee dotted line on the preview image 2 Do the following as necessary to work with the selected scan area If the marquee is correct continue with the next step To move the marquee click inside the scan area and drag the marquee where you want it 87 ...

Page 88: ...can Otherwise only the area inside the currently selected marquee will be scanned To delete a marquee click the marquee then click the Delete Marquee icon 3 Click inside each scan area and make any necessary settings in the Epson Scan window Parent topic Scanning in Office Mode Available Image Adjustments Office Mode You can select these Image Adjustments options in Epson Scan Office Mode Note Sel...

Page 89: ...djusts the overall lightness and darkness of the scanned image Contrast Adjusts the difference between the light and dark areas of the overall scanned image Threshold Adjusts the level at which black areas in text and line art are delineated improving text recognition in OCR Optical Character Recognition programs Parent topic Scanning in Office Mode Scanning in Professional Mode When you scan in P...

Page 90: ...90 ...

Page 91: ...t to use Before making adjustments click the image or scan area in the Preview window 10 If you want to reduce or enlarge your image as you scan select the Target Size setting you want to use 11 Click Scan You see the File Save Settings window 12 Change any of the necessary file save settings and click OK Epson Scan scans your original and saves the file in the selected folder or opens it in your ...

Page 92: ...ge You can select the entire image area or a portion of it You can even select multiple scan areas to create multiple scanned images of different areas Normal Preview mode only You can also use the scan area to select specific Image Adjustments settings for a scanned image Just be sure to click inside the scan area before selecting the settings Note In Professional Mode the default Preview mode is...

Page 93: ... scan area is selected automatically but you can change it Place your cursor in one corner of the desired scan area then click and drag the cursor to the opposite corner to create a marquee dotted line on the preview image 93 ...

Page 94: ...step To move the marquee click inside the scan area and drag the marquee where you want it To resize the scan area place your cursor over the edge or corner of the marquee then click and drag the edges where you want them Hold down the Shift key as you resize the marquee to retain the same width height proportions 94 ...

Page 95: ...will be scanned 3 Click inside the scan area and make any necessary settings in the Epson Scan window Parent topic Scanning in Professional Mode Available Image Adjustments Professional Mode You can select these Adjustments options in Epson Scan Professional Mode Note Not all adjustment settings may be available depending on the Image Type setting Click the image adjustment icon to access addition...

Page 96: ...u can adjust the level of auto exposure using a slider Histogram Adjustment Provides a graphical interface for adjusting highlight shadow and gamma levels individually For advanced users only Click the histogram icon to access the settings Tone Correction Provides a graphical interface for adjusting tone levels individually For advanced users only Click the tone correction icon to access the setti...

Page 97: ...n size such as a common photo size like 4 6 inches 102 152 mm This places a scan area of that size on the preview image so you can use it to help crop the image in the correct proportions 1 Click the Preview button to preview your image 2 In the Epson Scan window select the size you want your scanned image to be from the Target Size list Note If you need to rotate the orientation of the target siz...

Page 98: ...rag the marquee where you want it To resize the scan area place your cursor over the edge or corner of the marquee then click and drag the edge where you want it Note Manually adjusting the marquee will not change the target size of the scanned file The marquee only indicates the area of the image that will be scanned 98 ...

Page 99: ... size click Save and click OK Then create a scan area on the preview image The marquee is automatically proportioned for your custom scan size 6 To use additional sizing tools click the Windows or Mac OS X icon next to the Target Size setting and select options as desired Scale Reduces or enlarges your image by the percentage you enter 99 ...

Page 100: ...c Selecting Epson Scan Settings Scan Resolution Guidelines If you plan to enlarge a scanned image so you can print it at a larger size you may need to increase the resolution from the default resolution set by Epson Scan Follow these guidelines to determine the resolution setting you need You will enlarge the image as you scan it If you will enlarge the image using Epson Scan s Target Size setting...

Page 101: ...ur scan file on the File Save Settings window You can also select various optional settings that control how Epson Scan behaves when you scan and save files The File Save Settings window may appear after you click Scan on the Epson Scan window You may also be able to access the window by clicking the icon on the Epson Scan window 101 ...

Page 102: ...Optional Settings Parent topic Selecting Epson Scan Settings Available Scanned File Types and Optional Settings You can select from a variety scanned file types and optional settings on the File Save Settings window in Epson Scan File Formats Bitmap bmp A standard image file format for most Windows programs JPEG jpg An image format that lets you highly compress image data However the higher the co...

Page 103: ...Explorer or Mac OS X Finder automatically open to the folder where your scanned image is saved after scanning Show Add Page dialog after scanning If you are scanning a multi page document using the PDF or Multi Tiff format select to display a prompt for scanning additional pages after the first page is scanned Parent topic Selecting Scan File Settings Scanning with Mac OS X 10 6 10 7 10 8 Using Im...

Page 104: ...4 Select the Scan Mode setting indicating where you placed your original if available Select any other scan settings as necessary 104 ...

Page 105: ...pple pattern that might appear in subtly shaded image areas such as skin tones This option improves results when scanning magazines or newspapers The results of descreening do not appear in the preview image only in your scanned image Backlight Correction Removes shadows from photos that have too much background light Dust Removal Removes dust marks from your originals automatically Color Restorat...

Page 106: ... Document Format file on your computer 1 Place your original on your product for scanning 2 Start Epson Scan 3 Select the scan mode you want to use 4 Select the scan settings for your scan 5 Preview your image 6 When you finish selecting all your settings click Scan You see the File Save Settings window 106 ...

Page 107: ...the Type setting 8 Select any other settings you want to use on the File Save Settings window Click the Options button to access additional settings 9 Click OK Epson Scan scans your document and you see this window 107 ...

Page 108: ...u are finished click OK Note If you installed an OCR Optical Character Recognition program you may see a screen indicating the program is converting your page to text Wait until the program re scans the page and close the program if necessary 11 Click Close to exit the Epson Scan window if necessary Epson Scan scans your original and saves the PDF file in the selected folder or opens it in your sc...

Page 109: ...can settings for your scan 5 Preview your image 6 Locate or access the image adjustment settings 7 Select the Color Restoration checkbox 8 When you finish selecting all your settings click Scan 9 Click Close to exit the Epson Scan window if necessary Epson Scan scans your original and saves the color restored file in the selected folder or opens it in your scanning program If the file was saved di...

Page 110: ...atus Lights Checking Cartridge Status with Windows Checking Cartridge Status with Mac OS X Parent topic Replacing Ink Cartridges Checking Cartridge Status Lights You can check the status of your ink cartridges by checking the lights on your product If the ink light is flashing a cartridge is low You can continue printing until the cartridge needs replacement If the ink light is on a cartridge is e...

Page 111: ...ted on the screen Note If any of the cartridges installed in the product are broken incompatible with the product model or improperly installed Epson Status Monitor will not display an accurate cartridge status 3 To disable the low ink reminder right click the product icon in the Windows taskbar and select Monitoring Preferences You see this window 111 ...

Page 112: ...able promotional offers deselect the Display Epson Offers checkbox Promotional offers not available in Latin America Parent topic Check Cartridge Status Related references Control Panel Buttons and Lights Related tasks Removing and Installing Ink Cartridges 112 ...

Page 113: ...OS X 10 6 10 7 10 8 In the Apple menu or the Dock select System Preferences Select Print Fax or Print Scan select your product and select Options Supplies Select Utility and select Open Printer Utility Mac OS X 10 5 In the Apple menu or the Dock select System Preferences Select Print Fax select your product and select Open Print Queue Select Utility 2 Select EPSON Status Monitor You see this windo...

Page 114: ...pending on the color of the expended cartridge and how you are printing you may be able to continue printing temporarily Note If any of the cartridges installed in the product is broken incompatible with the product model or improperly installed Epson Status Monitor will not display an accurate cartridge status Parent topic Check Cartridge Status 114 ...

Page 115: ...ou use refilled cartridges The included cartridges must be used for printer setup and are not for resale For more information see www latin epson com infocartucho website available in Spanish only Yields vary considerably based on images printed print settings paper type frequency of use and temperature For print quality a variable amount of ink remains in the cartridge after the replace cartridge...

Page 116: ...ur product 2 Lift up the scanner unit Caution Do not move the print head by hand otherwise you may damage your product Do not touch the flat white cable inside the printer 3 If the ink light is on press the stop button If the ink light is flashing or off press and hold the stop button for 6 seconds until the ink cartridge holder moves to the replacement position If a cartridge is low or expended t...

Page 117: ... to remove it Note Dispose of used cartridges carefully Do not take the used cartridge apart or try to refill it Warning If ink gets on your skin wash it thoroughly with soap and water If ink gets into your eyes flush them immediately with water If ink gets into your mouth spit it out and see a doctor right away Keep ink cartridges out of the reach of children 117 ...

Page 118: ... leak 6 Remove the cartridge from the package Caution Do not touch the green chip on the cartridge Install the new cartridge immediately after removing the old one if you do not the print head may dry out and be unable to print 7 Remove the yellow tape from the side of the cartridge Caution Do not remove any other labels or seals or ink will leak 118 ...

Page 119: ...8 Insert the new cartridge into the holder and push it down until it clicks into place 9 Lower the scanner unit 10 Press the stop button 119 ...

Page 120: ... touch the ink supply port or surrounding area Always store ink cartridges with the label facing up do not store cartridges upside down Parent topic Replacing Ink Cartridges Related concepts Purchase Epson Ink Cartridges Replacing Ink Cartridges Using a Computer Utility You can use the Ink Cartridge Replacement utility to view on screen instructions for replacing an ink cartridge This method allow...

Page 121: ...ncepts Purchase Epson Ink Cartridges Printing With Black Ink and Expended Color Cartridges When a color ink cartridge is expended you can temporarily continue printing from your computer using black ink Replace the expended color cartridge as soon as possible for future printing Note You cannot print with expended color ink cartridges using your product s control panel 121 ...

Page 122: ... an envelope in your product 3 Access the print settings in your print application 4 Click the Main tab 5 Select Plain Paper Bright White Paper or Envelope as the paper type setting 6 Select the Black Grayscale checkbox 7 Click OK 8 Print your document Epson Status Monitor 3 displays a print message 9 Click Print in Black to print your document Parent topic Printing With Black Ink and Expended Col...

Page 123: ... select System Preferences 4 Select Print Fax or Print Scan select your product and select Options Supplies 5 Select Driver You see this screen 6 Select On as the Permit temporary black printing setting 7 Click OK 8 Close the utility window 9 Load plain paper or an envelope in your product 10 Access the print settings in your print application 11 Select Print Settings from the pop up menu 12 Selec...

Page 124: ...te The window appears only when you have selected Plain Paper Bright White Paper as the paper type setting and depends on other selected print settings To use this feature Epson Status Monitor must be enabled Click Yes to use a mixture of color inks to create black or No to continue using the remaining black ink for the document you are printing Click Disable this feature to continue using the rem...

Page 125: ...ty declines You can check for clogged nozzles before you clean them so you don t clean them unnecessarily Note You cannot clean the print head if an ink cartridge is expended and may not be able to clean it when a cartridge is low You must replace the cartridge first Print Head Nozzle Check Print Head Cleaning Parent topic Adjusting Print Quality Related topics Replacing Ink Cartridges Print Head ...

Page 126: ... pattern 5 Check the printed pattern to see if there are gaps in the lines Print head is clean Print head needs cleaning 6 If there are no gaps the print head is clean and you can continue printing If there are gaps or the pattern is faint clean the print head Parent topic Print Head Nozzle Check Related concepts Print Head Cleaning Checking the Nozzles Using a Computer Utility You can check the p...

Page 127: ...t Print Fax or Print Scan select your product and select Options Supplies Select Utility and select Open Printer Utility Mac OS X 10 5 In the Apple menu or the Dock select System Preferences Select Print Fax select your product and select Open Print Queue Select Utility 3 Select Nozzle Check You see a window like this 4 Click Print 5 Check the printed pattern to see if there are gaps in the lines ...

Page 128: ...ng If print quality has declined and the nozzle check pattern indicates clogged nozzles you can clean the print head Note You cannot clean the print head if an ink cartridge is expended and may not be able to clean it when a cartridge is low You must replace the cartridge first Cleaning the Print Head Using the Product Buttons Cleaning the Print Head Using a Computer Utility Parent topic Print Hea...

Page 129: ...mprovement after cleaning the print head up to 4 times turn off the product and wait at least 6 hours Then try cleaning the print head again If quality still does not improve one of the ink cartridges may be old or damaged and needs to be replaced Parent topic Print Head Cleaning Related concepts Print Head Nozzle Check Related topics Replacing Ink Cartridges Cleaning the Print Head Using a Comput...

Page 130: ...aning cycle The power light flashes throughout the cleaning cycle and stays on when the cleaning cycle is finished Caution Never turn off the product during a cleaning cycle or you may damage it 5 When the power light stops flashing and remains on you can check to see if the nozzles are clean click Print Nozzle Check Pattern and click Print 6 Check the printed pattern to see if there are gaps in t...

Page 131: ... head again If quality still does not improve one of the ink cartridges may be old or damaged and needs to be replaced Parent topic Print Head Cleaning Related topics Replacing Ink Cartridges Print Head Alignment If your printouts become grainy or blurry you notice misalignment of vertical lines or you see dark or light horizontal bands you may need to align the print head Note Banding may also oc...

Page 132: ... X 10 6 10 7 10 8 In the Apple menu or the Dock select System Preferences Select Print Fax or Print Scan select your product and select Options Supplies Select Utility and select Open Printer Utility Mac OS X 10 5 In the Apple menu or the Dock select System Preferences Select Print Fax select your product and select Open Print Queue Select Utility 3 Select Print Head Alignment 4 Click Next then cl...

Page 133: ...the sets choose the closest one in each set and click Realignment Then print another alignment sheet and check it Note Click Skip where available if you want to skip a particular alignment sheet 6 When you are done click Finish Parent topic Print Head Alignment Cleaning the Paper Path If you see ink on the back of a printout you can clean the paper path to remove any excess ink 1 Load a few sheets...

Page 134: ...but without placing a document on the scanner glass 3 Check the back of the ejected paper to see if it is clean 4 Repeat as necessary until the paper comes out clean Parent topic Adjusting Print Quality Related tasks Copying Documents or Photos 134 ...

Page 135: ...nplug the power cable 3 Disconnect any connected cables 4 Remove all the paper 5 Clean the scanner glass with a soft lint free cloth microfiber is recommended moistened with a little glass cleaner Caution Do not spray glass cleaner directly on the glass and do not press the glass surface with any force 6 Clean the outer case and control panel with a soft dry cloth Do not use liquid or chemical cle...

Page 136: ...rint head is in the far right position the home position If not turn on the product wait for the print head to move then turn the product off again 3 Secure the ink cartridge holder to the case with tape Caution Do not place tape on the white flat cable inside the product otherwise you may damage your product 4 Lower the scanner unit 5 Remove all the paper from the product 6 Unplug the power cable...

Page 137: ... Keep the product level during transportation Be sure to remove the tape from the ink cartridge holder before turning on your product If print quality has declined when you print again clean and align the print head Parent topic Cleaning and Transporting Your Product Related concepts Print Head Cleaning Print Head Alignment 137 ...

Page 138: ...ftware Updates Periodically it s a good idea to check Epson s support website for free updates to your product software Visit the driver download site at global latin epson com Soporte website available in Spanish and Portuguese only With Windows your printer software automatically checks for updates You can also manually update the software by selecting Software Update here Right clicking the pro...

Page 139: ...s still flashing after 3 minutes the cartridge may be installed incorrectly Reinstall the ink cartridge Paper is jammed in the product Remove the jammed paper and press The power light is flashing the B W copy button or the color copy button to clear the error The paper light is flashing No paper is loaded or multiple sheets fed at one time Load paper in the The power light is flashing product and...

Page 140: ...s flashing The paper light is flashing An error has occurred during firmware updating Connect your product The ink light is on using a USB cable and try updating the firmware again If the error The paper light is on message continues contact Epson for support The WiFi light is on A printer error has occurred Turn the product off and then back on The power light is flashing again If the error conti...

Page 141: ...e product is operating properly Any operation problem you may have could be caused by your computer cable software or selected settings Check the other solutions in this manual or try uninstalling and reinstalling your printer software If the page prints but the nozzle check pattern has gaps clean or align the print head If the page does not print the product may have a problem Check the other sol...

Page 142: ...uct software try these solutions Make sure your product is turned on and any necessary cables are securely connected at both ends If you still have problems installing software disconnect the cable and carefully follow the instructions on the Start Here sheet Also make sure your system meets the requirements for your operating system Close any other programs including screen savers and virus prote...

Page 143: ...ectly by connecting to it from your computer or another device You may need to disable the firewall and any anti virus software on your wireless router or access point Check to see if access restrictions such as MAC address filtering are set on the router or access point If access restrictions are set add your product s MAC address to your router s address list To obtain your product s MAC address...

Page 144: ...r internet connection when you initialize your router so note the next step before initializing it 4 Download your product software from the Epson website or install it from the CD that came with your product using the instructions on the Start Here sheet If you have replaced your router reinstall your product software to connect to the new router Parent topic Solving Network Problems Related conc...

Page 145: ... same wireless network If network printing is slow print a network status sheet and check the signal strength If it is poor place your product closer to your router or access point Note Avoid placing your product near a microwave oven 2 4 GHz cordless phone or large metal object such as a filing cabinet Check to see if your wireless router or access point has an enabled Privacy Separator function ...

Page 146: ...is set to Network then click the Test button Windows other versions Click or Start All Programs or Programs EPSON EPSON Scan EPSON Scan Settings Make sure the Connection setting is set to Network then click the Test button Mac OS X Open the Applications folder click Epson Software and click EPSON Scan Settings Make sure the Connection setting is set to Network then click the Test button Make sure ...

Page 147: ...he default paper size for copies is either A4 8 3 11 7 inches 210 297 mm or Letter 8 5 11 inches 216 279 mm To change the default paper size to A4 8 3 11 7 inches 210 297 mm make sure the product is turned off then hold down the color copy button and press the power button to turn the product on When the product turns on release both buttons To change the default paper size to Letter 8 5 11 inches...

Page 148: ...ate the sheets and reload it If paper jams when you load only one or two sheets try loading more sheets at a time Do not load more than the recommended number of sheets If paper jams when you print on both sides of the paper try loading fewer sheets For best results follow these guidelines Use new smooth high quality paper that is not curled creased old too thin or too thick Load paper in the shee...

Page 149: ... jammed paper and any torn pieces 6 Lower the scanner and press the power button to turn the product back on 7 Carefully follow all paper loading instructions when you load new paper Parent topic Solving Paper Problems Related topics Loading Paper Paper Ejection Problems If you have problems with paper ejecting properly try these solutions If paper does not eject fully you may have set the wrong p...

Page 150: ...s Make sure your product is turned on Make sure any interface cables are connected securely at both ends If you connected your product to a USB hub make sure it is a first tier hub If it still does not print connect your product directly to your computer instead of the hub Run a product check to see if a test page prints If the test page prints check to see if your product software is installed co...

Page 151: ...r in Windows Taskbar If you do not see your product icon in the Windows taskbar first try restarting your computer If that does not work try this solution 1 Do one of the following Windows 8 Navigate to the Start screen right click the screen and select All apps Select Control Panel Hardware and Sound Devices and Printers Windows 7 Click and select Devices and Printers Windows Vista Click select C...

Page 152: ...the requirements for your operating system If you are printing a high resolution image you may need more than the minimum requirements If necessary increase your system s memory If you are using Windows 7 close the Devices and Printers window before you print Clear space on your hard drive or run a defragmentation utility to free up existing space Close any programs you are not using when you prin...

Page 153: ...ems Check these sections if you have problems with the layout or content of your printed pages Inverted Image Too Many Copies Print Blank Pages Print Incorrect Margins on Printout Border Appears on Borderless Prints Incorrect Characters Print Incorrect Image Size or Position Slanted Printout Parent topic Solving Problems Inverted Image If your printed image is inverted unexpectedly try these solut...

Page 154: ...u are printing and you want to skip printing it select the Skip Blank Page setting in your printer software Run a print head nozzle check to see if any of the nozzles are clogged Then clean the print head if necessary Make sure your product is selected as the printer in your printing program Parent topic Solving Page Layout and Content Problems Related tasks Selecting Basic Print Settings Windows ...

Page 155: ...are Mac OS X Make sure you selected the Borderless checkbox or a paper size with a Borderless option in your printer software Adjust the Expansion setting to adjust the amount of image expansion on the edges of borderless prints Make sure the image size and the paper size are set correctly if the image is small the enlargement may not be enough to cover the paper Parent topic Solving Page Layout a...

Page 156: ...select Printers and Other Hardware if necessary and select Printers and Faxes Right click your product name select Open right click the stalled print job click Cancel and click Yes Make sure your product is selected as the printer in your printing program If your product is connected to a USB hub connect it directly to your computer instead Parent topic Solving Page Layout and Content Problems Inc...

Page 157: ...your printouts have problems with print quality but your image looks fine on your computer screen White or Dark Lines in Printout Blurry or Smeared Printout Faint Printout or Printout Has Gaps Grainy Printout Incorrect Colors Parent topic Solving Problems Related topics Solving Scanned Image Quality Problems White or Dark Lines in Printout If you notice white or dark lines in your prints also call...

Page 158: ... at a time Make sure your paper meets the specifications for your product Use Epson papers to ensure proper saturation and absorption of genuine Epson inks Make sure the paper type setting in your product software matches the type of paper you loaded Remove each sheet from the output tray as it is printed Avoid handling printouts on glossy paper right after printing to allow the ink to set Turn of...

Page 159: ...ting Printing Preferences Mac OS X Cleaning the Paper Path Related topics Loading Paper Faint Printout or Printout Has Gaps If your printouts are faint or have gaps try these solutions Run a nozzle check to see if any of the print head nozzles are clogged Then clean the print head if necessary The ink cartridges may be old or low on ink and you may need to replace them Make sure the paper type set...

Page 160: ... if necessary Align the print head You may need to increase the image resolution or print a smaller size see your software documentation Parent topic Solving Print Quality Problems Related concepts Print Head Alignment Related tasks Selecting Advanced Print Settings Windows Selecting Basic Print Settings Mac OS X Selecting Printing Preferences Mac OS X Incorrect Colors If your printouts have incor...

Page 161: ...eck these solutions if you have problems scanning with your product Scanning Software Does Not Operate Correctly Cannot Start Epson Scan Parent topic Solving Problems Scanning Software Does Not Operate Correctly If your scanning software does not operate correctly try these solutions Make sure your computer has adequate memory and meets the system requirements for your operating system Make sure y...

Page 162: ...ke sure the correct Connection setting is selected then click the Test button Mac OS X Open the Applications folder click Epson Software and click EPSON Scan Settings Make sure the correct Connection setting is selected then click the Test button Make sure you do not have multiple versions of Epson Scan installed If you do uninstall both versions and install one version If you upgraded your operat...

Page 163: ...u are scanning using the Epson Scan Black White setting adjust the Threshold setting and scan again Parent topic Solving Scanned Image Quality Problems Related references Available Image Adjustments Home Mode Available Image Adjustments Office Mode Available Image Adjustments Professional Mode Related tasks Placing Originals on the Scanner Glass Line of Dots Appears in All Scanned Images If a line...

Page 164: ...n the scanner glass Do not move your original or your product during scanning Your product will not operate properly while tilted at an angle Place it on a flat stable surface that extends beyond the base of the product in all directions Adjust these Epson Scan settings if available and try scanning again Select the Unsharp Mask setting Adjust the Auto Exposure setting Increase the Resolution sett...

Page 165: ...see a ripple pattern called a moiré in scanned images of printed documents This is caused by interference from differing pitches in the scanner s screen and your original s halftone screen To reduce this effect adjust these Epson Scan settings if available and try scanning again Select the Descreening setting Select a lower Resolution setting Parent topic Solving Scanned Image Quality Problems Rel...

Page 166: ...s Adjust the Tone Correction setting Adjust the Auto Exposure setting Parent topic Solving Scanned Image Quality Problems Related topics Selecting Epson Scan Settings Scan Area is Not Adjustable in Thumbnail Preview If you cannot adjust the scan area while viewing a Thumbnail preview in Epson Scan try these solutions Create a scan area by drawing a marquee on your preview image and adjusting it as...

Page 167: ... screen and select All apps Select Control Panel Programs Programs and Features Select the uninstall option for your Epson product then select Uninstall Change Note If you see a User Account Control window click Yes or Continue Select your product again if necessary then select OK and click Yes to confirm the uninstallation Windows other versions Click or Start and select All Programs or Programs ...

Page 168: ... In most cases you do not need to uninstall your product software before re installing it However you can download the Uninstaller utility from the Epson support website to uninstall your product software as described here Note If you find that re installing your product software does not solve a problem contact Epson 1 To download the Uninstaller utility visit the Epson download site at global la...

Page 169: ... to a Support Representative Before you call Epson for support please have the following information ready Product name Product serial number located on a label on the product Proof of purchase such as a store receipt and date of purchase Computer configuration Description of the problem Then call Country Telephone Argentina 54 11 5167 0300 Bolivia 800 100 116 Brazil State capitals and metropolita...

Page 170: ...ree number from a mobile phone Dial first 7 digits wait for a message then enter code If your country does not appear in the list contact the sales office in the nearest country Toll or long distance charges may apply Purchase Supplies and Accessories You can purchase genuine Epson ink and paper from an Epson authorized reseller To find the nearest reseller visit global latin epson com or call you...

Page 171: ...ifications Interface Specifications Network Interface Specifications Safety and Approvals Specifications Windows System Requirements To use your product and its software your computer should use one of these Microsoft operating systems Windows 8 Windows 7 Windows Vista Windows XP Professional x64 Edition Windows XP SP3 Note Visit Epson s support website at global latin epson com Soporte for the la...

Page 172: ...echnical Specifications Printing Specifications Paper path Sheet feeder top entry Sheet feeder capacity Approximately 50 sheets at 17 lb 64 g m2 to 24 lb 90 g m2 load legal size or user defined paper sizes one sheet at a time Parent topic Technical Specifications Related references Paper Loading Capacity Scanning Specifications Scanner type Flatbed color Photoelectric device CIS Effective pixels 1...

Page 173: ... changed by the manufacturer at any time Epson cannot guarantee the quality of any non Epson brand or type of paper Always test a sample of paper stock before purchasing large quantities or printing large jobs Single sheets Size A4 8 3 11 7 inches 210 297 mm A6 4 1 5 8 inches 105 148 mm Letter 8 5 11 inches 216 279 mm Legal 8 5 14 inches 216 357 mm 4 6 inches 102 152 mm 5 7 inches 127 178 mm 8 10 ...

Page 174: ... Plain bond paper Weight 20 lb 75 g m2 to 24 lb 90 g m2 Parent topic Technical Specifications Printable Area Specifications Note When printing borderless quality may decline in the expanded printable area Single sheets 1 Top 0 12 inch 3 mm minimum 2 Left 0 12 inch 3 mm minimum 3 Right 0 12 inch 3 mm minimum 4 Bottom 0 12 inch 3 mm minimum 174 ...

Page 175: ...ion properly if you use other types of cartridges or if you use refilled cartridges The included cartridges must be used for printer setup and are not for resale For more information see www latin epson com infocartucho website available in Spanish only Yields vary considerably based on images printed print settings paper type frequency of use and temperature For print quality a variable amount of...

Page 176: ... within 6 months of opening the package Parent topic Technical Specifications Related references Ink Cartridge Part Numbers Dimension Specifications Height Stored 5 7 inches 145 mm Printing 11 inches 279 mm Width Stored 15 4 inches 390 mm Printing 15 4 inches 390 mm Depth Stored 11 8 inches 300 mm Printing 19 8 inches 504 mm Weight 8 6 lb 3 9 kg without ink cartridges Parent topic Technical Specif...

Page 177: ... Operating 50 to 95 ºF 10 to 35 ºC Storage 4 to 104 ºF 20 to 40 ºC 1 month at 104 ºF 40 ºC Humidity Operating 20 to 80 RH non condensing Storage 5 to 85 RH Parent topic Technical Specifications Interface Specifications Interface type Hi Speed USB compatible with USB 2 0 specifications Parent topic Technical Specifications Network Interface Specifications Wireless LAN standard IEEE 802 11 b g n Wir...

Page 178: ...SA C22 2 No 60950 1 EMC CAN CSA CEI IEC CISPR 22 Class B COFETEL Notice Operation is subject to the following two conditions 1 this device may not cause harmful interference and 2 this device must accept any interference received including interference that may cause undesired operation of the device Product model C462M XP 211 This product uses the following wireless module Module Model Number WLU...

Page 179: ...low it to be stepped on or run over Be careful to keep the cord straight at each end If you use an extension cord with the product make sure the total ampere rating of the devices plugged into the extension cord does not exceed the cord s ampere rating Also make sure the total ampere rating of all devices plugged into the wall outlet does not exceed the wall outlet s ampere rating Always turn off ...

Page 180: ...t Doing so may cause fire Do not press too hard on the document table when placing originals Do not open the scanner section while the product is copying printing scanning or performing any other functions Be careful not to trap your fingers when closing the document cover or scanner Except as specifically explained in your documentation do not attempt to service the product yourself Unplug the pr...

Page 181: ...revent normal operation Do not shake cartridges after opening their packages this can cause them to leak If you remove an ink cartridge for later use protect the ink supply area from dirt and dust and store it in the same environment as the product Note that there is a valve in the ink supply port making covers or plugs unnecessary but care is needed to prevent the ink from staining items that the...

Page 182: ...ms are WITHOUT ANY WARRANTY without even the implied warranty of MERCHANTABILITY AND FITNESS FOR A PARTICULAR PURPOSE See the license agreements of each open source software program for more details which are described in OSS pdf on your Printer Software CD 4 OpenSSL toolkit This printer product includes software developed by the OpenSSL project for use in the OpenSSL Toolkit http www openssl org ...

Page 183: ... 0 1 12 zeroconf 0 6 1 1 iksemel 1 4 Apache License This printer product includes the open source software program Bonjour which apply the Apache License Version2 0 Apache License Program Bonjour License This printer product includes the open source software program Bonjour which applies the terms and conditions provided by owner of the copyright to the Bonjour Net SNMP license This printer produc...

Page 184: ... software programs which apply the Sun RPC License Sun RPC Programs The list of Sun RPC Programs busybox 1 2 2 1 netkit inetd 0 17 portmap 5beta TCP Wrappers license This printer product includes the open source software program libwrap libs 7 6 which applies the terms and conditions provided by owner of the copyright to the TCP Wrappers libncurses license This printer product includes the open so...

Page 185: ...pective owners Epson disclaims any and all rights in those marks Parent topic Notices Copyright Notice All rights reserved No part of this publication may be reproduced stored in a retrieval system or transmitted in any form or by any means electronic mechanical photocopying recording or otherwise without the prior written permission of Seiko Epson Corporation The information contained herein is d...

Page 186: ...d that I the above copyright notices and this permission notice appear in all copies of the software and related documentation and ii the names of Sam Leffler and Silicon Graphics may not be used in any advertising or publicity relating to the software without the specific prior written permission of Sam Leffler and Silicon Graphics THE SOFTWARE IS PROVIDED AS IS AND WITHOUT WARRANTY OF ANY KIND E...

Page 187: ...imes for Power Management for Epson Products This product will enter sleep mode after a period of nonuse This is to ensure that the product meets Energy Star standards of energy efficiency More energy savings can be achieved by setting the time to sleep to a shorter interval Parent topic Copyright Notice Copyright Attribution 2013 Epson America Inc 5 13 CPD 38994 Parent topic Copyright Notice 187 ...

Reviews: