TM-U295 Installation Manual 11
English
3. Press the
RELEASE
button. The
RELEASE
LED comes on,
indicating that the printer is in the paper release mode. In this
mode, the printer can accept paper and paper can be removed
from it.
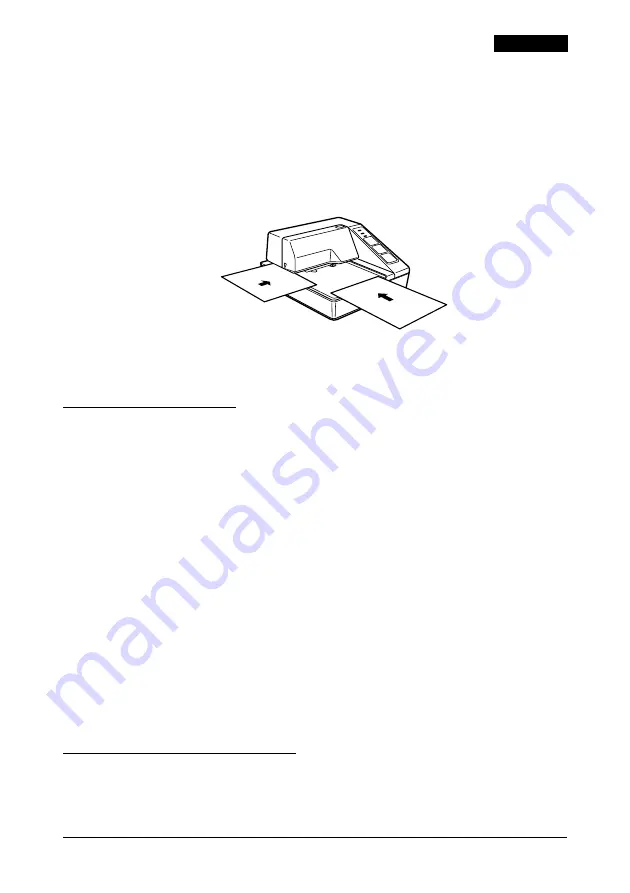
4. Insert the paper from either the front or the side, as shown in
the illustration below. Insert the paper into the printer until it is
stopped by the form stopper. The markings on the side of the
printer can also be used to judge how far to insert paper.
5. Check the
PAPER OUT
LED. When you insert the paper
correctly, the
PAPER OUT
LED goes out. If the
PAPER OUT
LED
is still on, remove the paper and re-insert it.
Running a Self Test
Any time that you want to check the performance of your printer
you can run a self test as described below. This shows whether
your printer is working correctly. It is independent of any other
equipment or software.
The self test checks the control circuits, printer mechanisms, print
quality, RAM, ROM version, and DIP switch settings.
To perform a self test, follow the steps below:
1. Make sure that the ribbon cassette is installed correctly.
2. Turn on the printer and make sure the printer is in the released
mode. If not, press the
RELEASE
button.
3. Insert a sheet of paper. Then turn off the power.
4. While holding down the
RELEASE
button, turn the power back
on to start the self test.
5. To end the self test, turn off the power.
Setting the DIP Switches
You can change several interface settings by changing the DIP
switch settings. If you need to change any of these settings, follow
these steps:


