Epson PictureMate Deluxe Viewer Product Information Download Page 5

PictureMate Deluxe Viewer Edition

4/05

PictureMate Deluxe Viewer Edition

 - 5

If you want to adjust the brightness, saturation, or sharpness 
of the photo, press the 

Menu

 button. 

5. Repeat steps 3 and 4 for all the photos you want to print.

You can press the 

Menu

 button to adjust settings for all 

selected photos. 

6. Press the 

Print

 button. You see the Print Confirmation:

You can press   or   to review the photo or photos you 
have selected. If you change your mind, press 

Back

.

7. Make sure you have enough paper loaded, then press 

Print


again to start printing.

Printing a Range of Photos

You can choose a range (or sequence) of consecutive photos 
from your camera’s memory card (for example, photos 7 
through 12). Selecting a range is convenient because you don’t 
have to choose each individual photo. 

1. At the photo selection menu, press the   or   button to 

highlight 

Print Range.

2. Press the 

OK


button. You see thumbnail images of your 

photos:

3. Press   or   to choose the first photo you want to print, 

then press 

OK

. The photo outline changes from orange to 

blue.

4. Press   or   to choose the last photo you want to print. All 

of your selected photos have blue outlines.

5. Press 

OK

.

6. Press   or   to select the number of copies you want for 

each photo.

Note: 

The number you select will apply to all photos in the 

range.

If you want to adjust any settings, press the 

Menu

 button.

7. Press 

Print

.

 You see the Print Confirmation. 

8. Make sure you have enough paper loaded, then press 

Print 

to start printing.

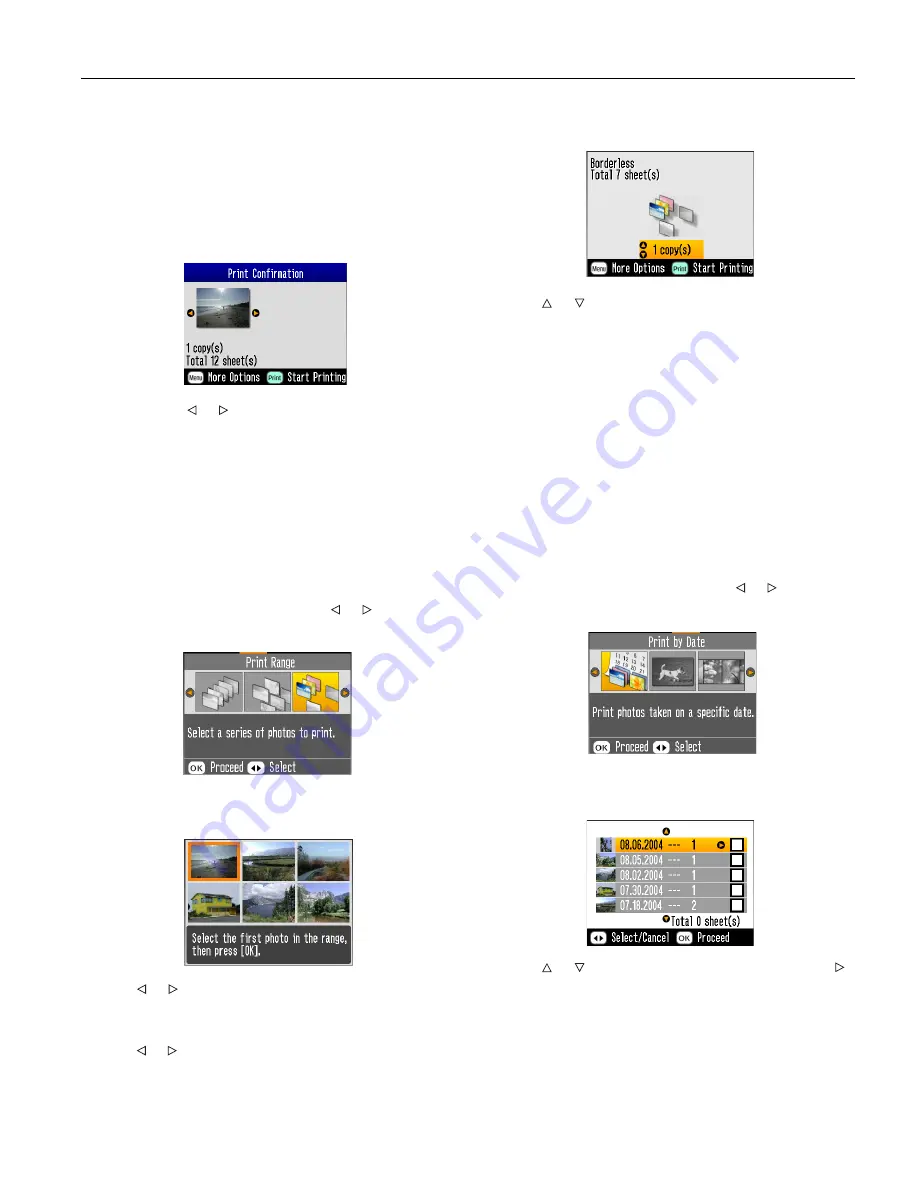
Printing Photos by Date

You can print photos taken on specific dates. If you have a lot 
of photos on your memory card, this makes it easier to find 
the ones you want.

1. At the photo selection menu, press the   or   button to 

highlight 

Print by Date

.

2. Press the 

OK


button. You see a list of dates, and a small 

image of one photo taken on that date:

3. Press   or   to highlight the date you want, then press   

to select the date.

Summary of Contents for PictureMate Deluxe Viewer

Page 1: ...r Specifications Printing Nozzle configuration 90 nozzles 6 yellow magenta cyan photo black red blue Print direction Bidirectional with logic seeking Control code ESC P Raster EPSON Remote command Input buffer 64KB Mechanical Paper capacity 20 sheets Dimensions Storage Width 10 0 inches 256 mm Depth 6 1 inches 154 mm Height 6 6 inches 167 mm Printing Width 10 0 inches 256 mm Depth 12 0 inches 305 ...

Page 2: ...to Cartridge to heat or direct sunlight Loading Paper Follow these steps to load PictureMate Photo Paper Caution Don t load plain paper this could damage PictureMate 1 Move the handle to the back and down then tilt up the photo viewer screen 2 Open the paper support and gently slide up the top part until it clicks into place Then open the output tray 3 Place your paper against the right edge gloss...

Page 3: ...otos on your memory card or device Inserting a Memory Card Note Insert just one card at a time The card does not go in all the way 1 Press the On button to turn on PictureMate 2 Open the memory card door 3 Insert the memory card into one of the three slots 4 Push the card in carefully until it stops it won t go in all the way When it is in the card light comes on 5 Close the memory card door Remov...

Page 4: ...ation You can press press or to review your photos If you change your mind press the Back button 4 Make sure you have enough paper loaded then press Print again to start printing Note If your card has more than 20 photos you will need to reload paper while printing Load a maximum of 20 sheets at a time When you see a message that paper is out load more paper and press OK to continue printing If yo...

Page 5: ... highlight Print Range 2 Press the OK button You see thumbnail images of your photos 3 Press or to choose the first photo you want to print then press OK The photo outline changes from orange to blue 4 Press or to choose the last photo you want to print All of your selected photos have blue outlines 5 Press OK 6 Press or to select the number of copies you want for each photo Note The number you se...

Page 6: ...ry card 3 Press or to select the photo you want to print in a frame Then press OK You see the first Disney frame 4 Press or to select the frame you want to use Then press OK You see your photo in the frame you selected If you want to select a different frame press Back and repeat step 3 If your photo doesn t quite fit in the frame you can crop it and adjust the picture area Press Back twice then p...

Page 7: ...ore paper away from extreme temperatures high humidity and bright light Replacing Ink When PictureMate is low on ink or you are out of paper it is time to buy a new PictureMate Print Pack includes a PictureMate Photo Cartridge and PictureMate photo paper and replace the Photo Cartridge Tip You can check the ink level at any time see the Using PictureMate Without a Computer book Caution Refilling t...

Page 8: ...the cartridge label side up into the slot 4 Push in both sides of the cartridge evenly to make sure it is not crooked It won t go in all the way 5 Move the lever to the Lock position by sliding it in the direction shown 6 Close the cartridge door Make sure it snaps shut 7 Lower the handle Cleaning the Print Head If your print quality is not as good as it used to be if your photos are too light or ...

Page 9: ...nt Head then press You see this message 4 Press the Print button The following alignment patterns are printed 5 Look at the printed squares to determine which one in each set is the most even with no streaks or lines You may need to use a magnifying glass 6 Press or to highlight the number for the best square 1 to 9 in set 1 Then press to move to 2 7 Press or to highlight the number for the best p...

Page 10: ...age 9 Using the Optional Battery With a fully charged battery you can print from 50 to 80 photos Follow these steps to install the optional battery 1 Turn the printer off and unplug the AC adapter 2 Open the battery cover on the back of the printer 3 Slide in the battery as shown until it clicks into place 4 Make sure the battery is pushed in all the way so that it locks into place as shown 5 Clos...

Reviews: