In the Professional Mode window, select the
Document Type
,
Document Source
,
Auto Exposure Type
(for
scanning documents or photos) or
Film Type
(for scanning film or slides),
Image Type
, and
Resolution
settings.
.
Click
Preview
to preview your image(s), then select your scan area. See
Previewing and Adjusting the Scan Area
for details.
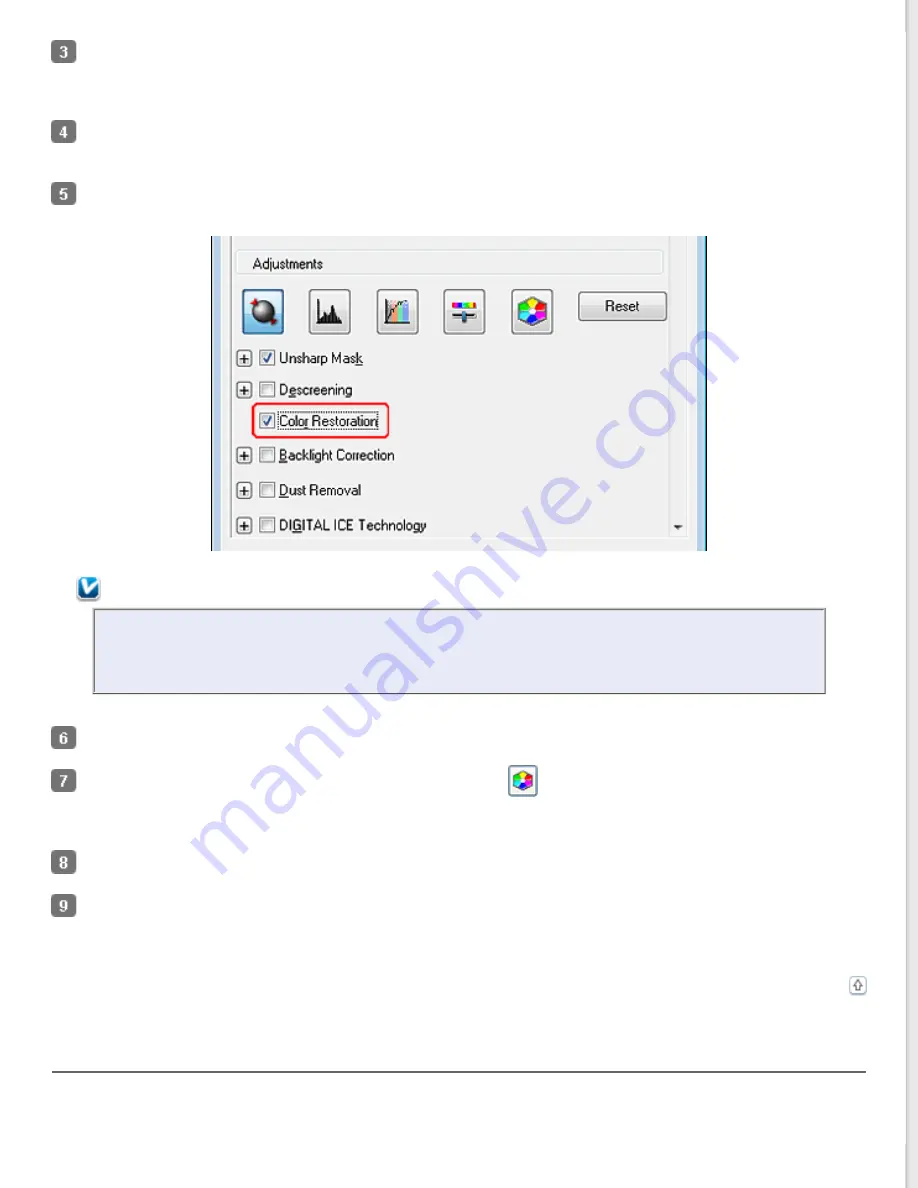
Scroll down to the Adjustments area and click the
Color Restoration
check box.
Note:
If you are scanning multiple images at the same time and you want to apply the Color Restoration
feature to all of your images or scan areas, click
All
in the Preview window before you click the check
box.
Make any other necessary image adjustments. See
Adjusting the Color and Other Image Settings
If you want to make more precise color adjustments, click the
Color Palette icon. See
Feature (for Professional Mode Only)
Size your image(s) as necessary. See
for details.
Click
Scan
.
What happens next depends on how you started Epson Scan. See
Using the Color Palette Feature (for Professional Mode Only)
Follow the steps in these sections to fine-tune the colors in your image using the Color Palette feature in Professional
Mode.


