background image

Epson Stylus SX230 series / SX235W series / SX430W series / SX440W series

Revision B

Disassembly/Reassembly

Detailed Disassembly/Reassembly Procedure for each Part/Unit

35

Confidential

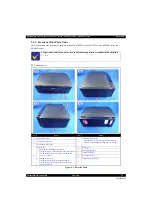
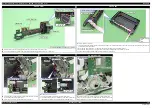
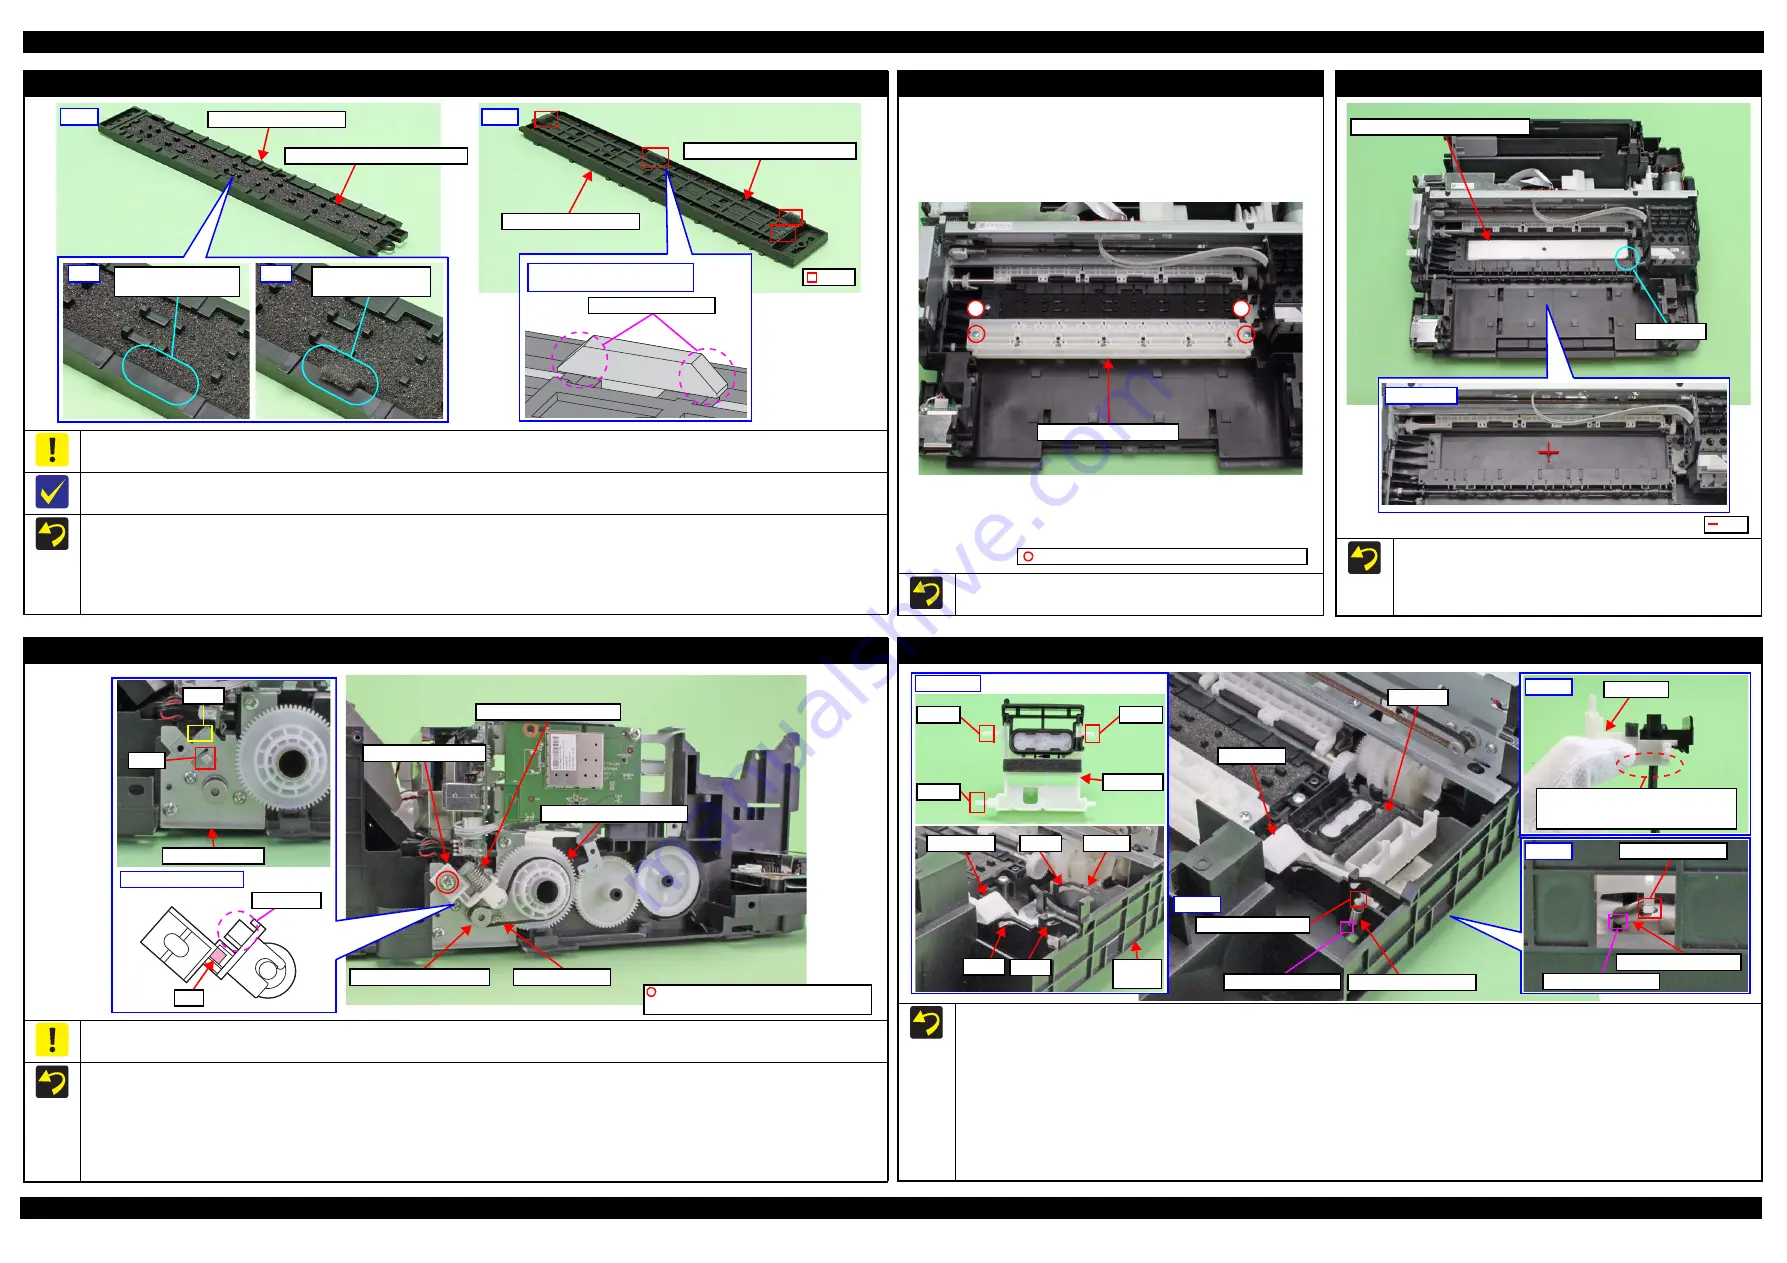
Paper Guide Front Porous Pad

When installing the Paper Guide Front Porous Pad, make sure to wipe off the grease attached on the Paper Guide Front Unit.

The Paper Guide Front Porous Pad is not included in the replacement parts when the maintenance error occurs.

After installing the Paper Guide Front Porous Pad, make sure of the following.

„

The entire anti-disconnect hooks on both ends of the legs (x4) of the Paper Guide Porous Pad should come out from the holes on the bottom of 
the Paper Guide Front Unit.

„

The tabs (x34) of the Paper Guide Front Porous Pad should be inserted completely into the grooves of the Paper Guide Front Unit.

„

No parts of the Paper Guide Porous Pad are wavy or lift over the platen surface of the Paper Guide Front Unit.

Back

Leg

Paper Guide Front Porous Pad

Paper Guide Front Unit

OK

No tab of the pad sticks 

out on the frame.

NG

A tab of the pad sticks 

out on the frame.

Paper Guide Front Unit

Front

Enlarged figure: a leg of Paper 

Guide Front Porous Pad

Anti-disconnect hooks

Paper Guide Front Porous Pad

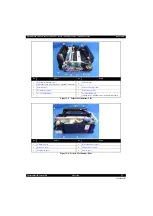
Star Wheel Holder Assy

Tighten the screws in the order indicated in the figure above.

Star Wheel Holder Assy

C.B.P-TITE SCREW 3x10 F/ZN-3C (6 ± 1 kgf·cm)

1

2

Paper Guide Lower Porous Pad

„

When installing the Paper Guide Lower Porous Pad, set it with 
the cut section to the front right of the printer.

„

Align the cutout of the Paper Guide Lower Porous Pad with the 
rib of the Frame Base.

Paper Guide Lower Porous Pad

Frame Base

Rib

Cut Section

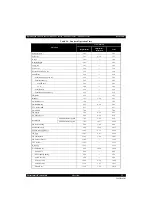
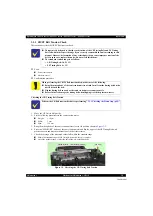
PF Driven Pulley Assy / PF Timing Belt

Do not hold the PF Driven Pulley Assy when securing it with the screw in order to prevent applying improper tension to the PF Timing Belt.

When installing the PF Driven Pulley Assy, follow the procedure below.
1. Align the rib of the PF Driven Pulley Assy with the hook of the PF Motor Frame, and install the PF Driven Pulley Assy.
2. Attach the Compression Spring 5.07 to the protrusion of the PF Driven Pulley Assy and the dowel of the PF Motor Frame.
3. Attach the PF Timing Belt in the order of the pinion gear of the PF Motor, PF Driven Pulley and Combination Gear 29.2,42.
4. Rotate the Combination Gear 29.2,42 clockwise three times to confirm the PF Timing Belt is correctly attached, and then secure the PF Driven 

Pulley Assy with the screw and washer to the PF Motor Frame.

Pinion gear of PF Motor

Hook

PF Motor Frame

Dowel

Rib

PF Driven Pulley Assy

Protrusion

Compression Spring 5.07

Combination Gear 29.2,42

PF Timing Belt

PF Driven Pulley Assy

C.B.S-TITE(P2) SCREW 3x6 F/ZN-3C
P.W. 3.4x0.43x7 (7 ± 1 kgf·cm)

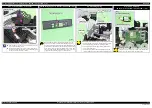
Cap Lever/Cap Assy

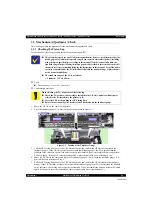
When installing the Cap Lever/Cap Assy, follow the procedure below.
1. Attach the Cap Lever to the Frame Base, and attach one end of the Extension Spring 0.65 to the hook of the Frame Base.
2. Connect the tube of the Pump Unit to the joint on the bottom of the Cap Assy. Then, viewing from the side, confirm the marking (10 

±

 1 mm 

from the tube end) on the tube is covered by the Cap Slider.

3. Insert the shaft A of the Cap Assy through the hole of the Cap Lever to the hole A of the Frame Base.
4. Insert the shaft B of the Cap Assy through the cutout of the Frame Base and to the hole B of the Frame Base.
5. Insert the shaft C of the Cap Assy to the hole C of the Frame Base.
6. Using a “spring hook jig” 

(p 20)

, attach the other end of the Extension Spring 0.65 to the hook of the Cap Assy.

7. Attach the Extension Spring 1.329 to the hooks of the Cap Lever and Frame Base.

Cap Lever

Extension Spring 1.329

Cap Assy

Extension Spring 0.65

Hook of Cap Assy

Hook of Frame Base

Step 6

Shaft B

Shaft A

Shaft C

Cap Assy

Step 2

Make sure the marking (10 ± 1 mm 
from the tube end) on the tube cannot 
be seen when viewed from the side.

Cap Slider

Cutout

Hole B

Cap Lever

Frame 

Base

Hole A Hole C

Step 1, 3-5

Hook of Frame Base

Hook of Cap Lever

Step 7

Summary of Contents for Epson Stylus NX330

Page 1: ...tylusSX230 EpsonMEOFFICE535 Epson StylusNX230 EpsonStylusTX230W EpsonStylusTX235W Epson StylusSX235W EpsonStylusNX330 EpsonStylusTX430W Epson StylusSX430W EpsonStylusSX435W EpsonMEOFFICE570W Epson StylusNX430 EpsonStylusTX435W EpsonStylusSX440W Epson StylusSX445W SEMF10 011 ...

Page 2: ... SEIKO EPSON would greatly appreciate being informed of them The contents of this manual are subject to change without notice The above not withstanding SEIKO EPSON CORPORATION can assume no responsibility for any errors in this manual or the consequences thereof EPSON is a registered trademark of SEIKO EPSON CORPORATION Note Other product names used herein are for identification purpose only and ...

Page 3: ... to personal injury or damage of the product 1 Repairs on Epson product should be performed only by an Epson certified repair technician 2 No work should be performed on this product by persons unfamiliar with basic safety knowledge required for electrician 3 The power rating of this product is indicated on the serial number rating plate Never connect this product to the power source whose voltage...

Page 4: ...oller Gears Rollers LCD Scanner Sensor Exterior parts 14 Never use oil or grease other than those specified in this manual Use of different types of oil or grease may damage the component or give bad influence on the printer function 15 Apply the specified amount of grease described in this manual 16 Make the specified adjustments when you disassemble the printer 17 When cleaning this product foll...

Page 5: ...anual Various symbols are used throughout this manual either to provide additional information on a specific topic or to warn of possible danger present during a procedure or an action Pay attention to all symbols when they are used and always read explanation thoroughly and follow the instructions Indicates an operating or maintenance procedure practice or condition that if not strictly observed ...

Page 6: ...een added Made change in Main Board p34 Made change in LD Roller Assy 1 p34 Paper Guide Front Porous Pad p35 has been added Made change in Paper Guide Lower Porous Pad p35 Made change in PF Driven Pulley Assy PF Timing Belt p35 Made change in Main Frame Assy p36 PF Grounding Spring p37 has been added Wireless LAN Module SX235W series SX430W series SX440W series p37 has been added Made change in Ma...

Page 7: ...tion of the Frame Base 3 p54 has been added 4 13 Lubrication of the Scanner Carriage 2 p57 has been added 4 15 Lubrication of Scanner Motor Combination Gear 14 4 10 8 and Combination Gear 13 8 9 66 p57 has been added 4 14 Lubrication of the Panel Stand p57 has been added Chapter 5 Made change in 5 1 1 Ink Discharge p59 Chapter 6 Made change in 6 2 1 Securing the CR Unit p62 6 2 2 Securing the Pape...

Page 8: ...ssembly Flowchart Printhead Main Board 31 2 3 Detailed Disassembly Reassembly Procedure for each Part Unit 32 2 4 Routing FFCs cables 38 Chapter 3 Adjustment 3 1 Required Adjustments 42 3 2 Adjustment Program 47 3 2 1 Operating Environment 47 3 2 2 Details of the Adjustment Program 47 3 2 2 1 CR Motor Heat Protection Control PF Motor Heat Protection Control 47 3 2 3 Scanner Motor Heat Protection C...

Page 9: ...Confidential CHAPTER 1 TROUBLESHOOTING ...

Page 10: ...oubleshooting workflow Follow the flow when troubleshooting problems In this chapter the product names are called as follows SX230 series Epson Stylus TX235 Epson Stylus SX230 Epson ME OFFICE 535 SX235W series Epson Stylus NX230 Epson Stylus TX235W Epson Stylus SX235W Epson Stylus TX230W SX430W series Epson Stylus NX330 Epson Stylus TX430W Epson Stylus SX430W Epson Stylus SX435W Epson ME OFFICE 57...

Page 11: ... of LD Roller or PF Roller PE Sensor Lever PE Sensor Main Board PF Motor Double Feed error Occurrence Condition When manual duplex printing is selected using the printer driver this error occurs if the actual paper length detected by PE Sensor does not match with the paper length specified in the printer driver The error occurs when the actual length is longer than the theoretical length specified...

Page 12: ...he fuse on the circuit boards in the printer 3 2 Checking for waste ink overflow 2 1 Checks the waste ink counter if the waste ink overflow is occurring 3 Seeking the home position 3 1 The CR Unit moves to the 80 digit side slowly and confirms it touches the Change Lever CR lock 3 2 The CR Unit moves to the 0 digit side slowly and confirms it touches the Right Frame 3 3 After the PE Sensor checks ...

Page 13: ... returns to its home position and displays on the LCD or with flashing LEDs that the paper jam error occurs When the user removes the paper and releases the paper jam error by panel operation the normal power on sequence from No 1 Table 1 1 is executed again 2 To recover from the maintenance error the dedicated software that can be downloaded from the web site which can be accessed from STM3 is re...

Page 14: ...eration for SX230 series SX430W series and SX440W series to display the fatal error code Method of displaying the fatal error code 1 Press the following buttons simultaneously while the fatal error is occurring Home button Stop button OK button Figure 1 1 Displaying the Fatal Error Code 1 2 Check the displayed fatal error code Figure 1 2 Displaying the Fatal Error Code 2 Since SX235W series does n...

Page 15: ...er failure contaminated detached scale Encoder Sensor failure CR Motor failure CR Unit drive mechanism overload paper jam foreign object insufficient grease deformation of the Main Frame Some part may be detached Paper Guide Upper Assy Cap Assy Cable disconnection Main Board failure Motor driver failure 08H CR load position reverse error CR Encoder failure contaminated detached scale Encoder Senso...

Page 16: ... PF load position excess load error PF Motor failure PF drive mechanism overload paper jam foreign object Tooth skip of the PF Timing Belt Improper tension of the PF Timing Belt Cable disconnection FCH PF load position error PF Encoder failure contaminated detached scale Encoder Sensor failure PF Motor failure PF drive mechanism overload paper jam foreign object Cable disconnection Motor drive tim...

Page 17: ...n object Deformation of the Main Frame Change Lever failure Paper jam Ink device error B0H CFH Ink device error Ink Cartridge failure Holder Board Assy failure CSIC Terminal failure CR Contact Module failure Main Board failure Circuit error 80H Circuit error include blowout of a fuse Main Board failure Table 1 3 Fatal Error List Printer Error type Error code Error name Possible cause ...

Page 18: ...e linearly arranged toothed area on the Scanner Housing Lower See Fig 1 3 Figure 1 3 Rack section Table 1 4 Fatal Error List Scanner Error code Error name Possible cause 10H Home position detection error CIS Module failure Scanner Housing Upper failure home seek pattern 1 is dirty Scanner Housing Lower failure the rack section 2 is damaged Scanner Motor failure Insufficient grease Foreign object F...

Page 19: ...Confidential CHAPTER 2 DISASSEMBLY REASSEMBLY ...

Page 20: ... such as when reassembling Cap Lever Cap Assy p35 the spring hook jig helps you to remove attach the spring easier 2 1 2 1 Making the Spring Hook Jig Fold a clip commercial item as shown in Fig 2 1 Figure 2 1 Making the Spring Hook Jig In this chapter the product names are called as follows SX230 series Epson Stylus TX235 Epson Stylus SX230 Epson ME OFFICE 535 SX235W series Epson Stylus NX230 Epso...

Page 21: ... in dotted lines No Name No Name 1 Housing Rear p27 4 SX440W series p 28 Panel Board w Touch Panel p28 Panel Housing Upper Assy p28 Panel Housing Lower Assy p28 2 Tray Front Assy p27 3 Frame Base Assy p28 4 Panel Unit SX230 series SX430W series p 28 Panel Board p29 Panel Buttons p29 LCD p29 Panel Housing Upper Assy p29 Panel Housing Lower Assy p29 SX235W series p 28 Panel Board Assy p28 Panel Butt...

Page 22: ...e p28 8 PF Roller Unit p30 3 CR Timing Belt p30 9 Star Wheel Holder Assy p27 4 Printhead p27 10 Paper Guide Front Unit p27 5 CR Encoder Sensor p30 11 Paper Guide Lower Porous Pad p27 6 Holder Board Assy p27 12 Paper Guide Upper Assy p30 No Name No Name 1 LD Roller Cover p28 6 Cap Lever p27 2 LD Roller Assy p28 7 Cap Assy p27 3 Hopper p28 8 Porous Pad for Cap Assy p27 4 Retard Roller Assy p27 9 Pum...

Page 23: ...e 1 Wireless LAN Module p27 SX235W series SX430W series SX440W series only 5 PF Scale p29 2 EJ Roller p27 6 PF Encoder Sensor p29 3 PF Motor Assy p30 7 EJ Roller Gear p27 4 PF Timing Belt p29 8 Card Slot Board p27 SX230 series SX430W series SX440W series only No Name No Name 1 CR Motor p28 4 Waste Ink Pad Assy p27 2 Head FFC p30 5 PE Sensor Lever p28 3 Main Board p28 6 PS Unit p27 3 1 2 7 8 4 5 6 ...

Page 24: ...using rear 0 36 0 36 Paper Support Assy 0 12 0 12 Tray Front Assy 0 13 2 32 2 45 Document Cover 0 10 0 10 Document Mat 0 23 0 23 Star Wheel Holder Assy 0 33 4 10 4 43 Paper Guide Front Unit 0 37 8 47 9 24 Paper Guide Lower Porous Pad 0 46 0 16 1 02 FFC Cover Outer 0 10 0 10 Holder Board Assy 1 11 1 11 FFC Cover Inner 0 12 0 12 Print Head 2 49 14 40 17 29 Waste Ink Pad Assy 0 29 0 16 0 45 Paper Bac...

Page 25: ...oller Assy 4 24 0 44 5 08 FFC Holder MB 4 17 4 17 Shield Plate 7 04 7 04 CR Motor 7 52 0 31 8 23 PE Sensor Lever 8 34 0 44 9 18 Main Board EEPROM Data copy OK 7 45 1 29 9 14 EEPROM Data copy NG 7 45 16 37 24 22 CR Driven Pulley 3 44 1 00 4 44 Main Frame Assy 8 02 12 35 20 37 Paper Guide Upper Assy 14 08 8 31 22 39 CR Unit 12 47 9 47 22 34 CR Timing Belt 13 01 1 00 14 01 CR Encoder Sensor 13 08 13 ...

Page 26: ... or destruction of equipment if not strictly observed Indicates the reference page in blue letter Indicates the parts that are inevitably broken in the disassembling procedure and should be replaced with a new one for reassembly Indicates the reference page in blue letter Indicates necessary check items in the disassembling assembling procedure Indicates the reference page in blue letter Indicates...

Page 27: ...ing Left 1 5 p 32 S4 Tray Front Assy 4 p 41 Paper Guide Front Unit 2 2 p 34 p 35 p 41 S4 Waste Ink Pad Assy 1 2 p 32 p 41 S4 Paper Back Lever 2 p 52 Retard Roller Assy 2 p 41 FFC Cover Outer 1 p 37 Holder Board Assy 2 FFC Cover Inner 2 p 37 Printhead 3 p 36 p 41 S1 Hinge 1 S4 Housing Right 3 p 32 Cap Assy 3 p 35 Wireless LAN Module 2 p 37 S5 Cap Lever p 35 PS Unit 2 p 32 p 40 p 41 EJ Roller Gear p...

Page 28: ...sy FFC Cover Inner FFC Cover Outer Holder Board Assy Printhead 5 p 30 Hopper 2 p 41 Shield Plate 1 S6 Main Board 1 p 34 p 38 p 41 S7 CR Motor 2 p 39 p 41 S8 LD Roller Assy p28 PE Sensor Lever 2 p 41 FFC Cable 2 Extension Spring x3 FFC Cable 1 Extension Spring CR Timing Belt FFC Cable 3 Extension Spring FFC Cable 4 CR Timing Belt FFC Cable 5 FFC cable list No FFC Cable No FFC Cable 1 Remove disconn...

Page 29: ...P S TITE P2 SCREW 3x6 F ZN 3C 7 1 kgf cm S1 S2 S3 S4 S5 S6 S7 S8 S9 S10 Panel Buttons 4 p 34 Scanner Motor 2 p 40 p 41 S3 Panel Housing Upper Assy p 37 Scanner Housing Upper 4 7 p 32 S4 Scanner Housing Lower p 40 p 52 Scanner Carriage Unit p 40 Spacer 2 CIS Holder Unit p 52 CIS Module Panel Board LCD FFC Cable 6 FFC cable list No FFC Cable 6 Remove the double sided tape x1 and release the Scanner ...

Page 30: ...P SCREW 3x4 F ZN 3C 4 1 kgf cm C P F B TITE SCREW 2x8 F ZN 3C 4 1 kgf cm C P S TITE P2 SCREW 3x6 F ZN 3C 7 1 kgf cm S1 S2 S3 S4 S5 S6 S7 S8 S9 S10 Paper Guide Upper Assy 6 p 41 Spur Gear 16 5 Main Board p28 PE Sensor Lever p28 Shield Plate p28 CR Motor p28 CR Unit p 39 p 41 Head FFC p 39 CR Timing Belt 1 p 41 CR Encoder Sensor 1 1 S9 Pump Unit 1 1 p 36 S4 PF Roller Unit p 41 p 52 Frame Base p 41 p...

Page 31: ...sy 2 Hopper 2 p 41 Shield Plate 1 S6 Main Board 1 p 34 p 38 p 41 S7 CSIC FFC Scanner FFC CN11 Ferrite core FFC Cable 11 FFC Cable 12 FFC cable list No FFC Cable 10 Disconnect the Panel FFC CN2 and remove the ferrite core 11 Remove disconnect the following FFC CN102 CN6 PF Motor cable CN13 PS Unit cable CN501 12 Remove disconnect all FFCs cables START Printhead START Main Board FFC Cable 10 FFC Hol...

Page 32: ... while avoiding the Hopper and Scanner Unit C B P TITE SCREW 3x10 F ZN 3C 6 1 kgf cm Step 2 Section B Section A Section C Step 3 4 Ink Position Label Section D Step 1 Housing Rear Dowel Rib Housing Rear The section enclosed in red dotted line may be interfered with the Hopper or the Scanner Unit Housing Right Housing Left CR Scale Attach the CR Scale to the hook on the left of the Main Frame with ...

Page 33: ...e the Panel Housing Lower Assy Hook Inside Panel Unit Panel Housing Upper Assy Panel Housing Lower Assy C B P TITE SCREW 3x10 F ZN 3C 6 1 kgf cm Back Panel Unit Panel Housing Lower Assy SX235W series Be careful not to damage the hooks x2 of the Panel Housing Upper Assy when releasing them When removing the Panel Housing Lower Assy follow the procedure below 1 Remove the screws x3 on the back of th...

Page 34: ...Label to the Shield Plate on the position shown above MAC Address Label Shield Plate Position of MAC Address Label PE Sensor Lever Main Board PE Sensor Paper Guide Front Unit When installing the Paper Guide Front Unit align the positioning holes x2 of the Paper Guide Front Unit with the dowels x2 of the Frame Base Tighten the screws in the order indicated in the figure above Dowel and positioning ...

Page 35: ...follow the procedure below 1 Align the rib of the PF Driven Pulley Assy with the hook of the PF Motor Frame and install the PF Driven Pulley Assy 2 Attach the Compression Spring 5 07 to the protrusion of the PF Driven Pulley Assy and the dowel of the PF Motor Frame 3 Attach the PF Timing Belt in the order of the pinion gear of the PF Motor PF Driven Pulley and Combination Gear 29 2 42 4 Rotate the...

Page 36: ...3 5 Align the screw holes of Main Frame and PF Motor Frame PF Motor Frame Main Frame 4 Tighten screw while pressing Main Frame in the direction of the arrow C B P TITE SCREW 3x10 F ZN 3C 6 1 kgf cm C B S TITE SCREW 3x6 F ZN 3C 6 1 kgf cm 1 2 Main Frame Assy Change Lever must not interfere with Main Frame Rib and groove Positioning hole and dowel Section A PF Encoder Sensor PF Scale Do not reuse th...

Page 37: ... holes when removing the LCD and can not hold the LCD securely Once the LCD is removed from the Panel Housing Upper Assy be sure to replace the Panel Housing Upper Assy with a new one Rib Panel Housing Upper Assy PF Grounding Spring When installing the PF Grounding Spring follow the procedure below 1 From the left side of the printer insert the spring leg A of the PF Grounding Spring into the hole...

Page 38: ...SX230 series SX430W series only Hole of Panel Housing Lower Assy Pull out grounding wire from here Panel Unit 1 Route the Panel FFC and grounding wire SX230 series SX430W series only as follows before installing the Panel Unit Route the Panel FFC through the hole of the Frame Base as shown above with the side with the stiffener upward Pull out the grounding wire from the hole of the Frame Base sho...

Page 39: ...rough the CR Unit as shown in the figure above and then connect them to the Printhead CR Encoder Sensor and Holder Board Assy Be careful not to damage the Head FFC when routing it through the hole of the CR Unit Head FFC Printhead Inside CR Unit Connector of Printhead CSIC FFC Head FFC CR Unit Connector of CR Encoder Connector of CR Contact Module Put Head FFC over CSIC FFC Hole of CR Unit Left si...

Page 40: ...the Scanner FFC to the Relay Board and CIS Module as shown above Bottom of Scanner Carriage Connector of Relay Board Connector of CIS Module Hole Scanner FFC Scanner Carriage Rib Double sided tape PS Unit Pull out the PS Unit cable from the hole of the Frame Base first and then route it through the rib of the Frame Base Put the ferrite core into the position shown in the figure above Hole Rib PS U...

Page 41: ...Confidential CHAPTER 3 ADJUSTMENT ...

Page 42: ... In this chapter the product names are called as follows SX230 series Epson Stylus TX235 Epson Stylus SX230 Epson ME OFFICE 535 SX235W series Epson Stylus NX230 Epson Stylus TX235W Epson Stylus SX235W Epson Stylus TX230W SX430W series Epson Stylus NX330 Epson Stylus TX430W Epson Stylus SX430W Epson Stylus SX435W Epson ME OFFICE 570W SX440W series Epson Stylus NX430 Epson Stylus TX435W Epson Stylus...

Page 43: ...of the motor and the power supply board To measure and correct the electrical variation of the motor and the power supply board To measure and correct the electrical variation of the motor Part Name Tray Front Assy Remove Replace O Star Wheel Holder Assy Remove Replace O O PaperGuide Front Unit Remove Replace O O O O PaperGuide Lower Porous Pad Remove Replace O Printhead Remove 1 O O Replace O O O...

Page 44: ...feed accuracy to achieve higher print quality To correct variations in paper feed accuracy to achieve higher print quality in band printing To reset the counter or set it to its maximum according to the replaced parts To measure and correct the electrical variation of the motor and the power supply board To measure and correct the electrical variation of the motor and the power supply board To mea...

Page 45: ...paper feed accuracy to achieve higher print quality To correct variations in paper feed accuracy to achieve higher print quality in band printing To reset the counter or set it to its maximum according to the replaced parts To measure and correct the electrical variation of the motor and the power supply board To measure and correct the electrical variation of the motor and the power supply board ...

Page 46: ...ations in paper feed accuracy to achieve higher print quality To correct variations in paper feed accuracy to achieve higher print quality in band printing To reset the counter or set it to its maximum according to the replaced parts To measure and correct the electrical variation of the motor and the power supply board To measure and correct the electrical variation of the motor and the power sup...

Page 47: ...Motor PF Motor Main Board and Power Supply Board to determine the correction value used for estimating the current values of the motors Risks if the adjustment is not correctly made The printer cannot measure the current value of motor correctly then the heat generation caused by motor drive cannot be estimated accurately either and which may results in trouble such as incorrect control of motors ...

Page 48: ...h the Scanner Carriage can operate without any problem is applied the printer cannot control the drive of the motors correctly which may result in occurrence or generation of scanner fatal error vibration or noises Procedure 1 Select from the menu of the Adjustment Program and press the Perform button to measure the correction value 2 Turn off the printer and turn it back on After the Scanner Carr...

Page 49: ...nds and confirm the CR Unit touches the thickness gauges If the CR Unit does not come in contact with the thickness gauges the PG is greater than the standard value therefore check if the unit is correctly reassembled If not reassemble the unit and perform PG check again If the unit is correctly reassembled replace the unit with a new refurbished one This printer does not have any PG adjustment me...

Page 50: ...elt tension check is complete Out of the standard range replace the unit with a new refurbished one Figure 3 2 Checking the CR Timing Belt Tension This printer is designed so that the each tension of the CR Timing Belt and PF Timing Belt fall within the expected range if you correctly reassemble the unit according to this manual However deformation of any related part s can cause improper tension ...

Page 51: ...stic tweezers and measure the tension of the belt three times 4 Check the average of the measured values falls within the standard range Within the standard range the PF Timing Belt tension check is complete Out of the standard range reinstall the PF Driven Pulley Assy p35 and then perform the PF Timing Belt Tension Check again Figure 3 3 Checking the PF Timing Belt Tension Perform the PF Belt ten...

Page 52: ...Confidential CHAPTER 4 MAINTENANCE ...

Page 53: ...ate the printer parts are determined based on the results of the internal evaluations Therefore refer to 4 2 Lubrication Points and Instructions p54 for the repairing procedures below and apply the specified type and amount of the grease to the specified part of the printer mechanism 4 2 Lubrication Points and Instructions p54 also provides information about whether or not the parts which require ...

Page 54: ...ints x2 on the Frame Base with the Panel Assy Type G 74 Application Amount Appropriate amount Remarks Apply with flux dispenser Stir G 74 before use Apply grease inside the rail section Apply grease inside the rail section Application Point Frame Base Figure 4 3 Lubrication of the Frame Base 3 Part supply as ASP None Lubrication status when supplied as ASP Lubrication Point 1 Contact points x2 on ...

Page 55: ... along the tier on the shaft Lubricate before attaching the part EJ Roller Gear Application Point Part supply as ASP None Lubrication status when supplied as ASP Lubrication Point 1 On the bearings x2 of the CR Driven Pulley on the CR Driven Pulley Holder 2 Contact points x4 on the groove of the CR Driven Pulley Holder with the Main Frame Type G 71 Application Amount Appropriate amount Remarks 1 A...

Page 56: ... Lubrication status when supplied as ASP Lubricated Lubrication Point Guide rail of the Scanner Housing Lower Type G 45 Application Amount 0 03 g x 3 points Remarks After applying with injector spread it with brush in the direction of the arrow Scanner Housing Lower Spread grease with brush Guide rail Application Point Figure 4 12 Lubrication of the Scanner Carriage 1 Part supply as ASP Supplied a...

Page 57: ... ASP Lubricated Lubrication Point Shafts x4 of the Panel Stand Type G 74 Application Amount Appropriate amount Remarks Using flux dispenser apply all over the shafts shown in the figure Stir G 74 before use Panel Stand Application Point Figure 4 15 Lubrication of Scanner Motor Combination Gear 14 4 10 8 and Combination Gear 13 8 9 66 Part supply as ASP Supplied as the Scanner Unit Lubrication stat...

Page 58: ...Confidential CHAPTER 5 REFURBISHMENT ...

Page 59: ...written on the EEPROM on the Main Board of the printer This is performed in order to erase the personal information including the network settings and the operating information of the printer before refurbishment etc This default value restoration is automatically done when performing the ink discharge by the Adjustment Program for refurbishment automatically Name Category EPSON Part Code Ink Supp...

Page 60: ...Confidential CHAPTER 6 APPENDIX ...

Page 61: ...s Epson Stylus NX330 Epson Stylus TX430W Epson Stylus SX430W Epson Stylus SX435W Epson ME OFFICE 570W SX440W series Epson Stylus NX430 Epson Stylus TX435W Epson Stylus SX440W Epson Stylus SX445W B M Y C SX230 series SX430W series SX440W series CN501 CN9 CN7 CN13 CN12 CN6 CN11 CN102 Printhead CIS PE Sensor CR Motor SCN Motor PF Motor USB CN3 Panel Board CN2 CN4 PF Encoder CR Encoder WiFi Board AC i...

Page 62: ... that the CR Unit can touch the side of the tip on the Change Lever 3 Attach the folded end of strong tape on the Housing Right The point of the tape 125 mm from the folded end should be aligned with the corner of the Housing Right then 4 Attach the unfolded end of strong tape to the side of the CR Unit and secure the CR Unit Figure 6 2 Securing the CR Unit In order to prevent damaging the Change ...

Page 63: ...it is not performed The Paper Support Assy will be scratched and the abrasion powder will be produced due to the shock during transportation Preparation Prepare two pieces of strong tape length 85 mm width 22 mm fold one end 5 mm Method Attach strong tape on both sides of the Paper Support Assy and secure the Paper Support Assy to the Housing Right Housing Left Figure 6 3 Securing the Paper Suppor...

Reviews: