


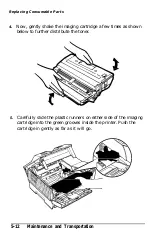

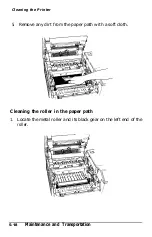


Replacing Consumable Parts
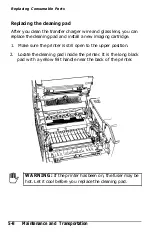
5. Hold the yellow felt handle on the new cleaning pad and insert
the pad into the slot on the fuser. Match the yellow mark on
the left, front corner of the cleaning pad with the triangle on
the fuser, as shown below.
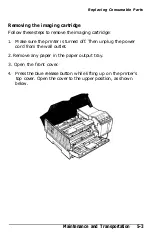
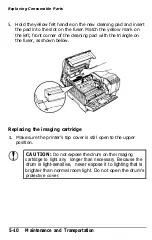
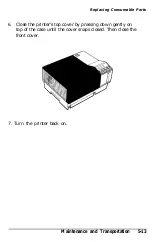
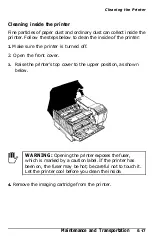
Replacing the imaging cartridge
1.
Make sure the printer’s top cover is still open to the upper
position.
CAUTION:
Do not expose the drum on the imaging
cartridge to light any longer than necessary. Because the
drum is light-sensitive, never expose it to lighting that is
brighter than normal room light. Do not open the drum's
protective cover.
5-10
Maintenance and Transportation
Summary of Contents for EPL-8000
Page 1: ......
Page 3: ......
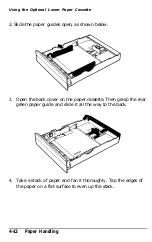
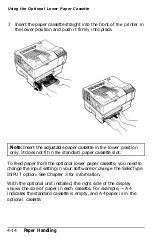
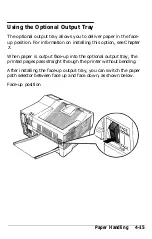
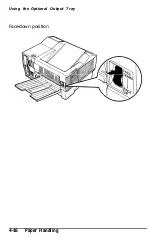
Page 122: ...Using the Optional Output Tray Face down position 4 16 Paper Handling ...
Page 146: ...Transporting Your Printer 5 24 Maintenance and Transportation ...
Page 190: ...Data Dump Mode 6 44 Troubleshooting ...
Page 236: ...Interface Specifications A p p e n d i x A A 9 ...
Page 240: ...Interface Specifications Appendix A A 13 ...
Page 267: ...Available Fonts and Symbol Sets Roman 8 8U ECMA 94 Latin 1 ON B 18 Appendix B ...
Page 268: ...Available Fonts and Symbol Sets IBM US IOU IBM DN 11U Appendix B B 19 ...
Page 270: ...Available Fonts and Symbol Sets I 0 ANSI ASCII OU Ventura Math 6M Appendix B B 21 ...
Page 271: ...Available Fonts and Symbol Sets Ven ha International 13J Ventura US 14J B 22 Appendix B ...
Page 273: ...Available Fonts and Symbol Sets Math 8 8M Pi Font 15U B 24 Appendix B ...
Page 274: ...Available Fonts and Symbol Sets Microsoft Publishing 6J Windows 9U Appendix B B 25 ...
Page 275: ...Available Fonts and Symbol Sets Desk Top 7 B 26 Appendix B ...
Page 276: ...Available Fonts and Symbol Sets PsZapf Dingbats I OL Zd 100 11L Appendix B B 27 ...
Page 277: ...Available Fonts and Symbol Sets Zd 300 13L B 28 Appendix B ...
Page 333: ......
Page 334: ......
Page 335: ......