Name
Function
D
Security cable
installation point
Pass a commercially available wire lock through here and
lock it in place.
s
E
Ceiling mount fixing
points (four points)
Attach the optional Ceiling Mount here when suspending
the projector from a ceiling.
s
s
F
Screw hole for the
screw to fix the lens
unit removal button
When installing a lens unit, use this screw hole to fix the
lens unit removal button using the screw supplied.
s
"Removing and Attaching the Projector Lens Unit"
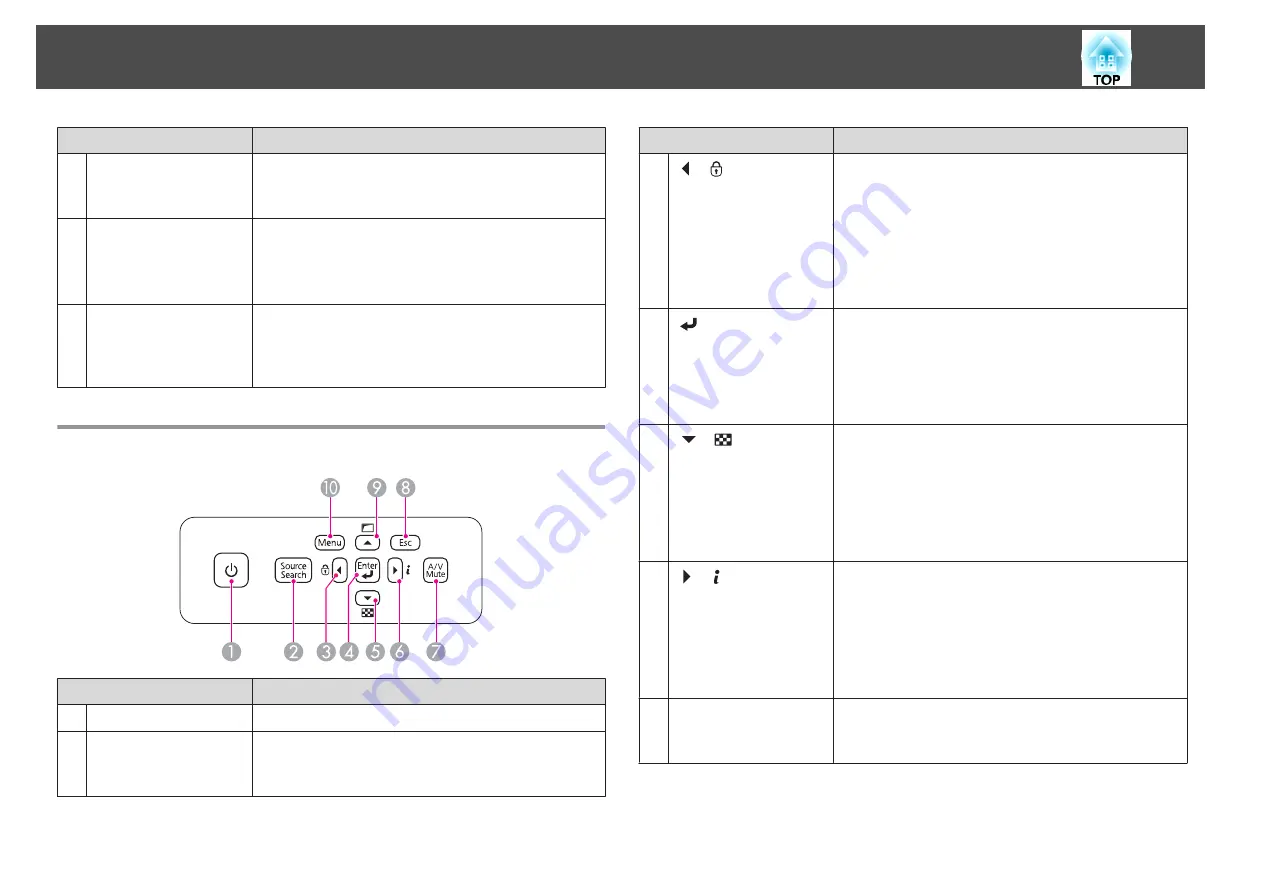
Control Panel
Name
Function
A
[
t
] button
Turns the projector power on or off.
B
[Source Search]
button
Changes to the next input source that is sending an image.
s
"Automatically Detect Input Signals and Change the
Projected Image (Source Search)"
Name
Function
C
[
]/[
] buttons
•
Displays the Control Panel Lock screen allowing you to
make settings to lock the control panel buttons.
s
•
If pressed when the Configuration menu or the Help
screen is displayed, this button selects menu items and
setting values.
s
"Using the Configuration Menu"
s
D
[
] button
•
When the Configuration menu or the Help screen is
displayed, it accepts and enters the current selection and
moves to the next level.
•
If pressed while projecting analog RGB signals from the
Computer port or the BNC port, you can automatically
optimize Tracking, Sync., and Position.
E
[
]/[
] buttons
•
Displays a test pattern.
s
•
If pressed when the Configuration menu or the Help
screen is displayed, this button selects menu items and
setting values.
s
"Using the Configuration Menu"
s
F
[
] /[ ] buttons
•
Displays the Info menu from the Configuration menu.
s
•
If pressed when the Configuration menu or the Help
screen is displayed, this button selects menu items and
setting values.
s
"Using the Configuration Menu"
s
G
[A/V Mute] button
Turns the video and audio on or off.
s
"Hiding the Image and Sound Temporarily (A/V
Part Names and Functions
11
Summary of Contents for EB-G6800
Page 1: ...User s Guide ...
Page 7: ...Introduction This chapter explains the names for each part ...
Page 18: ...c Pull the lens unit straight out as it is released Part Names and Functions 18 ...
Page 39: ...Basic Usage This chapter explains how to project and adjust images ...
Page 83: ...Configuration Menu This chapter explains how to use the Configuration menu and its functions ...
Page 137: ...Appendix ...


