


Adjustment
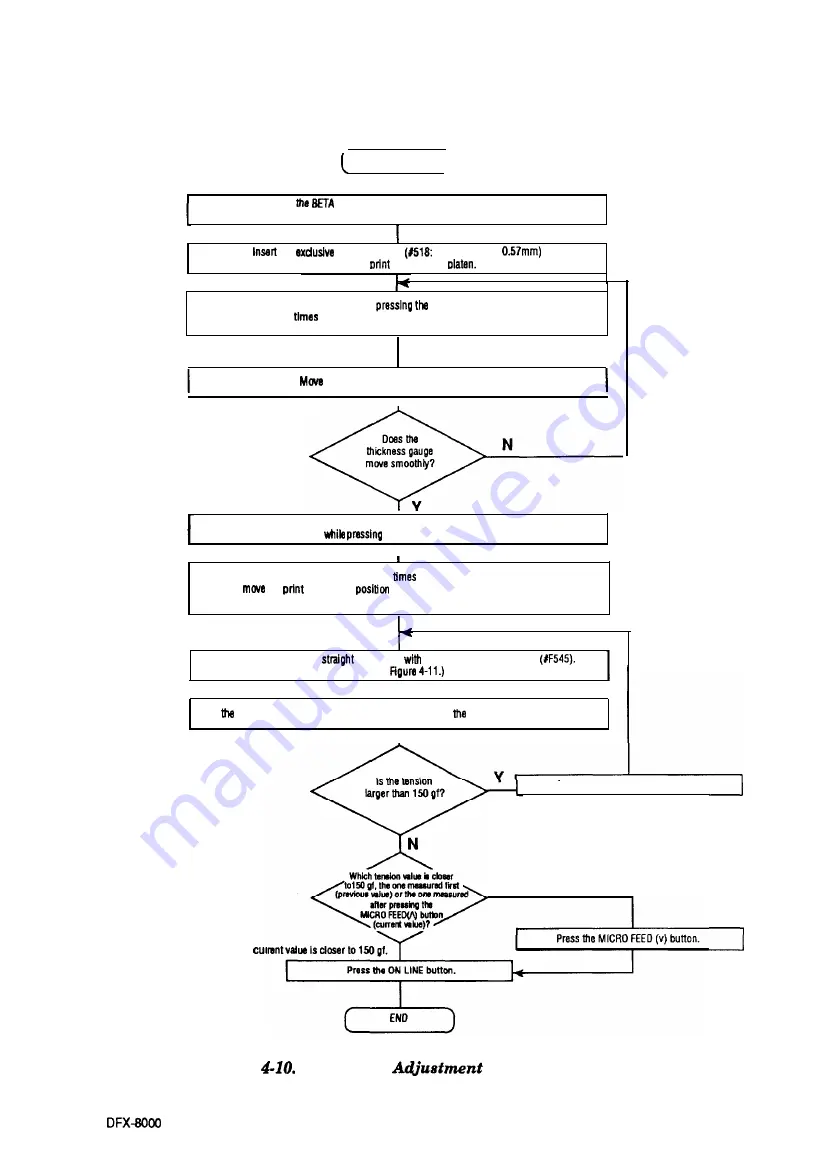
START
I
I
Reset
value by pressing the MICRO FEED(V) button
while pressing the TEAR OFF button.
the
thickness gauge
0.5 + 0.07, total
between the
head and the
Press the MICRO FEED (A) button while
TEAR OFF button. (Do not forget how
many
you press the MICRO FEED(A) button (X times). )
the thickness gauge to the left and right
Reset the BETA value by pressing the MICRO FEED (v) button
the TEAR OFF button.
I
Press the MICRO FEED (A) button (X-l)
while pressing the TEAR OFF button
to
the
head to the
one step away from the position where the
print head and the thickness gauge contact
Pull the thickness gauge
to the right
the exclusive tension gauge
(Refer to
I
Read tenslon value (the scale on the tenslon gauge) when thickness gauge begins to move.
I
The
Press the MICRO FEED (A) button.
The previous value is closer to 150 gf.
Figure
Mechanism
Value Measurement
4 - 1 7
Summary of Contents for DFX 8000
Page 1: ...D F X 8 0 0 0 Dot Matrix Printer TM DFX8000 ...
Page 2: ...EPSON D F X 8 0 0 0 Service Manual Revision Level 11 ...
Page 5: ...iv ...
Page 141: ...3 14 ...
Page 218: ...Troubleshooting Figure 5 2 Bypass Method of Interlock Switch DFX 8000 ...
Page 227: ...Cl 6 DFX 3000 Figure 5 10 Print Head Cable Signal Assignment 5 13 ...
Page 250: ...Maintenance 13 G261 EEgure6 2 DFX43tXNl Lubricdn and Adhesive Diagram DFX 8000 ...
Page 251: ...6 6 DFX 8000 ...
Page 281: ...Technical Specifications CW II figure A CWOBZAIN Board Component Layout DFXgOOO A 28 ...
Page 283: ...Technical Specifiitions A 30 DFX 8000 ...
Page 286: ...Technical Specifications II Ii I II I I Figure A 10 CO3OIUAtNBo d Circuit Diugmm DFX4000 ...
Page 287: ...Technical Specifications p y Figure A 11 Dl X4XKM Exploded Diugram 1 A 34 DFX WOO ...
Page 291: ...19 l G26 24 lQu re A 15 DRX Lubrication andAdhesive Diagram 1 A 38 ...


