


164
12. Select a non-borderless paper size as the paper size setting.
13. Select
Plain Paper/Bright White Paper
,
Letterhead
, or
Envelope
as the paper type setting.
14. Select the
Grayscale
option.
15. Select any other options as needed.
16. Click
to print your document.
Parent topic:
Printing with Black Ink and Expended Color Cartridges
Related tasks
Loading Paper in the Rear Paper Feeder
Conserving Low Black Ink with Windows
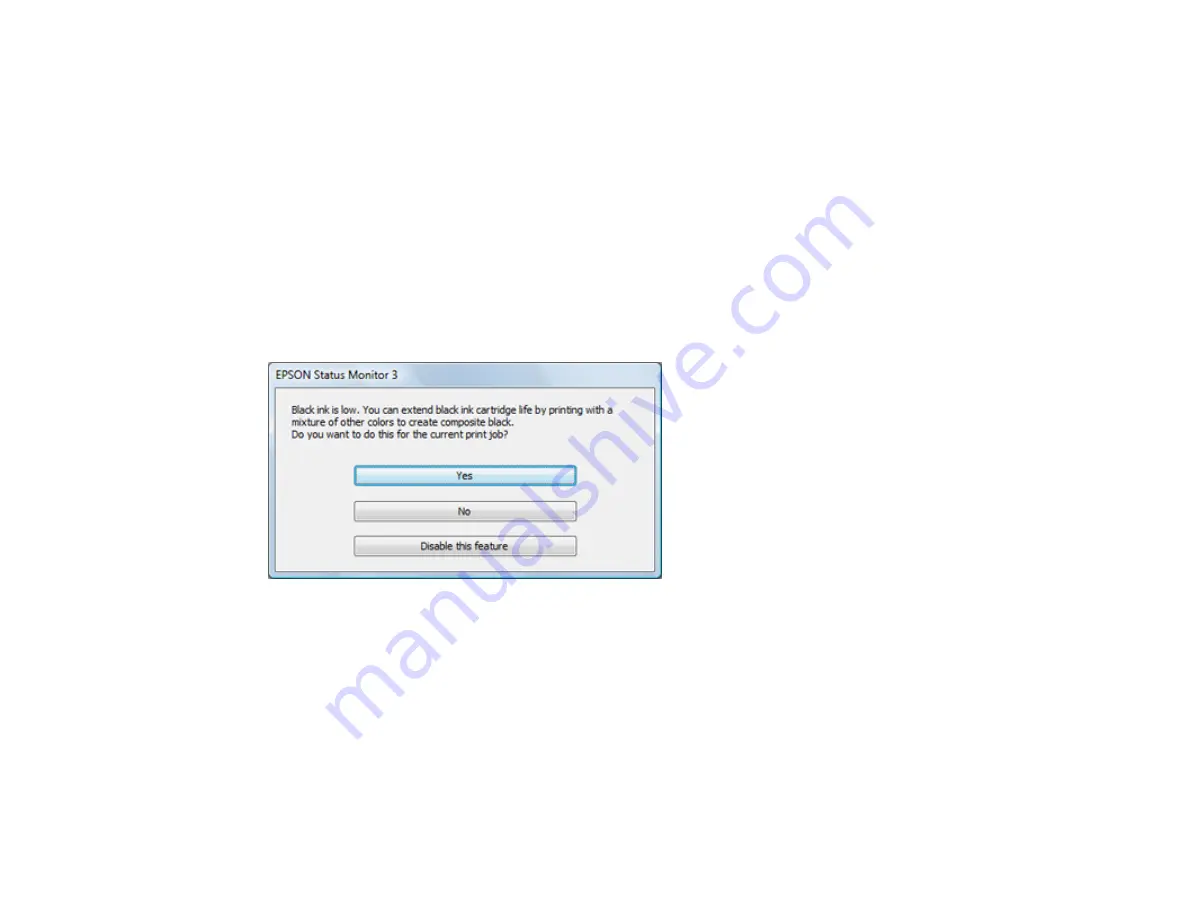
The following window appears when black ink runs low and there is more color ink.
Note:
The window appears only when you have selected
Plain Paper/Bright White Paper
or
Letterhead
as the paper type setting, and depends on other selected print settings. To use this feature,
Epson Status Monitor must be enabled.
• Click
Yes
to use a mixture of color inks to create black, or
No
to continue using the remaining black ink
for the document you are printing.
• Click
Disable this feature
to continue using the remaining black ink.
Note:
If you disable this feature, it remains disabled until you install a new black ink cartridge.
Summary of Contents for C11CK65201
Page 1: ...XP 4200 XP 4205 User s Guide ...
Page 2: ......
Page 119: ...119 You see an Epson Scan 2 window like this ...
Page 121: ...121 You see an Epson Scan 2 window like this ...
Page 135: ...135 You see a screen like this 2 Click the Save Settings tab ...
Page 140: ...140 You see this window ...
Page 192: ...192 Related tasks Aligning the Print Head Using the Product Control Panel ...


