background image


When the battery pack is inserted, it will automatically lock. 
When removing the battery pack, this spring lock must be retained in the 
unlocked position.


3 Battery Pack

  The battery pack is automatically charged when connected to an AC power source 

and maintains power to the Netbook when AC power is not connected.This allows use when moving 
temporarily between locations.Battery time variel by usage and by the specifications for this 
Netbook.The battery pack cannot be disassembled and must be purchased as a single unit. 

4 Rating Label The label shows the model number and other information about your Netbook.


5 Fan Outlets 

These are open ports for the fan to dissipate heat from the computer's internal 

components. Do not block or place the computer in such a position that you inadvertently allow the 
outlets to become blocked.


6 Harddisk cover 

Open the cover can be installed on the hard disk 

7 Memory cover 

Open the cover can be installed memory 

(3)

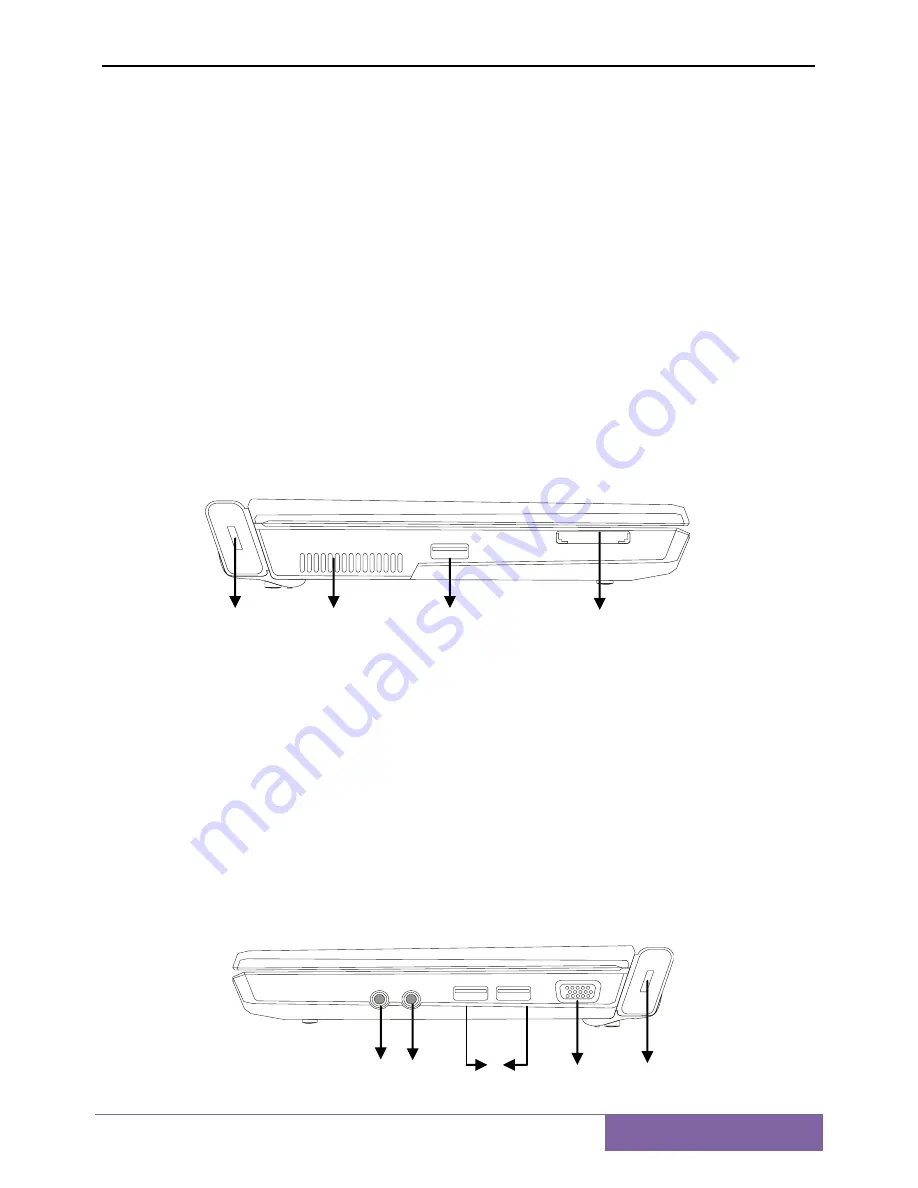
 Left view


NO. Item Description 
1 Security Port 

Connects to a Kensington-compatible computer security lock. 


2 Fan Outlets 

These are open ports for the fan to dissipate heat from the computer's internal 

components. Do not block or place the computer in such a position that you inadvertently allow the 
outlets to become blocked. 
3 USB 2.0 port 

Connect to USB 2.0 devices. (e.g., USB mouse, USB camera).


4 Memory Card Reader

The memory card reader offers the fastest and most convenient method to 

transfer pictures, music and data between your netbook and flash compatible devices such as digital 
cameras, MP3 players, mobile phones, and PDAs. 

(4)

 Right view


1


2


3


4


1


2


3


4


5


Summary of Contents for ET106 Series

Page 1: ...ual TRADEMARK All products and company names are tradmarks or registered trademarks of their respective holders These specifications are subject to change without notice june 2009 Revision 1 0 EPoX ET...

Page 2: ...3 Startup 9 4 Shut down 9 5 Indicators 10 6 Touchpad 10 7 Using the keyboard 11 Chapter 2 BIOS Setup Utility 12 2 1 When to Use BIOS Setup 12 2 2 How to Run BIOS Setup 12 2 3 Control Keys 12 2 4 Boot...

Page 3: ...ventilation is provided Never push objects of any kind into this product through cabinet slots as they may touch dangerous voltage points or short out parts that could result in a fire or electric sho...

Page 4: ...fications CPU Intel Atom Processor Chipset Intel 945G Series Intel ICH7 Series LCD Screen 10 2 WSVGA color TFT LCD with LED Backlight Power Management ACPI V3 0 S0 S3 S4 S5 support System Memory DDR2...

Page 5: ...00Mbps Fast Ethernet Support Wireless LAN Mini PCI E interface Support 802 11A B G Security Port One Kensington Lock Battery Li Ion battery pack 1 3 Knowing the Parts After check package complete and...

Page 6: ...u use the computer 7 Touchpad Touch sensitive pointing device which functions like a computer mouse 8 Click buttons left and right The left and right buttons function like the left and right mouse but...

Page 7: ...l components Do not block or place the computer in such a position that you inadvertently allow the outlets to become blocked 6 Harddisk cover Open the cover can be installed on the hard disk 7 Memory...

Page 8: ...when out of door Install cell 1 Please gently push out the cell switch for unlock cell button 2 Will be up at the bottom of the computer the cell will have a groove and towards the side of the groove...

Page 9: ...same time using one hand to remove the cell Please don t forces remove the cell when your netbook is post status otherwise maybe destroy the data of HDD or others symptom 2 Connect power supply 1 pow...

Page 10: ...lay saffron and hint battery is charging the led will be display green color if the battery charges complete HDD According to led light status for opinion HDD working status if the led is blinking and...

Page 11: ...11 Hotkeys The computer employs hotkeys or key combinations to access most of the computer s controls like screen brightness volume output and the BIOS utility...

Page 12: ...creen snaps and setting options in this chapter are for your references only The actual setting screens and options on your Netbook may be different because of BIOS update 2 3 Control Keys Press F1 to...

Page 13: ...enu Notes The menu will difference if you installs difference of device on your netbook Please select boot device 2 5 BIOS Menu Please according to your needs to set in the BIOS setup utility 2 5 1 Bo...

Page 14: ...device priority sequence from available removable drives ENTER to select boot devic 2 5 2 Security Setting Change Supervisor Password Set the Supervisor Password under this item up to six characters i...

Page 15: ...apter 3 Driver install and utility 3 1 Driver access Go to website www epox us 3 2 Driver install It is integrated chipset driver application software and others application program you must install t...

Page 16: ...the below of screen will display friendly UI for differ hotkey and easy to operate 3 3 Network Connection setting If you need to use the network connection function the computer network to provide wir...

Page 17: ...hooting Warning Under the condition that you can t handle trouble please refer to your dealer to get professional service AC Adapter Trouble Solution No Power Supplies to Netbook Make sure the AC adap...

Page 18: ...power drops to a critically low level and the machine emits a high pitched beep or displays a warning message after that recharge battery pack to make battery pack work longer Keyboard Trouble Solutio...

Page 19: ...nd its USB interface is well connected to Netbook Error printing Please refer to the user s manual of your printer for help Audio Trouble Solution No sound emitted Adjust sound controller Check the se...

Reviews: