page | 6
www.snapav.com Support 866.838.5052
the mounting dogs clamp onto the ring. Be careful, over-
tightening the screw can damage the ceiling tile and/or
the speaker.
7.
Set the speaker tap switch on the front of the speaker to
the appropriate setting.
Tip:
If you aren’t sure of the tap settings needed for the
speaker, leave the grille off so that settings can easily be
adjusted using the rotary knob.
8.
Maneuver the speaker, bracket, and tile to the ceiling grid,
and attach the screw terminal connector.
9.
Attach a security tie wire to the eyelet on top of the speaker
and attach the other end to the ceiling support system per
your local building code.
10.
Slide the whole assembly into the ceiling, and place the grille on the front of the speaker.
Note:
The 8 subwoofer has a grille retention wire for rare cases when air pressure generated from bass can cause
the grille to detach. Push the plug on the end of the wire into the hole in front of the subwoofer, then attach
the grille.
ADJUSTING THE DOGS
Follow the steps below to adjust the dogs to accommodate thicker tiles.
1.
Back the dogs all the way out of the slot and remove it.
2.
Flip the dog over and screw it back into the slot.
3.
Tighten over the tile as needed once installed around the tile.
1
2
3
PERMANENT CEILINGS
1.
Choose a location for each speaker that is free of obstructions created by joists, HVAC ductwork, electrical wire
runs, plumbing or anything else that might not allow for the depth of the speaker or create interference or noise.
2.
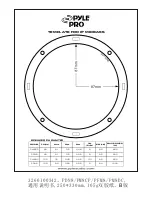
Once you have determined your locations, mark the hole to cut out for the speaker using the supplied template.
Don’t forget to allow for the size of the speaker bezel if you are choosing to install the speaker near a side wall
or other item that could become an obstacle.
3.
If you are unsure of potential obstacles, carefully cut your holes using an angle to the inside of the cutout area
as illustrated. This will allow you to ‘plug’ the hole easily if needed. If the area is clear and a good location for the
speaker, cut the edges of the opening at 90 degrees to accommodate the speaker diameter.
4.
Make up the speaker wiring connection before installing the speaker. See “Wiring Connections” for instructions.
www.snapav.com Support 866.838.5052


