background image

5

in 1 second, pausing for 2 seconds and then flashing three times, pausing for 3
seconds.

Short circuit protection: The green light repeats in a cycle of flashing once in 1 second,
pausing for 2 seconds and then flashing four times, pausing for 3 seconds.

Over-current protection: The green light repeats in a cycle of flashing once in 1
second,pausing for 2 seconds and then flashing five times, pausing for 3 seconds.

Battery temperature is too high: The green light repeats in a cycle of flashing twice in
1 second, pausing for 2 seconds and then flashing three times, pausing for 3 seconds.

Battery temperature is too low: The green light repeats in a cycle of flashing twice in 1
second, pausing for 2 seconds and then flashing four times, pausing for 3 seconds.

Contactor-related failures: The green light repeats in a cycle of flashing three times in
1 second, pausing for 2 seconds and then flashing four times, pausing for 3 seconds.

The yellow light flashes rapidly in 1 second when other failures happen.

When powered off, if the green light of power indicator is always on, it means that the
battery is in a balanced state, which is a normal phenomenon.

LCD (2) displays the state of charge;

The LCD (3) remain green light lit under normal,
flashing show the failure state of truck

See

section 6 Trouble shooting Error Message

.

DISPLAY

DESCRIPTION

Continuous red

Charge is charging

Continuous green

Battery charging is complete

Summary of Contents for HPL152

Page 1: ......

Page 2: ...ter been ordered Through our online after sales service system customers can process their warranty claims order spare parts and consult the operation manuals maintenance materials and spare parts cat...

Page 3: ...ny questions please keep in touch with the sales department or let the dealer know Notes 1 This manual is used for operation and maintenance the detail parameters size and specifications in context is...

Page 4: ...Set the key switch to the OFF position and remove the key 4 Before starting to operate truck Be in operating position Place directional control in neutral Before operating truck check functions of lif...

Page 5: ...e extent that it would create a hazard 10 Truck shall be kept in a clean condition to minimize fire hazards facilitate detection of loose or detective parts 11 Modifications and additions which affect...

Page 6: ...6 3 2 4Parking the truck securely 17 4 Battery Maintenance Charging 18 4 1 Lithium Battery Precautions 18 4 2 Battery Charger 19 4 3 Charging the battery 20 4 3 1 Vehicle charging 20 4 3 2 External ch...

Page 7: ...ery operating instructions 35 Chapter 1 Safety Precautions 36 Chapter 2 Battery Introduction and Instructions 37 Chapter 3 Charging 38 Chapter 4 Storage 39 Chapter 5 Transportation 40 Chapter 6 Common...

Page 8: ...d In special cases e g leasing or renting the proprietor is considered the person who in accordance with existing contractual agreements between the owner and user of the industrial truck is charged w...

Page 9: ...lets as well as roll cages beyond the area of the load wheels Suitable environment temperature is 5 C to 40 C If a long time in less than 5 C environment cold storage or in the extreme conditions of t...

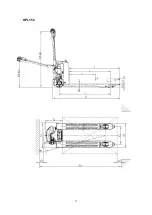
Page 10: ...3 1 2 Assemblies Item Component Item Component 1 Control handle 6 Battery 2 Control shaft 7 Lowering lever 3 Pump 8 Fork 4 Driving wheel 9 Emergency stop switch 5 Load wheels...

Page 11: ...as below Under voltage of single cell battery The green light repeats in a cycle of flashing once in 1 second pausing for 2 seconds and then flashing twice pausing for 3 seconds Over voltage of single...

Page 12: ...s too low The green light repeats in a cycle of flashing twice in 1 second pausing for 2 seconds and then flashing four times pausing for 3 seconds Contactor related failures The green light repeats i...

Page 13: ...n points and data plates Item Description 1 Nameplate 2 Instructions label 3 Emergency stop switch label 4 Anti pinch hand label 5 Charging indicator label 6 No Riding 7 Fault Indicator Label 8 LIION...

Page 14: ...7...

Page 15: ...mber 3 Item Description Item Description 1 Product name 8 Battery voltage v 2 Model type 9 Rated drive power kw 3 Series no 10 Max battery weight kg 4 Manufacture date 11 Min battery weight kg 5 Lift...

Page 16: ...loading side lb kg 558 1172 2 3 Axle loading unladen driving side loading side lb kg 84 46 Types Chassis 3 1 Tyre type driving wheels loading wheels PU PU 3 2 Tyre size driving wheels diameter width...

Page 17: ...3 5 4 5 2 Lifting speed laden unladen fpm m s 10mm time 5 3 Lowering speed laden unladen fpm m s Manual 5 8 Max gradeability laden unladen 5 10 5 10 Service brake type Electromagnetic Electric engine...

Page 18: ...11 HPL152...

Page 19: ...Only operate the truck with battery current Rectified AC current will damage the electronic components Cable connections to the battery tow leads must be less than 6 m Preparing the truck for operati...

Page 20: ...rved while the machine is in a stage of 100 hours of operation Must prevent the new battery from over discharging when early used Please charging when remain power less than 20 Perform specified preve...

Page 21: ...amage and Faults The supervisor must be immediately informed of any damage or faults to the Pallet truck Trucks not safe for operation e g wheel or brake problems must not be used until they have been...

Page 22: ...rmed before starting daily work Visually inspect the entire truck in particular wheels and load handler for obvious damage Switching on the truck Open the power switch Pull out emergency stop switch 3...

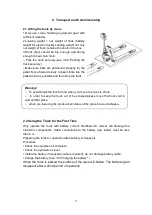
Page 23: ...ill or uneven roads please lift fork leg to stop the bottom of fork leg and the ground being rubbed 3 2 3Lifting transporting and depositing loads Unsecured and incorrectly positioned loads can cause...

Page 24: ...wering lever 2 Lower Set fork to the lowest position by pulling lowering lever 2 upward 3 2 4Parking the truck securely Set fork to the lowest position by pulling lowering lever 1 upward Turn off the...

Page 25: ...Do not let the battery close to any open flame heat flammable and explosive objects Do not place the battery vertically on a conductive object to prevent the electrode from being touched by protruding...

Page 26: ...ge the battery at an ambient temperature of 0 to 40 C Attention In case of battery fault please contact the dealer to make appointment for repair Never attempt to disassemble the battery 4 2 Battery C...

Page 27: ...g check all cables and plug connections for visible signs of damage Before start and finish charging to make sure power is turn OFF It is essential to follow the safety regulations of the battery and...

Page 28: ...charged LED Green on Charger fault LED Yellow flash Battery fault LED Yellow on Before removing the battery make sure that the vehicle is completely powered down The figure on the right shows the top...

Page 29: ...for 3 hours in a fully charged state Before plugging the battery back please make sure that the vehicle is still in the power off state Please identify the positive and negative electrodes according...

Page 30: ...If the vehicle is to be parked for longer than a month it must be placed in dry and frost free environment When not in use remove the battery If the parking time is within one month fully charge the...

Page 31: ...nnel Industrial trucks must only be serviced and maintained by the manufacturer s trained personnel The manufacturer s service department has field technicians specially trained for these tasks We the...

Page 32: ...truck does not slew e g when replacing wheels always left and right simultaneously 5 3 Servicing and inspection Thorough and expert servicing is one of the most important requirements for the safe op...

Page 33: ...le Power supply Visually inspect battery Check battery cable connections are secure grease terminals if necessary Travel Check the transmission for noise and leakage Check travel mechanism adjust and...

Page 34: ...iners They may be flammable and must therefore not come into contact with hot components or naked flames Only use clean containers when filling up with consumables Do not mix consumables of different...

Page 35: ...to prevent the carrier from accidentally starting When working under a raised lift truck secure it to prevent it from tipping or sliding away Removing the cover remove the four screws 1 lift off Cove...

Page 36: ...turer s service department 5 4 1 Prior to decommissioning Thoroughly clean the truck Check the brakes Check the hydraulic oil level and replenish as necessary See 5 3 3 Maintenance Instructions Apply...

Page 37: ...purely a safety viewpoint without regard to operational or economic circumstances The inspector shall be sufficiently instructed and experienced to be able to assess the condition of the truck and the...

Page 38: ...be rectified after carrying out the remedial procedure notify the manufacturer s service department as any further troubleshooting can only be performed by specially trained and qualified service per...

Page 39: ...OFF FAULT 2 1 not used 2 2 MAIN FAULT 2 3 MAIN ON FAULT 2 4 not used 2 5 WIRING FAULT 3 1 BRAKE ON FAULT 3 2 PRECHARGE FAULT 3 3 BRAKE OFF FAULT 3 4 HPD FAULT 3 5 CURRENT SENSE FAULT 4 1 HARDWARE FAIL...

Page 40: ...ry voltage 17 volts 2 Bad connection at battery or controller 1 5 OVERVOLTAGE FAULT battery voltage too high 1 Battery voltage 31 volts 2 Vehicle operating with charger attached 3 Intermittent battery...

Page 41: ...push or inhibit inputs 2 Misadjusted throttle pot 4 1 CURRENT SENSE FAULT current sense out of range 1 Short in motor or in motor wiring 2 Controller failure 4 2 HARDWARE FAILSAFE motor voltage out of...

Page 42: ...Introduction and Instructions 2 2 1 Battery Introduction 2 2 2 Instructions 2 2 3 Display Instrument 3 2 4 Battery Nameplate 4 Chapter 3 Charging 5 Chapter 4 Storage 6 Chapter 5 Transportation 6 Chap...

Page 43: ...or a long time DO NOT disassemble squeeze puncture or heat the battery Lithium batteries are forbidden for those who lack the knowledge of safe use of lithium batteries DO NOT immerse the battery in w...

Page 44: ...by over discharge of the battery after self discharge 4 Do not place metal objects such as wrenches knives on the lithium battery or other objects that may cause short circuiting of the battery to avo...

Page 45: ...cuit work normally and the whole power supply system has no sign of short circuit over current over temperature or overcharge 5 When charging connect the battery plug connector to the charger plug con...

Page 46: ...re vibration etc 4 DO NOT stack stacking of this series of products is not allowed 5 DO NOT store under the condition that the load or the hidden load is connected that is it is prohibited to have any...

Page 47: ...hould be avoided and throwing rolling inverting squeezing and excessive stacking are prohibited 2 Prevent rain during transportation 3 Ensure that the battery or battery pack has been disconnected fro...

Page 48: ...s looseness cracks cracks in the insulation layer burn marks etc of the battery s pole pressing bolts conductive strips main circuit wires and connectors are found before and during the installation s...

Page 49: ...osed to heavy rain during use 5 Estimate the charging time and discharging time of the battery according to the actual status of use of the battery or battery pack observe whether there is any abnorma...

Page 50: ...tance value meets the Chinese national standard 500 V and to ensure that there is no electric leakage with the battery once a month 7 3 Disposal of Used Battery Packs To prevent environmental pollutio...

Reviews: