background image

8

Connections

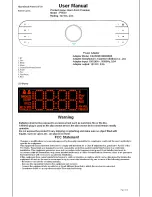
Controls & Functions

Channel Switch

Allows selection of

Right, Left of Mono

Audio output

Volume Controls

Controls local volume

of the wireless speaker

Tone Controls

Allows you to tune

the speaker acoustics

the type of music and

the room acoustics

Volume Control

Adjusts the local volume

setting of the wireless

speaker

Zone Select

Allows the selection of

Zone 1 or Zone 2

output

Link Button

Used to link the

wireless speaker with

the transmitter

Station Presets

Allows you to select from

the stored station presets

on the Streaming Music 

Player (EOSP-500). Must be used

line of sight of the player

Power Status LED

Link Status LED

Displays the Power

status of the speaker

Displays the Link

status of the speaker

Summary of Contents for EOSP-622

Page 1: ...commercial wireless audio TM EOSP 622 Dual Zone Wireless Speaker User Manual ...

Page 2: ...o System We are committed to making sure your experience is problem free If you experience any difficulty and or have any questions regarding the Eos system that are not addressed in this manual please feel free to contact the Eos Technical Support Team toll free at 877 465 3927 between the hours of 8 30 AM and 5 PM pacific time Our Eos Support Team aims to offer quick comprehensive and thorough t...

Page 3: ...1 Hiding Power Cords 11 Getting the most out of your wireless audio 12 Wireless Audio Troubleshooting Guide 13 Contents Important Safety Instructions 4 FCC Information 5 Limited Warranty 6 Product Support 6 Wireless System Setup 7 Linking Procedure 7 Adding Additional Wireless Speakers Receivers 7 Controls Functions 8 Wireless Speaker Operation 9 Channel Switch 9 Volume Control 9 Zone Switch 9 Lin...

Page 4: ...ure Do not use this product near a bathtub washbowl kitchen sink laundry tub in a wet basement near a swimming pool or anywhere else that water or moisture are present 6 Clean only with a dry cloth and as directed by IntelliTouch Unplug this product from the power supply before cleaning 7 Avoid prolonged exposure to direct sunlight or heat 8 Do not install near any heat sources such as radiators h...

Page 5: ...evision reception which can be determined by turning the equipment off and on you are encouraged to try to correct the interference by one or more of the following measures Reorient or relocate the transmitter and or receiver Increase the separation between the equipment and transmitter and or receiver Connect the equipment to an outlet on a different circuit than the one to which the transmitter ...

Page 6: ...ng with RMA number and return shipping infor mation 2 Enclose proof of purchase 3 Enclose your check or money order payable to IntelliTouch in the amount of 20 00 to cover shipping and handling costs 4 Enclose your name return address and contact number 5 Ship the unit prepaid via UPS or parcel post insured This warranty is void if the product is 6 Damaged through negligence misuse abuse moisture ...

Page 7: ...wered down and moved to their final location Linking Procedure Note linking procedure needs to be done on each wireless speaker receiver one at a time 1 Power on TX 2 Using the IR Remote power on speaker The Power LED will be ON and the Link LED will flash slowly 3 Press the link button on the TX The Status LED will flash quickly 4 Press the link button of speaker The Link LED will flash quickly 5...

Page 8: ...olume Control Adjusts the local volume setting of the wireless speaker Zone Select Allows the selection of Zone 1 or Zone 2 output Link Button Used to link the wireless speaker with the transmitter Station Presets Allows you to select from the stored station presets on the Streaming Music Player EOSP 500 Must be used line of sight of the player Power Status LED Link Status LED Displays the Power s...

Page 9: ... on line of sight with the wireless speaker To use remote stand close to the speaker you are adjusting and point the front of the remote at the speaker Wireless Speaker Sleep Mode If the transmitter is turned off the wireless speaker will go into a low power sleep mode When in Sleep mode the POWER staus LED will be off This sleep mode avoids having turn off all the speakers individually When the t...

Page 10: ...hat you use the security wall bracket mount to keep the speaker from falling out of the wall outlet Removing the integrated power supply A traditional power supply with 6 feet of cable is integrated into the cabinet of the wireless speaker If you wish to remove the power supply for your installation follow these steps 1 Remove the 4 Phillips head screws 2 Lift off plastic plate to expose the power...

Page 11: ...l mounting kit see the diagram below Complete intallation information can be found in the EOSP 5 instruction guide included with the wall mounting kit EOSP 5 Hiding Power Cords When wall mounting the speaker you ll want to hide the power cord with a self adhesive cord channel raceway available from most home improvement stores in a variety of sizes and configurations Route the extension cord thoug...

Page 12: ... and keep free air around it Do s don ts Avoid physical obstructions whenever possible Any barriers along the line of sight between transmitters and wireless speakers receivers degrade the wireless audio signal Plaster or brick walls tend to have the most negative impact even obstructions like cabinets furniture and even people can weaken the signal to some degree Obstructions tend to reside close...

Page 13: ...ceivers as high as possible Move further away from any wireless router or WiFi enabled computers printers Move transmitter to another place in the room or into another room to see if reception improves Decrease distance between transmitter and wireless speakers receivers Check output volume on audio source on transmit side Check to make sure Zone switch is in the proper position on receive side Ch...

Page 14: ...877 465 3927 www eoswireless com pro commercial wireless audio TM ...

Reviews: