SRN
24
EOS Australia PTY LTD
1. Select the cameras you want to register to the NVR
2. You can assign IP address to all selected cameras by click the
[Assign IP]
button, change the login
password of the cameras if they aren't using default login, from
[ID/PW]
or skip all these process and
click
[Connection Test]
to check make sure the cameras are connected correctly
NOTE
:
NVR sometime will detect the same cameras with same IP address, this is due to the NVR
picking up Samsung protocol as well as ONVIF protocol.
Do not tick the ONVIF box unless it isn't a Samsung camera
3.3.2
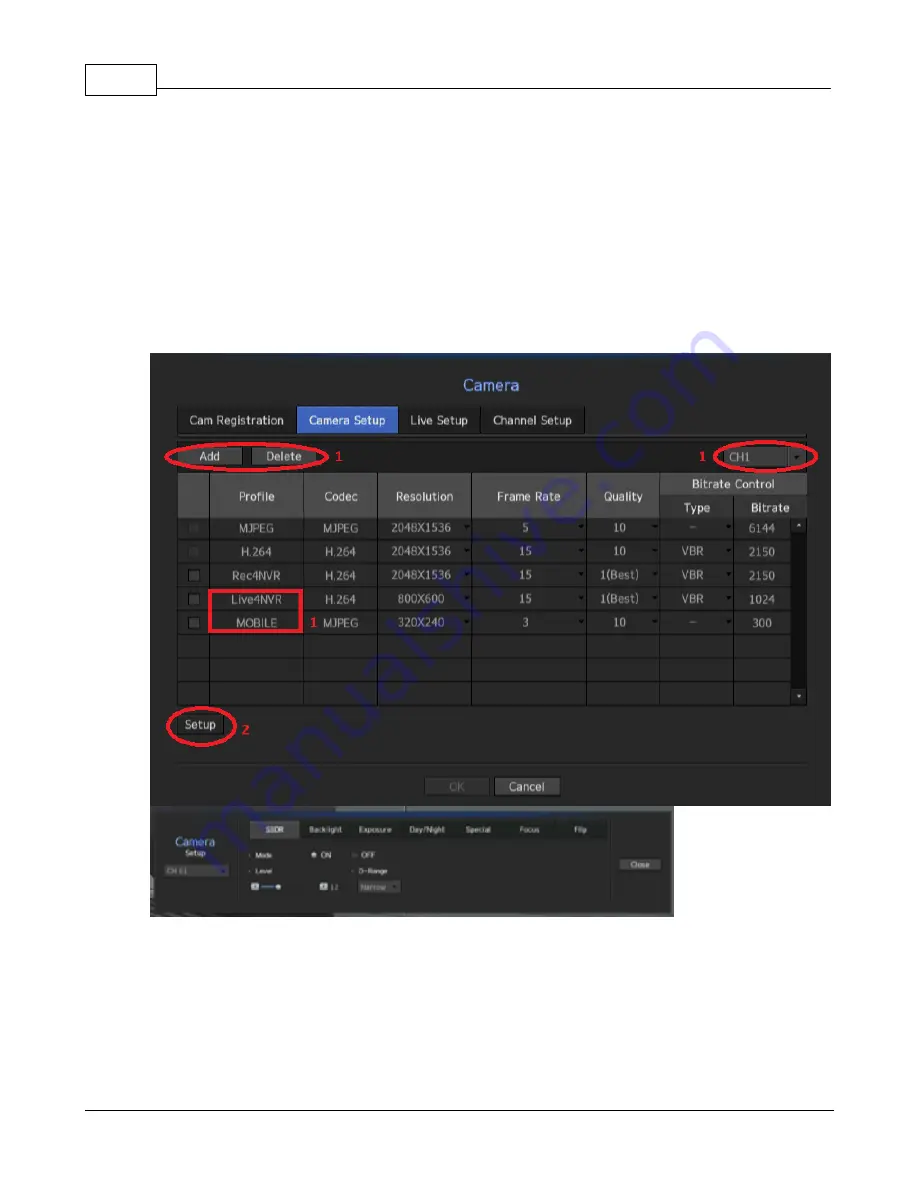
Adjusting a Camera
From the main camera setting page go to
[Camera Setup]
tab
1. You can add, delete and modify the configuration for each camera's profile to fine tune the resolution,
frame rate and bitrate to suit the environment.
It is recommended to always create an additional profile for each individual camera at a lower resolution
then normal, so it can stream live video more efficient
2. You can also click
[Setup]
to enter the camera's main menu to adjust some basic settings
Summary of Contents for SRN-1000
Page 1: ...SRN Configuration Manual ...
Page 4: ...SRN 2 EOS Australia PTY LTD 1 1 2 Plug Play Range ...
Page 24: ...SRN 22 EOS Australia PTY LTD Go to Device and click Camera ...
Page 31: ...Record Setup 29 EOS Australia PTY LTD Go to back to the Record menu and select Record Setup ...
Page 35: ...Record Setup 33 EOS Australia PTY LTD 5 Playbacks 5 1 Search ...


