


3
English
Deutsch
Français
Italiano
Español
Nederlands
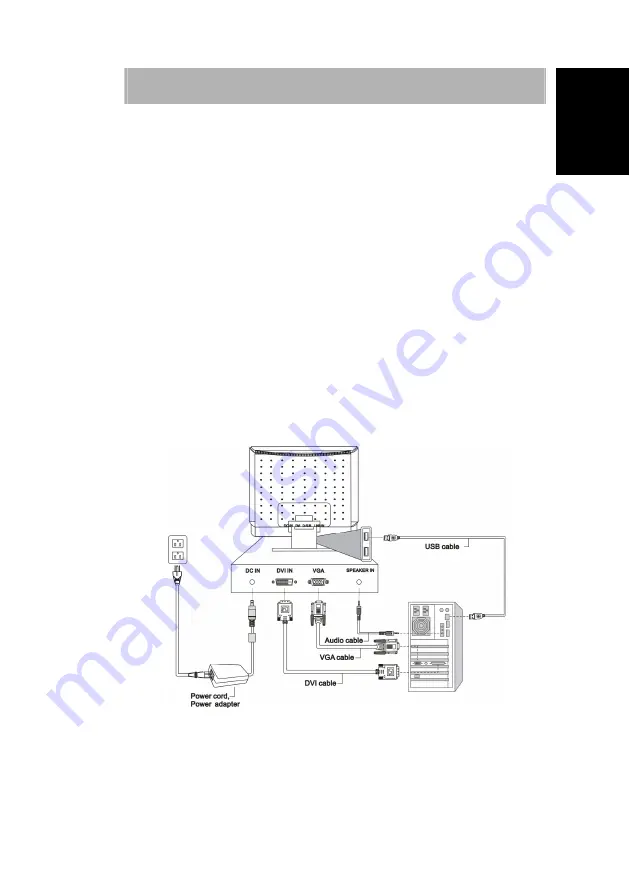
CONNECTING
Î
To connect the monitor to your computer
1.
Make sure that the computer and monitor are unplugged.
2.
Connect the 15-pin signal cable to the monitor and the computer.
If you have a graphic card with a digital DVI-D connector (24-pin socket), then connect one
end of the DVI-D cable to the DVI-D connector of your monitor, the other end to the
computer.
Î
Connecting the audio cable
If your computer is equipped with an audio output port, then connect one end of the sound
cable to the audio input connector of the monitor and the other end to the Line-Out
connector of the computer.
Î
To connect the monitor to the power source
1.
Connect the power cable to the power socket of the monitor.
2.
Connect one end of the power supply cable with the power supply and plug it into an
electrical outlet.
Î
USB Ports
The monitor features four USB ports (one upstream and three downstream), which are
located on either side of the monitor stand.
.
Summary of Contents for EN7450
Page 1: ......
Page 12: ...11 English Deutsch Fran ais Italiano Espa ol Nederlands...


