background image

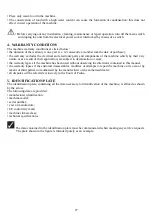
The signs that you will find inside the manual hare following nearing:

CAUTION!

 Safety measures for the user

WARNING:

The machine and its components may be damaged

PRECAUTION:

Additional information on the operation underway

SEE:

General instructions

2. GENERAL WARNINGS

This instruction manual is aimed at the owner and/or user of the machine and employees assigned to handling, 
installation and scrapping of the machine.
This manual provides detailed information and instructions on:
•  technical specifications of the machine
•  scheduled use of the machine
•  handling and installation of the machine
•  maintenance and scrapping of the machine

This manual should be considered an integral part of the machine which is designed for professional use but can
never be a substitute for adeguate preparation and experience on the part of the user.
The manufacturer reminds the customer, user of the machine, of the obligation to comply with the current 
legislation concerning health and safety at work.
This manual should be considered an integral part of the machine and must be kept for future consultation until 
the machine is scrapped.
This manual reflects the state of the art existing at the time of sale of the machine and cannot be considered 
inadequate due to subsequent updates on the basis of new experience.
The manufacturer reserves the right to make any updates necessary to the machine and the instruction manual 
without this entailing the obligation to update machines and/or manuals pertaining to previous production. The 
manufacturer will nevertheless provide the customer with any further information requested and likewise will 
take due account of any proposals for improvement of this manual.
If the machine is sold, the customer is kindly requested to inform the manufacturer of the address of the new 
owner.
The manufacturer declines all liability for injuries sustained by persons or animals or damage to things deriving
from:
a. inappropriate use of the machine or use of it by personnel not trained in the use of professional machines
b. use contrary to the specific national legislation
c. incorrect installation
d. electrical power supply faults
e. inadequate cleaning and maintenance
f. non-authorised modifications or work
g. use of non-original spare parts or parts not specific for the model
h. total or partial failure to observe the instructions contained in this manual

i.

exceptional events

3. GENERAL PRECAUTIONS

• Do not leave the machine unattended, especially if there are children in the vicinity.
• The liquid in the machine tray is not toxic, but do not drink it.

26

Summary of Contents for City line

Page 1: ...GNO MARIA ТЕПЛОВЫЕ БУФЕТЫ IT MANUALE ISTRUZIONI EN INSTRUCTION MANUAL FR NOTICE D INSTRUCTION DE BEDIENUNGSANLEITUNG SP MANUAL DE INSTRUCCIONES RU РУКОВОДСТВО ПО ЭКСПЛУАТАЦИИ стр 44 70 Music Salsa Music luxus 1 ...

Page 2: ... Gran buffet Music City line Drop in 2 ...

Page 3: ... rischi per la salute e la sicurezza 7 9 Segnaletica e simbologia 8 10 Trasporto movimentazione e immagazzinamento 8 11 Predisposizione locali e installazione della macchina 9 12 Messa in funzione uso e regolazione 10 13 Riempimento dell acqua in vasca 18 14 Igiene alimentare e pulizia 18 15 Manutenzione e controlli 19 16 Anomalie e possibili rimedi 19 17 Situazioni di emergenza 21 18 Smantellamen...

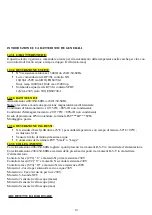
Page 4: ...e o ai suoi componenti PRECAUZIONE notizie aggiuntive riguardanti l operazione in corso NOTA indicazioni generali 2 AVVERTENZE Questo manuale istruzioni è rivolto al proprietario e o utilizzatore della macchina e al personale dipendente addetto alla movimentazione all installazione all uso alla manutenzione e allo smantellamento della medesima Questo manuale fornisce dettagliate informazioni e ist...

Page 5: ...uzioni di questo manuale i eventi eccezionali 3 PRECAUZIONI GENERALI Non lasciare la macchina incustodita soprattutto in presenza di bambini Non ingerire il liquido seppur atossico contenuto negli accumulatori di freddo Inserire nella macchina solo prodotti alimentari già caldi La conservazione di prodotti alimentari ad alto contenuto di acqua può provocare la formazione di condensa ciò non pregiu...

Page 6: ...a costruttrice 3 tipo di macchina 4 numero di matricola della macchina 5 modello della macchina 6 DESTINAZIONE D USO I mobili per la ristorazione sono destinati all esposizione e alla conservazione giornaliera di alimenti destinati all immediato consumo nei pubblici esercizi quali alberghi ristoranti trattorie pizzerie gastronomie supermercati Eventuali usi per scopi diversi non sono consentiti in...

Page 7: ...sibile 8 1 Misure di prevenzione contro i rischi di origine meccanica La macchina è dotata di protezioni atte ad evitare contatti accidentali con gli organi in movimento In particolare Tranne per i modelli DROP IN la macchina è dotata di 4 ruote piroettanti di cui 2 con freno a pedale La macchina è stabile e non necessita di ancoraggio al pavimento pericolo di urto Accanto alle lampade riscaldanti...

Page 8: ... 8 4 Misure di prevenzione contro i rischi originati dal rumore Si può affermare che la macchina non produce rumorosità fastidiose ne dannose 9 SEGNALETICA E SIMBOLOGIA La segnaletica di sicurezza richiama l attenzione dell operatore su eventuali possibili pericoli per salvaguardare lo stesso ai fini della sicurezza PERICOLO Alimentazione elettrica Controllare la perfetta conservazione dei colori ...

Page 9: ...a superficie piana consistente ed il più vicino possibile al luogo di posizionamento definitivo 11 PREDISPOSIZIONE LOCALI E INSTALLAZIONE DELLA MACCHINA Il locale nel quale la macchina sarà installata così come nei vari impianti esistenti dovrà rispettare le normative e le specifiche tecniche locali vigenti Posizionare la macchina in un luogo asciutto e ben aerato rispettando le norme tecnicosanit...

Page 10: ... 25 C Umidità relativa U R 60 Prima di mettere in funzione la macchina osservare le seguenti istruzioni 1 Verificare che l impianto ed i collegamenti elettrici siano conformi alle normative locali vigenti 2 Verificare che il voltaggio della macchina indicato nella targhetta d identificazione corrisponda alla tensione di linea esistente nella presa di utilizzo In caso contrario non procedere all al...

Page 11: ... fini di una conservazione ottimale non riempire le vaschette gastronomiche fino al bordo ma lasciare liberi almeno 3 cm in altezza Assemblaggio piani in laminato legno Fissaggio dei marmi con supporti 11 ...

Page 12: ...tta Ad apparecchio spento è possibile abbassare la calotta e ricollocare i ripiani in acciaio inox forati il cui peso provvede a mantenere abbassata la calotta 12 1 Pannello di comando Il pannello di comando è situato sul basamento e contiene un termoregolatore elettronico che consente la regolazione della temperatura dell acqua l accensione e lo spegnimento dell impianto riscaldante e dell illumi...

Page 13: ...zione IP54 contenitore terminale PST LR IP65 Montaggio a parete 12 3 4 DESCRIZIONE INGRESSI Ntc standard Carel 10Kohm a 25 C per sonda temperatura con campo di misura 50 C 90 C risoluzione 0 1K Sensore livello di minima massima acqua Connessione del terminale PST Small o Large 12 3 5 COLLEGAMENTI Con alimentazione 400 3 50 60Hz togliere i ponti presenti tra i morsetti R S T in morsettiera d alimen...

Page 14: ...scita di carico acqua modifica parametri passa da un parametro al successivo LED acceso fisso carico acqua in funzione Lampeggiante richiesta di attivazione carico acqua tempo Tasto 8 premuto per 1 sec visualizza e o imposta il set point Tacita allarme acustico e visivo Premuto per 5 sec non in presenza di allarme dà accesso al menu parametri di tipo F frequenti Premuto all accensione del controll...

Page 15: ...astiera frontale e nel caso siano previste le opportune opzioni da seriale chiave di programmazione 12 4 4 MODIFICA DEL SET POINT Sullo strumento è impostato un Set Point di 90 C ma può essere modificato come segue premendo per 1 sec il tasto 8 compare a display il valore del Set Point impostato lampeggiante incrementare o diminuire il valore con i tasti 6 e o 7 fino a raggiungere il valore deside...

Page 16: ... 500 r2 10 r2 Set massimo consentito all utente C r1 1990 99 rd Differenziale regolatore isteresi F 0 199 2 St Set point temperatura C r1 r2 90 ATTENZIONE il controllo è previsto di altri parametri che possono interferire con il buon funzionamento della logica per cui è stato installato Si prega vivamente di non manomettere i parametri non riportati nella lista 4 ALLARMI E RICERCA GUASTI 12 5 1 AL...

Page 17: ...da la luce o si accende brevemente e poi si spegne accende La luce può essere pilotata anche attraverso alcuni automatismi che by passano la tastiera riferirsi al manuale in ogni caso controllare se il parametro L1 è 0 il sistema è controllato da fotocellula se i parametri A4 A5 sono programmati a 4 o 5 ripristinare secondo la lista 5 ACCESSORI 12 6 1 CHIAVE COPIA PARAMETRI La chiave è un accessor...

Page 18: ... dal controllo RIEPILOGO TASTI FORNITURA MATERIALE del codice CM00005639 e CM00005640 N 1 SONDA NTC015HP00 10Kohm a 25 C con campo di misura 50T100 C in aria 50T50 C in fluido risoluzione 0 1K N 1 TERMINALE codice PST00LR400 RICAMBISTICA SIGLA DESCRIZIONE CODICE KM1 contattore mini 3 4KW 0202925CEL AP2 relè di livello 0100725AXX AP1 Scheda di controllo 6500210AXX ST1 sonda NTC NTC015HP00 AP3 termi...

Page 19: ...almente è necessario riempire la casca di acqua fino a coprire il sensore Nel momento in cui l impianto riscaldante viene interrotto per mancanza d acqua viene azionata automaticamente un elettrovalvola che permette il riempimento dell acqua in vasca per un tempo prefissato dal relativo parametro del termoregolatore Scarico dell acqua Per scaricare l acqua dalla vasca agire sul sistema di scarico ...

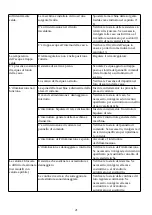
Page 20: ...Il cavo di alimentazione è danneggiato o interrotto Verificare lo stato del cavo Se necessario rivolgersi ad un tecnico qualificato per sostituirlo con un altro di pari caratteristiche L interruttore bipolare di rete è disinserito Inserire correttamente l interruttore bipolare di rete L interruttore generale della macchina è spento Inserire l interruttore generale della macchina C è un interruzion...

Page 21: ...anneggiato o interrotto Verificare lo stato del cavo Se necessario rivolgersi ad un tecnico qualificato per sostituirlo con un altro di pari caratteristiche L interruttore bipolare di rete è disinserito Inserire correttamente l interruttore bipolare di rete L interruttore generale della macchina è disinserito Inserire l interruttore generale della macchina C è un interruzione di corrente nel panne...

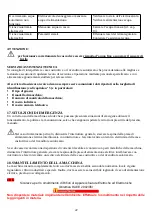
Page 22: ...tto uso della macchina esclude che si possano presentare situazioni di emergenza durante il funzionamento la pulizia e la manutenzione salvo che vengano rispettate le istruzioni prescritte dal presente manuale Nel caso di imminente pericolo disinserire l interruttore generale staccare la spina dalla presa di alimentazione elettrica interbloccata con interruttore e fare intervenire un tecnico elett...

Page 23: ...o sotto riprodotto apposto sulla presente apparecchiatura indica che la stessa è stata posta sul mercato dopo il 13 8 2005 e che deve essere oggetto di raccolta separata e In caso di smaltimento abusivo di RAEE sono previste le seguenti sanzioni 1 Il distributore che nell ipotesi di cui all articolo 6 comma 1 lettera b indebitamente non ritira a titolo gratuito una apparecchiatura elettrica od ele...

Page 24: ...aria da euro 2 000 ad euro 20 000 9 Fatte salve le eccezioni di cui all articolo 5 comma 2 chiunque dopo il 1 luglio 2006 immette sul mercato AEE nuove contenenti le sostanze di cui all articolo 5 comma 1 o le ulteriori sostanze individuate ai sensi dell articolo 18 comma 1 è punito con la sanzione amministrativa pecuniaria da euro 50 ad euro 500 per ciascuna apparecchiatura immessa sul mercato op...

Page 25: ... checks 40 16 Faults and possible solutions 40 17 Emergencies 42 18 Scrapping the machine WEEE Directive 43 19 Ordering spare parts 43 Attachments DROP IN mounting A Wiring diagrams B CE declaration of conformity C 1 INTRODUCTION This instruction manual should be read before carrying out any operation on the machine This instruction manual has been designed and organised to permit quick easy consu...

Page 26: ... sale of the machine and cannot be considered inadequate due to subsequent updates on the basis of new experience The manufacturer reserves the right to make any updates necessary to the machine and the instruction manual without this entailing the obligation to update machines and or manuals pertaining to previous production The manufacturer will nevertheless provide the customer with any further...

Page 27: ...re subject to deterioration or wear the warranty lapses if the machine has been used without observing the directions contained in this manual the warranty lapses if the customer disassembles modifies or attempts to repair the machine on its own or by means of third parties not authorised by the manufacturer or the authorised dealer all disputes will be referred exclusively to the Court of Padua 5...

Page 28: ...ollows machine srtucture and base made of solid painted wood non painted on request the DROP IN model s base is a stainless steel sheet metal inside tray made of satin finish AISI 304 stainless steel insulated with expanded polyurethane resins wooden worktop DROP IN models excluded canopy temperated glass complete with internal lighting controlled by switch handle for opening and closing the canop...

Page 29: ...the scheduled tests have been performed as certified by the CE declaration of conformity see attachment B All the tests provided for by the current technical regulations for implementation of the EEC directive concerning EMC 2004 108 CEE directive have also been performed In particular The components are all guaranteed by the manufacturers each one bears the guarantee marking The equipment and all...

Page 30: ...tor are described in the thermoregulator user s guide chapter 10 TRANSPORT HANDLING AND STORAGE The machine weights and dimensions are given in chapter n 6 The machine is packed in a cardboard box bearing the symbols and indications for handling It is subsequently placed on a pallet and loaded on a container or wagon by means of an adequate forklift truck The machine must always be handled with th...

Page 31: ...rd box and then all the packaging protection materials Once you have removed the packaging check that the machine is in perfect condition and notify the manufacturer or authorised dealer of any damage found within 48 hours from receipt of the goods For installation of the machine take account of the data given on the identification plate and the overall dimensions see chapter n 5 and n 6 A free sp...

Page 32: ...differential 4 If the power supply socket and plug are not of the same type have the socket replaced by a qualified technician Do not use extensions or multiple adapters The power supply cable and plug must be easily accessible after installation If they show signs of wear or damage they must be immediately replaced by a qualified technician 5 Ensure that the control panel and the glass light bulb...

Page 33: ...nisedsupports with the aluminium supports n 3 3 Fasten the wooden corners n 5 over the supports 4 Slot the marble n 2 into the wooden corners using the runners n 1 TANGO AND SAMBA MODELS During operation the peerforated stainless steel shelves have to be removed from the centre of the transparent hood of the top mounted structure This enables the hood to be raised fully Should the lifting system n...

Page 34: ...t and a digital level sensor input for water infeed filling is timed The control panel is connected to the DIN module via a telephone wire 12 3 CONTROL PANEL FOR FOOD WARMING CONTAINERS INTRODUCTION AND GENERAL FEATURES 12 3 1 FEATURES The electrical panel manages and controls the utilities that maintain the temperature in food warming containers featuring water level control by time and with two ...

Page 35: ...er level sensor max HARDWARE ARCHITECTURE 12 4 1 CONTROL KEYPAD Button 1 not used Button 2 pressed for 1 second activates deactivates the light output LED on steady light on Button 3 pressed for 5 seconds unit on off LED on steady unit on Button 4 not used Button 5 not used Button 6 parameter setting moves from one parameter to the next LED on steady heaters on Flashing heater activation request t...

Page 36: ...wanted tampering The parameters can be set on the front keypad and if the relevant options are fitted via a serial connection programming key 12 4 4 HOW TO CHANGE THE SET POINT The instrument comes with a set point of 90 C however this can be changed as follows press button 8 for 1 second the display shows the set point flashing increase or decrease the value with buttons 6 and or 7 until reaching...

Page 37: ...P Max effective water fill duration F 1 199 45 r1 Minimum set point allowed to the user C 500 r2 10 r2 Maximum set point allowed to the user C r1 1990 99 rd Control differential hysteresis F 0 199 2 St Temperature set point C r1 r2 90 IMPORTANT the controller also features other parameters that may affect the correct operation of the configured control logic any parameters not shown in the list sh...

Page 38: ... point is automatically cancelled displaying The button on the terminal does not control the light or it comes on briefly and then switches off on The light can also be controlled using some automatic functions that bypass the keypad see the manual in any case check if parameter L1 is 0 the system is controlled by photocell if parameters A4 A5 are set to 4 or 5 reset as shown in the list 5 ACCESSO...

Page 39: ...e controller KEY SUMMARY OF THE BUTTONS MATERIAL SUPPLIED with code CM00005639 e CM00005640 Pcs 1 NTC015HP00 SENSOR 10Kohm at 25 C with range of measurement 50T100 C in air 50T50 C in fluid 0 1K resolution Pcs 1 PST00LR400 TERMINAL SPARE PARTS CODE DESCRIPTION PART NUMBER KM1 mini contactor 3 4KW 0202925CEL AP2 level relay 0100725AXX AP1 control board 6500210AXX ST1 sensor NTC NTC015HP00 AP3 termi...

Page 40: ... piece of furniture until that the level of the waterdoes not exceed the sensor As soon as the heating system cuts out due to lack of water a solenoid valve cuts in automatically and the tray will fill with water for a time preset on the thermoregulator parameter Draining the water In order to drain water out of the well drainage system plug or tap 14 FOOD HYGIENE AND CLEANING Before carrying out ...

Page 41: ...panel Check the condition of the control panel If necessary contact a qualified technician to restore the current The thermoregulator is off Switch the thermoregulator on as indicated in its chapter Water missing in the tray Load water inside the tray see chapter 13 The thermoregulator calibration values are not correct Calibrate the thermoregulator as indicated in its chapter If necessary contact...

Page 42: ...the condition of the lighting If necessary contact a qualified technician to replace it with identical lighting The hood is blocked or difficult to move in models with opening hood The superstructure supporting system is damaged Check the condition of the system If necessary contact the manufacturer or authorised dealer for replacement The steel cords supporting the upper part are damaged Check th...

Page 43: ... and Electronic Equipment 5 WEEE Directive 2002 96 EC Do not dump pollutant material in the environment Dispose of it in compliance with the relevant laws Under the WEEE Waste Electrical and Electronic Equipment Directive 2002 96 EC when scrapping equipment the user must dispose of it at the specific authorised disposal centres or reconsign it still installed to the original seller on purchase of ...

Page 44: ... Customer s address The technical information provided in this manual is intended as a guide The manufacturer reserves the right to make changes at any time without notice РУКОВОДСТВО ПО ЭКСПЛУАТАЦИИ 44 ...

Page 45: ...символы 8 10 Транспортировка перемещение и хранение 8 11 Требования к помещению и установка оборудования 9 12 Подключение и эксплуатация и наладка 10 13 Заполнение ванны водой 18 14 Соблюдение гигиенических норм и чистка 18 15 Техническое обслуживание и контроль 19 16 Неполадки и их устранение 19 17 Экстренные ситуации 21 18 Утилизация оборудования Норматив RAEE 22 19 Заказ запчастей 23 Приложения...

Page 46: ...тво входит в комплект оборудования предназначенного для профессионального использования и следовательно не в состоянии заменить надлежащей подготовки обслуживающего персонала Производитель напоминает клиенту пользователю оборудованием об обязанности последнего соблюдать действующее законодательство в отношении гигиены рабочего места Данное руководство является неотъемлемой частью комплекта оборудо...

Page 47: ...чите его от электросети 4 ГАРАНТИЙНЫЕ УСЛОВИЯ Ниже приведены гарантийные условия и требования гарантийный срок составляет один год один год равен 12 последовательным месяцам с момента приобретения оборудования эта гарантия не распространяется на электрические и электронные компоненты и элементы установки подверженные износу и амортизации гарантия недействительна если оборудование находилась в эксп...

Page 48: ...привести к возникновению неисправностей 7 ОПИСАНИЕ ОБОРУДОВАНИЯ ТЕХНИЧЕСКИЕ ХАРАКТЕРИСТИКИ Данная ресторанная мебель имеет следующие характеристики Корпус из массива дерева окрашенный по желанию может быть неокрашенным в моделях DROP IN основа из листовой стали внутренняя ванна из сатинированной нержавеющей стали AISI 304 с изоляцией нижняя полка из дерева исключение модели DROP IN витрина из зака...

Page 49: ...происхождения Меры по устранению опасности прямых или непрямых контактов с элементами под напряжением приняты в соответствии с директивой 2006 95 CEE и нормой EN 60335 кроме этого были проведены все предусмотренные испытания о чем свидетельствуют заявления соответствия СЕ см приложение Также были проведены испытания предусмотренные действующим техническим стандартом согласно директиве CEE по EMC д...

Page 50: ...щих или вредных шумов 9 УСЛОВНЫЕ ОБОЗНАЧЕНИЯ И СИМВОЛЫ Символы безопасности призваны предостеречь и уберечь пользователя от потенциальных опасностей и рисков ОПАСНО Источник напряжения Необходимо обеспечить сохранение цвета и надписей условных обозначений и символов При первых признаках потускнения или исчезновения надписи необходимо запросить ее копию у производителя или официального дилера и про...

Page 51: ...ВАНИЯ Помещение где будет установлено оборудование должно соответствовать техническим требованиям и нормам местного законодательства Установите оборудование в сухом и хорошо проветриваемом помещении в соответствии с местными технико санитарными нормами В частности Не устанавливайте оборудование вблизи источников тепла радиаторов печей плит и т д или сквозняков Если это не представляется возможным ...

Page 52: ...нии необходимо соблюдать следующие инструкции 1 Убедитесь что оборудование и электрические соединения соответствуют местными нормами 2 Убедитесь что электрическое напряжение агрегата указанное в паспортной табличке соответствует линейному напряжению электросети В противном случае не приступайте к подключению и обратитесь к производителю или дилеру 3 Проверьте правильность заземления и наличие двух...

Page 53: ...Для обеспечения оптимального хранения не заполняйте гастроемкости до краев оставив 3 см до верхнего края Монтаж панелей из дерева ламината Фиксирование мраморных панелей 53 ...

Page 54: ...ную крышку После отключения оборудования можно опустить навес и вновь установить панели из перфорированной нержавеющей стали вес которых обеспечит фиксацию навеса в нижнем положении 12 1 Панель управления Панель управления расположена в основании конструкции и содержит электронный терморегулятор позволяющий регулировать температуру воды включение и выключение системы нагрева и подсветки для исполь...

Page 55: ...сации Условия хранения 20T 70 C 90 относительная влажность без конденсации Степень защиты IP54 корпус клемма PST LR IP65 Вертикальное настенное крепление 12 3 4 ОПИСАНИЕ ВХОДОВ Стандартный терморезистор с отрицательным температурным коэффициентом сопротивления Carel 10 кОм при 25 C для температурного зонда с диапазоном измерения 50 C 90 C разрешение 0 1 К Датчик минимального максимального уровня в...

Page 56: ...и или задает исходное значения параметра Отключает визуальное и звуковое сигнальное оповещение При нажатии в течение 5 сек в случае отсутствия сигнального оповещения дает доступ к менюнаиболее используемых параметров тип F При нажатии во время включения управления вместе с клавишей 7 выполняет сброс настроек параметров восстановление параметров СВЕТОДИОД горит постоянным светом сигнальное оповещен...

Page 57: ...первого изменяемого параметра PS вновь нажать на клавишу 8 после чего значение обнулится 00 при помощи клавиш 6 и или 7 следует задать 22 77 пароль при подтверждении пароля при помощи клавиши 8 появится код первого изменяемого параметра прокрутить настройки при помощи клавиш 6 и или 7 до тех пор пока не появится параметр чье значение нужно изменить нажать на клавишу 8 для визуализации ассоциируемо...

Page 58: ...исание E1 ошибка зонда rE ошибка регулировки зонда dA общее оповещение нехватка воды датчик уровня загрязнен EA тревога E2P таймер cn отсутствие сообщения с терминалом E0 отсутствие сообщения с терминалом 12 5 2 ПОИСК И УСТРАНЕНИЕ ПРОБЛЕМ Терминал подключен и отображает клавиатура не отвечает Терминал отключен при продолжительном нажатии на клавишу SET отобразится PS затем нужно выбрать параметр t...

Page 59: ...РАМЕТРОВ Ключ это устройство позволяющее дублирование конфигурации системы управления с их последующим переносом на другие системы управления с таким же кодом Управление функциями разработанно для каждой системы управления поэтому дается описание только везде присутсвующих базовых функций а прочие характерные функции описаны в руководстве каждой отдельной системы управления Ключ подключается к сое...

Page 60: ...50T100 C в воздухе 50T50 C в жидкости разрешение 0 1 К N 1 ТЕРМИНАЛ код PST00LR400 ЗАПЧАСТИ ОБОЗНАЧЕНИЕ и ОПИСАНИЕ КОДА KM1 мини контактор 3 4 кВт 0202925CEL AP2 реле уровня 0100725AXX AP1 панель управления 6500210AXX ST1 зонд NTC NTC015HP00 AP3 терминал PST000LR400 или PST00LR200 Соеденительный кабель Терм PSTCONN00300 60 При нажатии в течение 1 сек Вкл Выкл света При нажатии в течение 1 сек Вкл ...

Page 61: ...ение ванны до нужного уровня Уровень воды должен находится в промежутке между минимальным 30 мм и максимальным 50 мм так чтоб вода покрывала датчик установленный в ванне Введение в эксплуатацию водяной бани автоматическое наполнение ванны водой Изначально необходимо наполнить ванну водой до уровня покрытия датчика В момент когда система нагрева отключится из за недостаточного количества воды автом...

Page 62: ... отключите его от электросети Ежедневно Убедитесь что сетевой шнур не имеет повреждений в противном случае замените его равнозначным 16 НЕПОЛАДКИ И ИХ УСТРАНЕНИЕ Для определения неполадок и их устранения смотрите приведенную ниже таблицу НЕПОЛАДКА ВОЗМОЖНАЯ ПРИЧИНА УСТРАНЕНИЕ Система нагрева не работает Вилка сетевого шнура агрегата отключена Подключите агрегат к электросети Сетевой шнур поврежден...

Page 63: ...и или термозащиты При необходимости обратитесь к производителю или авторизованному дистрибьютору для замены Слишком много воды в ванне Проверьте уровень воды в ванне и доведите его до необходимого уровня как указано в главе 13 Температура воды слишком высокая Терморегулятор настроен неправильно Настройте терморегулятор Постоянное присутствие воды на дне ванны Система слива заполнена Слейте воду уд...

Page 64: ...и к авторизованному дистрибьютору для замены Автоматический набор воды не работает Электроклапан поврежден или отсутсвует вода на входе в систему Проверьте состояние электроклапана Проверьте водоснабжение Отображается сигнал оповещения dA Недостаточное количество воды в ванне Наполните ванну водой смотр Главу 13 Отображается сигнал оповещения EA Параметры нарушены Осуществите переустановку терморе...

Page 65: ...лизацию в соответствии с требованиями законодательства В процессе утилизации в соответствии с директивой RAEE 2002 96 отходы электрических и электронных приборов пользователь должен сдать электроприборы в специальный авторизованный центр сбора или же вернуть их в установленном виде продавцу в рамках новой сделки купли продажи Все оборудование подлежащее утилизации согласно директиве RAEE 2002 96 о...

Page 66: ...Производитель оставляет за собой право вносить изменения в любое время без предварительного уведомления 66 ...

Page 67: ...rte anteriore per una eventuale manutenzione Leave the front part free for maintenance and ventilation of the unit Laisser libre la partie avant pour d éventuelles opérations de maintenance et pour l aération de l unitè Den Vorteil für eventuelle Wartung und die Belüftung des Geräts frei lassen Оставьте пространство в передней части агрегата для облегчения доступа при техническом обслуживании 67 ...

Page 68: ...USES d une portèe de minimum 35 Kg Für das Modell Super ohne Aufbau SAUGNÄPFE mit einer Tragkraft von minde stens 35 Kg verwenden Для модели Super без надстраиваемого блока используйте ВАКУУМНЫЕ ПОДЪЕМНЫЕ УСТРОЙСТВА с минимальной подъемной мощностью 35 кг Per il modello standard senza sovrastruttura usare VENTOSE con portata minima 35 kg For the standard model without upper part use SUCTION CUPS w...

Page 69: ...ЛОЖЕНИЕ В ЭЛЕКТРОСХЕМЫ SCHEMA ELETTRICO MODELLO A 1 LIVELLO codice CM00005639 WIRING DIAGRAM OF MODEL WITH 1 LEVEL code CM00005639 SCHALTPLAN 1 PEGEL MODELL Art Nr CM00005639 SCHÉMA ÉLECTRIQUE MODÈLE À UN NIVEAU RÉFÉRENCE CM00005639 SCHEMA ELETTRICO MODELLO A 1 LIVELLO codice CM00005639 ЭЛЕКТРОСХЕМА МОДЕЛЬ А УРОВЕНЬ 1 код CM00005639 69 ...

Page 70: ...70 ...

Page 71: ...E DI CONFORMITÀ CE ATTACHMENT C CE DECLARATION OF CONFORMITY ANNEXE C DÉCLARATION DE CONFORMITÉ CE ANLAGE C CE KONFORMITÄTSERKLÄRUNG ADJUNTO C DECLARACIÓN DE CONFORMIDAD CE ПРИЛОЖЕНИЕ С СООТВЕТСТВИЕ ТРЕБОВАНИЯМ ДИРЕКТИВ CE 71 ...

Page 72: ...following standards DE AT Und Normen stehen FR BE LU Et des normes ci apres ES Y en las siguientes normas PT E das seguintes normas NL En van de volgende normen DK Samt følgende lovkrav SE Samt följande lagkrav FI Sekä allamainittuja lakivaatimuksia GR RU И следующими нормами IT E in applicazione a quanto previsto dalle direttive citate sono state dotate di marcatura CE ed é stato predisposto un a...

Page 73: ...a Empresa Идентификационный номер производителя 00813890282 www enofrigo it I 35010 BORGORICCO PD Via dell Industria 9 a Tel 39 049 5798041 Fax 39 049 5798806 info enofrigo com INFORMAZIONI COMMERCIALI SALES INFORMATION vendite enofrigo enofrigo com Tel 39 049 5798041 ASSISTENZA TECNICA TELEFONICA TELEPHONE TECHNICAL SERVICE service enofrigo enofrigo com 73 ...

Page 74: ...Tel 39 049 9338084 74 ...

Reviews: