20
1
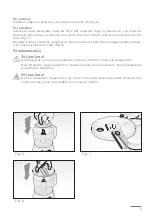
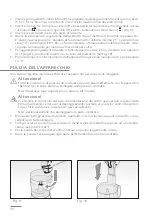
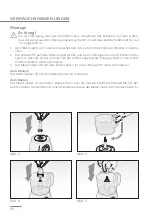
Put the ingredients in the bowl (P). If possible, cut solid foods into small pieces (1.5 x 1.5 cm).
Do not put food over the maximum level indicated on the bowl.
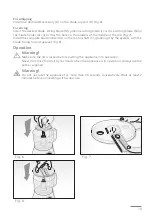
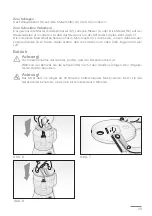
2 Insert the lid (O) over the bowl (P) aligning the notch inside the bowl with the symbol (
).
Lock the cover (O) turning it clockwise until it snaps (
) (Fig 9).
3 Insert the plug into a power outlet.
4 Turn the speed control knob (A) to put the appliance into operation. It is possible to select
three operation modes: minimum speed ("1"), maximum speed ("2") and pulsed ("P"). For
the best operation of the pulse mode, keep the knob turned for maximum 2/3 second each
time.
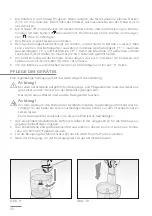
5 To add ingredients during operation, use the hole on the lid (O). Push foods inserted with
the aid of the pusher (G) (Fig 10).
6 To stop the appliance operation use the knob (A) and position it to "0".
APPLIANCE CLEANING
Regular cleaning maintains the appliance efficient for a longer time.
Warning!
All cleaning operations described below must be carried out with the appliance switched
off and with the plug disconnected from the socket.
Never immerse the appliance in water or other liquids.
Warning!
Check the state of the power cable of your appliance on a regular basis before using it,
and if it is damaged, take it to the service centre closest to you to have it replaced only by
specialised personnel.
Never use solvents which may damage the plastic parts.
1 Remove all the accessories used, operating in the reverse direction to that described previ-
ously for the assembling.
2
All accessories can be washed in a dishwasher on the top rack at a maximum temperature of
50°C/122°F.
3 To clean the motor body (B) use a slightly damp cloth.
4 After cleaning, dry all parts thoroughly before reassembling the appliance again.
Fig. 9
Fig. 10

