IMPORTANT!
READ AND FOLLOW
ALL
INSTALLATION AND MAINTENANCE INSTRUCTIONS, INCLUDING
CLEANING THE UNIT AS SPECIFIED, AND REPLACING GASKETS ANNUALLY, AND PARTS AS NEEDED.
ENGLAND’S STOVE WORKS IS NOT RESPONSIBLE FOR ANY DAMAGE OR INJURY INCURRED DUE TO NEGLECT, OR DUE
TO UNSAFE INSTALLATION OR USAGE OF THIS PRODUCT. CALL TECHNICAL SUPPORT WITH QUESTIONS.
16
NOTE
If the unit does not start or maintain a fire, you will receive an
E-2
in the
Heat Range and Blower
Speed window of the Control Board. If this occurs, wait until unit has cooled completely down and
repeat.
To remove the Stirrer for cleaning
While the unit is
COLD
and the unit is off, press and hold the “AIR ON TEMP” (i.e. “Air On”)
button until the Stirrer is at the “12:00” position (with the 4 prongs pointing up). Pull the hitch pin
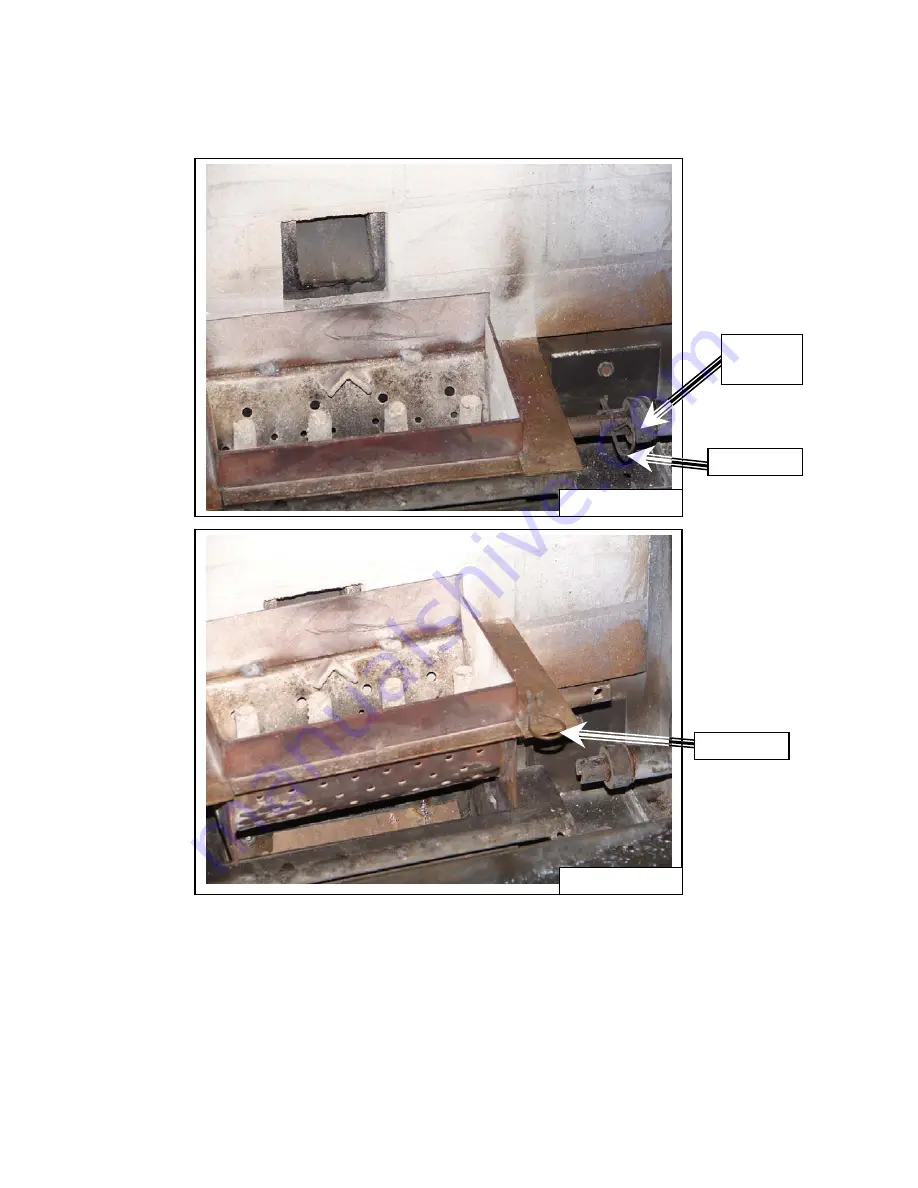
(marked in Illustration 3). Lifting the burnpot and Stirrer at the same time, remove the Stirrer from the
burnpot. Clean and clear all holes in the burnpot and replace Stirrer and burnpot back into the unit.
NOTE:
When replacing the burnpot, notice there is a welded piece that is always set toward the
back
of the Firebox. Also, be sure to replace the hitch pin.
Illustration 3
Locking
Collar
Illustration 4
Hitch Pin
Hitch Pin


