background image

19 


5.1.4


Stop


Preview


5.2 Recording and Capturing Image   

The previewing channel is required when recording and capturing image.   
 

Note:

 When stop previewing, will also stop the recording of this channel. 

5.2.1


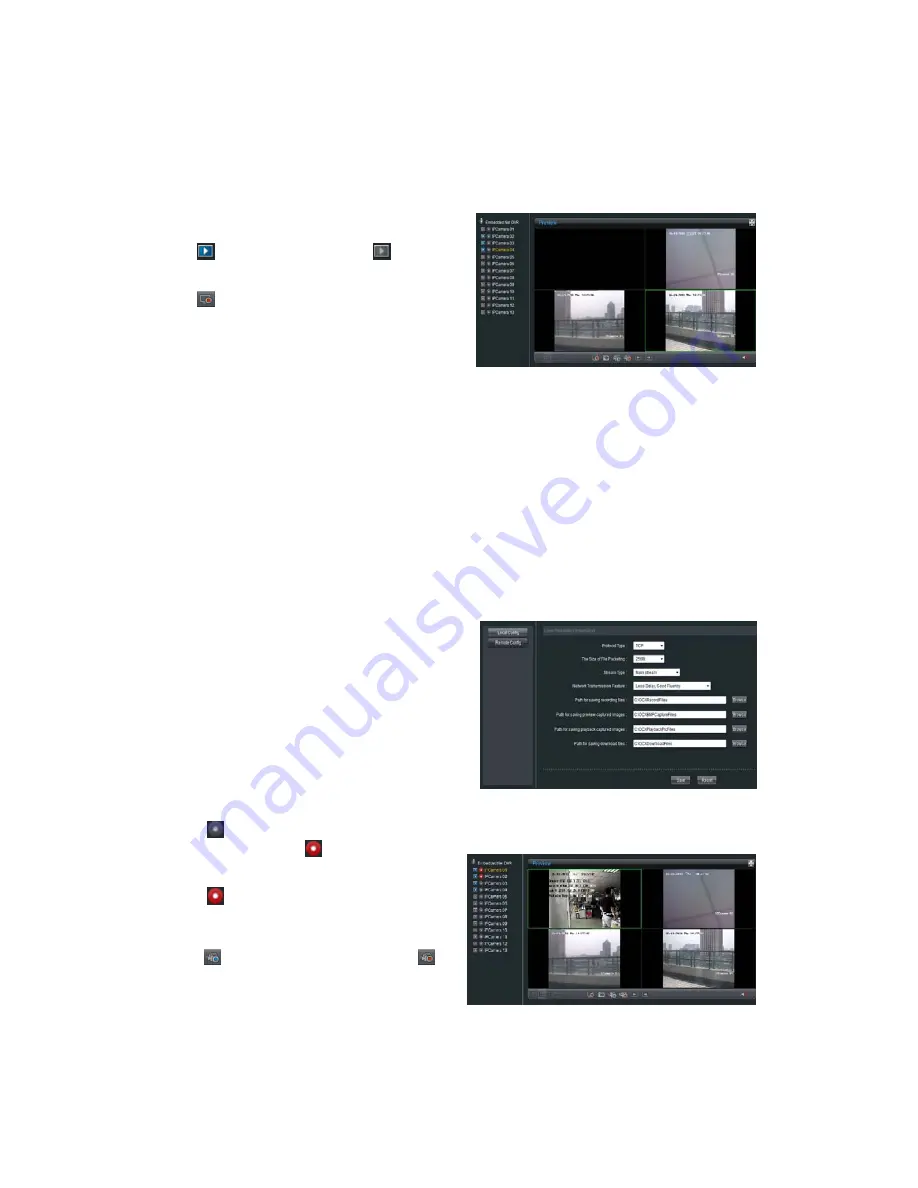
Recording


Click 

  on the playlist, it will become 

. This 

can stop the channel preview. 
 

Click 

  to stop all channels preview. 

Click “Config”, enter local configuration menu 
where can change the directory of saving recording 
file and the size of file packing. 

Click 

  button on playlist to start recording of this 

channel, if the icon is not 

, it will note “Recording 

failed”. 
 

Click 

  icon again to stop recording, and the saving 

file folder will pop up automatically. 
 
When multiple channels are under previewing, user may 

click 

  to start all channel recording, or click 

 to 

stop all channel recording.   
 
Stop previewing will also stop recording of this 
channel. 

Summary of Contents for FNR-4016/500

Page 1: ...User Manual Network Video Recorder 16 IP Channels H 264 FNR 4016 500 ...

Page 2: ... excessive heat dust damp and vibration Do not place any heavy objects on the unit To disconnect the power cord of the unit pull it out by the plug Never pull the cord itself Pay attention when laying the connection cable and observe that the cable is not subject to heavy loads kinks or damage and no moisture can get in Do not attempt to disassemble the camera board from the dome Contact your loca...

Page 3: ...ording 19 5 2 2 Capturing Image 20 5 3 Video Parameters Setting 20 C H A P T E R 6 21 PTZ Control 21 C H A P T E R 7 23 Playback 23 7 1 Playback Query 25 7 2 Play Recording File 25 7 3 Capturing Image and Download 26 7 4 Remote Backup 27 C H A P T E R 8 28 Log Search 28 C H A P T E R 9 30 Configuration 30 9 1 Local Configuration 31 9 2 IP Camera Configuration 32 9 2 1 Quick Add of IP camera 33 9 2...

Page 4: ... DDNS Settings 48 9 5 4 NTP Settings 48 9 5 5 Net Disk Settings 49 9 5 6 E Mail Settings 49 9 6 Channel Configuration 50 9 6 1 Channel Display Settings 50 9 6 2 Video Mask 50 9 7 Account Management 51 9 8 Remote Upgrade 52 9 9 HDD Settings 53 C H A P T E R 10 55 Appendix 55 Glossary 56 FAQ 57 Specifications 58 ...

Page 5: ...4 C H A P T E R 1 Introduction ...

Page 6: ...ly HDD HDD indicator blinks red when data is being read from or written to HDD Ready Ready indicator turns blue when NVR is functioning properly 1 Status LED Indicators Backup Backup indicator blinks blue when data is being backup 2 Backup Button Backup video files 3 USB Ports Universal Serial Bus USB ports for additional devices such as USB mouse and USB Hard Disk Drive HDD 4 Power Button Powers ...

Page 7: ...ns the unit is power on and ready to be configured Power Off Standard Shutdown Press and hold the POWER button for 3 seconds the device will enter power off process when power indicator turns red turn off the power switch on the back panel Other Methods of Shutdown Shutdown with Power Switch Please try to avoid shutting down the unit by turn off the power switch on the back panel especially during...

Page 8: ...7 C H A P T E R 2 Network Parameters Configuration ...

Page 9: ...of the FNR 4016 500 is 192 168 0 1 2 1 Hyper Terminal Setup The common method is to connect NVR and PC with serial line run Hyper Terminal and modify parameters with serial command Please connect the RS 232 port of NVR with the COM port of PC directly power on the NVR and PC and follow the steps Step 1 Enter Hyper Terminal Click Start Programs Accessories Communications Hyper Terminal in Windows s...

Page 10: ... box Step 3 Select the communication port Select COM1 in Connect To inter face Please select the COM port according to the reality in case PC has more than 1 COM Press OK to enter Properties dialogue box Figure 2 1 2 Step 4 Serial port setup Set port parameters in COM1 Properties dialogue box as follow Fig 2 1 3 Figure 2 1 3 ...

Page 11: ...n root dvrdvs appears the connection is established Figure 2 1 4 Step 5 Disconnect and save connection According to the tips disconnect and save HK for the next time After saving there will be a new Hyper Terminal item established in the program group Start Accessories Communications Hyper Terminal Connection names of all Hyper Terminal are included You can see an icon named as HK here ...

Page 12: ...omplish the parameters setup in the prompt Figure 2 2 1 Commands Utilities helpm Console help command is used to print common commands show as Figure 2 2 1 getIp Show the current IP address of NVR Command format getIp Enter setIp Setup NVR IP address Command format setIp IP mask e g setIp 192 168 1 11 255 255 255 0 getPort Show the current port of NVR Command format getPort Enter setPort Setup NVR...

Page 13: ...12 C H A P T E R 3 ActiveX Control Installation ...

Page 14: ...nter The system will remind you to install the ActiveX control After the installation you can configure and manage the NVR remotely The ActiveX control has English and Chinese to selections It can be used under 1024 768 1152 864 1280 1024 display resolutions Note Please use IE 6 0 or IE 7 0 as browser and upgrade OS to the latest version ...

Page 15: ...14 C H A P T E R 4 User Login and Exit ...

Page 16: ...he IE browser Figure 4 1 On the top right corner language is selectable between Chinese and English Input the correct user name password and port click Login to enter preview interface or it will pop up an error box The default user name is admin password is 12345 and port is 8000 After login click Exit to log off and return to the login interface ...

Page 17: ...16 C H A P T E R 5 Preview ...

Page 18: ... 4 windows division 9 windows division 16 windows division Stop all preview Capture image Start all recording Stop all recording Previous page Next page Open Close audio 5 1 Preview 5 1 1 Windows Division When live preview the windows division can be selected by click the button on play control area It can support 1 4 9 and 16 windows division The change between different windows division modes wi...

Page 19: ...ing to the selected window divisions Click to switch to the next page click to the previous page Or just click and to start preview by page Double click to maximize Click the selected window can maximize the window to full screen double click again to resume Full screen display Click to change the multi channel preview to full screen click to resume When previewing select the channel and click to ...

Page 20: ...view Click Config enter local configuration menu where can change the directory of saving recording file and the size of file packing Click button on playlist to start recording of this channel if the icon is not it will note Recording failed Click icon again to stop recording and the saving file folder will pop up automatically When multiple channels are under previewing user may click to start a...

Page 21: ...k Config to enter local configuration menu where can modify the saving capturing image directory Select a previewing window click to capture image If capture image successfully the saving folder will pop up automatically Select the previewing channel and adjust the brightness contrast saturation and Hue for it Click to increase and click to decrease Click or can also adjust the value Click icon to...

Page 22: ...21 C H A P T E R 6 PTZ Control ...

Page 23: ...n preview With the direction buttons it can achieve 8 directions control Also zoom focus iris light and wiper are adjustable Click to enable auto scan click again to stop it If preset point is set the point can be called by selecting in the draw down list and clicking ...

Page 24: ...23 C H A P T E R 7 Playback ...

Page 25: ...a Description Area Description Channel list Playback video Playback control Playback status Calendar Download Backup Timeline Playback control buttons description Button Description Button Description Play Stop Slow down Speed up Play by single frame Snapshot Video clip Open Close audio ...

Page 26: ...a Drag the timeline to select the specific time Different file types will be indicated with different colors 7 2 Play Recording File Step 1 Select a channel on the channel list Channel 1 is the default Step 2 Select a date in calendar After searching file click to play When playback the playback status will indicate the channel number time and status ...

Page 27: ...time in the pop up box and click Go This will start the file playback from the specified time Drag timeline and set to the specified time to play back the video When playback click to pop up saving file window After the selection the status will become click again to stop saving Click Config to enter local configuration menu where can change saving directory of captured image and recorded file ...

Page 28: ...hing file click to pop up a new page where list all the files for the specific day Select one file and click to start download click again to stop download During download the window will display the file number and download progress After searching files click to pop up a new page where list all the files for the specific day Select the backup device enable backup player or not select the files a...

Page 29: ...28 C H A P T E R 8 Log Search ...

Page 30: ...ogs as Excel or TXT file Note Up to 2000 logs can be listed if the items are more than 2000 please choose a certain period and search again Select the log type and date and click to list all matched logs Enable Start as to search the log file in a certain period of a day ...

Page 31: ...30 C H A P T E R 9 Configuration ...

Page 32: ...gs Stream Type Main Stream for recording Substream for viewing live images Network Transmission Feature Set real time and fluency of network feature Path for saving recording files Select a folder to save the recordings Path for saving preview captured images Select a folder to save the pictures captured while preview Path for saving playback captured images Select a folder to save the pictures ca...

Page 33: ...ote Config and enter IP camera configuration menu Figure 9 2 Model Name IP camera connections FNR 4016 500 Up to 16 ch D1 or 8 ch 720P or 4 ch UXGA IP cameras Note For FXC 1201M IP camera at UXGA resolution up to 4 channels to FNR 4016 model ...

Page 34: ...password port number are not changed Click the on line IP cameras will be listed as figure below shown Figure 9 3 Tick a box in front of the listed camera and click OK to finish 9 2 2 Single Add of IP camera This function enables you to add a single IP camera quickly When there are supported IP cameras in the same network segment of a LAN with NVR you may add it in one button with default user nam...

Page 35: ...he menu on the right and click Modify to confirm Manually Add IP camera First select a Channel No to enable IP camera Config menu shown on the right Input the IP address port user name and password click Modify to finish adding an IP camera that will be listed in the IP Camera Information area Clicking Reset button will restore the configurations of IPC back to the previous ones Clicking button wi...

Page 36: ...35 9 3 Recording Settings Click Remote Config and select to enter remote settings menu where you can configure recording alarm network settings and etc Figure 9 5 ...

Page 37: ...ent and Sub stream Stream Type Video and Video Audio Resolution Recording Resolution Bit rate Type Variable and Constant Frame Type BBP BP and Single P 9 3 2 Schedule Recording Step1 Enable Schedule Recording Note When NVR is succeed to connect to IP camera it will start schedule recording which means recording for 7 24 ...

Page 38: ...ect All Day recording if necessary You may also set period recording by disable All Day Recording there are 8 time periods in one day Then you can select schedule recording from the drop down menu beside the periods Then you may also select copy the settings to whole week or to one day Note Please make sure that each time period is not overlapped ...

Page 39: ... its own software Step 1 Select Channel No for motion detection recording Step 2 Enable motion detection by tick the box Step 3 Then you can click settings buttons to set area arm schedule and linkage In the Advanced Record Settings you may configure parameters of Pre Record time Post Record time Recordings Duration Redundant Recording and whether to record audio ...

Page 40: ... may also set period recording by disable All Day Recording there are 8 time periods in one day Then you can select Motion Detection from the drop down menu beside the periods Then you may also select copy the settings to whole week or to one day Note 1 Please make sure that each time period is not overlapped 2 The valid time of motion detection recording is the intersection of arm schedule and re...

Page 41: ...hannel Step 2 Select the type of alarm input NO or NC Note NO is the default status The settings will become effective after rebooting If you are using IP camera that is not from eneo please setup this function by using its own software Step 3 Enable Alarm Handle to activate Arm Schedule Linkage Method ...

Page 42: ...ls you want Step 6 Enter schedule recording interface Click to enable Recording Step 4 Set the fortify time for alarm input Click Settings in Fortify Time menu Select Weekday as some day of the week or the whole week for recording time The All Day Record or 8 Segments can be selected as well Note The time of each segment can not be overlapped ...

Page 43: ...n 9 3 3 Motion Detection Recording Step 2 The same with the Step 2 of Section 9 3 3 Motion Detection Recording Step 3 The same with the Step 3 of Section 9 3 3 Motion Detection Recording Step 4 The same with the Step 4 of Section 9 3 3 Motion Detection Recording Step 7 Select one day in a week and select All Day recording if necessary You may also set period recording by disable All Day Recording ...

Page 44: ...ilbox Trigger Alarm Output Trigger alarm output of the device if the device is 9000 series triggering alarm output of IP channel can be selected as well 9 4 2 Signal Level Alarm Step 1 The same with the Step1 of Section 9 3 4 Alarm Recording Step 2 The same with the Step2 of Section 9 3 4 Alarm Recording Step 3 The same with the Step3 of Section 9 3 4 Alarm Recording Step 4 The same with the Step4...

Page 45: ...reset sequence and pattern Step 1 Select the channel number for video loss Select Æ Step 2 Enable Video Loss to activate settings of Fortify Time and Linkage Step 3 Set the fortify time for video loss Click Settings in Fortify Time menu Select Weekday as some day of the week or the whole week for the fortify time The All Day Record or 8 Segments can be selected as well Note The time of each segmen...

Page 46: ...able on IP cameras from eneo Step 4 Set linkage for video loss Click Settings in the Linkage menu Step 1 Select the channel number for video tampering Select Æ Step 2 Enable Video Tampering Alarm to activate settings of Area Settings Arm Schedule and Linkage ...

Page 47: ...he fortify time for video tampering Click Settings in Arm Schedule menu Select Weekday as some day of the week or the whole week for the arm schedule The All Day Record or 8 Periods can be selected as well Note The time of each segment can not be overlapped Step 5 Set linkage for video tampering Click Settings in the Linkage menu 域 布防时间和联动方式的设置 Step 3 Set the video tampering area and sensitivity T...

Page 48: ...the exception type and handle method Select to enter configuration interface Select Æ Configure the network according to the actual situation If there is DHCP server in the network enable Obtain Auto and reboot the device to get the IP address under this network segment automatically Select Advance to enter advanced configuration You can configure preferred DNS server1 and spare DNS server2 IP add...

Page 49: ...t IP address will be displayed in the blank DDNS IP Click Æ Enable DDNS If the IP Server IP is selected as protocol then input the address where the IP server is running If the Dyndns is selected as protocol Server Name Input the IP address of the server such as members dyndns org Domain the domain name that user applied for the device such as test dynlia com User name password and verify the acco...

Page 50: ...o private network the IP address of NTP server built by NTP software can be input the blank Server Address Select Æ If server authentication is needed enable it i e and input user name and password Input the sender and recipient information if it needs to send picture you can enable Attachment i e Note Currently the function of captured picture attachment is invalid for the FNR 4016 500 Select Æ I...

Page 51: ...his function is only available on IP cameras from eneo 9 6 2 Video Mask Note This function is only available on IP cameras from eneo Select Æ You can configure channel name OSD and related parameters here Step 1 Select channel number and enable video mask i e Select Æ ...

Page 52: ...to two levels user and operator For Remote Configuration privilege operator has Voice Talk right user does not for Channel Configuration privilege operator has all the rights user has local playback remote playback rights Step 2 Set the mask area Click Settings to enter area set menu Enable Start Draw i e select the mask area by clicking and dragging the mouse Note Max 4 areas can be configured in...

Page 53: ...store parameters to factory defaults and import settings to as well as export settings from NVR Remote Log Search Remotely view logs that are saved on the NVR Remote Advanced Operation Remotely manage hard disk drives initializing and setting properties for HDDs Ability to remote update system firmware and stop of the relay output Voice Talking Ability to use two way radio between the remote clien...

Page 54: ...DD Property Settings Select one disk and configure its property by selecting Read Write Read Only or redundant from drop down menu shown as figure right Note Read Write Writing in or Read from this disk is allowed when selecting this option Write Only Unable to write in this disk to protect existed recordings from being overwritten when selecting this option Redundant Redundant recording in this d...

Page 55: ...k HDD Group attribute button to enter setup page First select a HDD group and then tick channels you want to record in this HDD group and then click OK to finish Note Recording the images of one channel in one HDD group is recommended ...

Page 56: ...55 C H A P T E R 10 Appendix ...

Page 57: ...network service that provides the capability for a networked device such as a router or computer system using the Internet Protocol Suite to notify a domain name server to change in real time ad hoc the active DNS configuration of its configured hostnames addresses or other information stored in DNS MTU Maximum Transmission Unit Unit is represented by bytes MTU of most network devices is 1500 If i...

Page 58: ...the motion detection If there are no recorded video after setting the motion detection please check 1 Check that the recording schedule is setup correctly by following the steps listed in Schedule Recording 2 Check that the motion detection area is configured correctly See Motion Detection 3 Make sure that channels are being triggered for motion detection See Motion Detection Why doesn t the NVR d...

Page 59: ... browser Recording permanent movement contact timer alarm event Audio input Audio output Alarm inputs 16 Alarm output 4 Pre alarm recording yes Secondary Storage MP4 Network 10 100 1000 Base Tx RJ45 Network protocols TCP IP PPPoE DHCP DNS DDNS NTP SADP SMTP SNMP Network connection RJ 45 Control units external remote control mouse Serial interfaces RS 485 Interfaces external storage 2x USB 2 0 Remo...

Page 60: ... distribution through specialised trade channels only Videor E Hartig GmbH Carl Zeiss Straße 8 63322 Rödermark Germany Tel 49 0 60 74 888 0 Fax 49 0 60 74 888 100 www videor com Technical changes reserved www eneo security com Copyright by Videor E Hartig GmbH 02 2011 ...

Reviews: