10
4
5
Fig.2
6
7
8
9
10
11
12
Model
EWS-3
100
EWS-5
55
EWS-7
55
Table-1
Spring Balancer Repair Manual
Turn Worm (34) further and remove it.
Remove Plug (31), and remove Wire rope (21)
from Drum (13).
Loosen Screws (33) and remove Cover (32).
Remove Drum (13) and Spindle (12) together from Casing (1).
Then remove Spindle (12) from Drum (13).
Loosen Screws (20) and remove Plate (15) from
Drum (13).
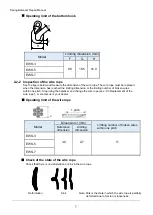
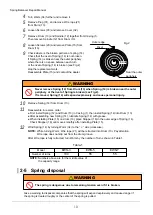
Check where is the broken portison of spring (14).
Check that the rivet of Spring (14) is not broken.
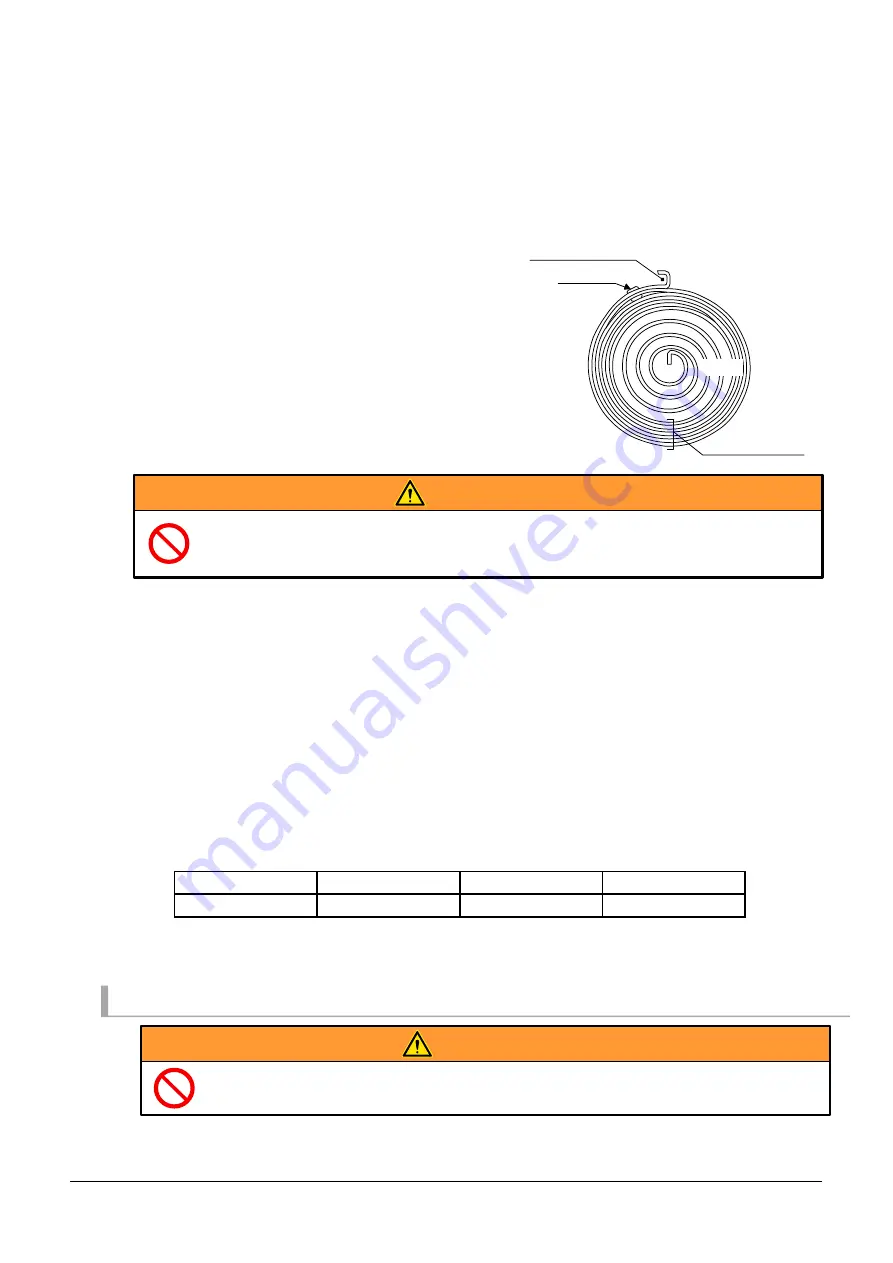
If Spring (14) is broken near the outer periphery
where there is no space between each turn
or the rivet of Spring (14) is broken (see Fig.2),
stop the replacement work.
Reassemble Plate (15) and contact the dealer.
Outer edge
Rivet
Near the outer
periphery
Inside
WARNING
Never remove Spring (14) from Drum (13) when Spring (14) is broken near the outer
periphery or the rivet of Spring is broken (see Fig.2).
If removed, Spring (14) will expand explosively and cause personal injury.
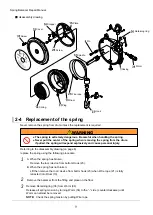
Remove Spring (14) from Drum (13).
Reassemble in reverse order.
● First install Spring (12) and Drum (13) in Casing (1), then install Spring (14) into Drum (13).
● After assembling new Spring (14), lubricate Spring (14) with grease.
● When installing Plate (15) on drum (13), place Stopper (16) in the outer edge of Spring (14).
Check Stopper (16) can move smoothly after installing Plate (15).
Wind Spring (14) by turning Worm (34) to the “ + ” side (clockwise).
While turning Worm, Wire rope (21) will be retracted into Drum (13). Pay attention
Wire rope does not slip out from the drum groove.
NOTE:
After Wire rope is fully retracted, turn Worm by the number of turns shown in Table1.
Number of turns
NOTE:
Numbers above are for the middle value of
the capacity range.
2-5 Spring disposal
The spring is dangerous due to remaining tension even if it is broken.
Give a warning to disposal companies that the spring will expand explosively and cause danger if
the spring is treated roughly or the center of the spring is pulled.
WARNING

