background image


17

NOTE

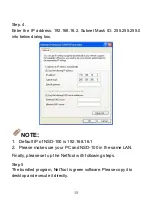
Default IP of NSD-100 is 192.168.16.1


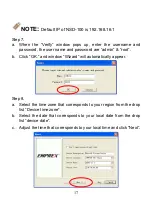
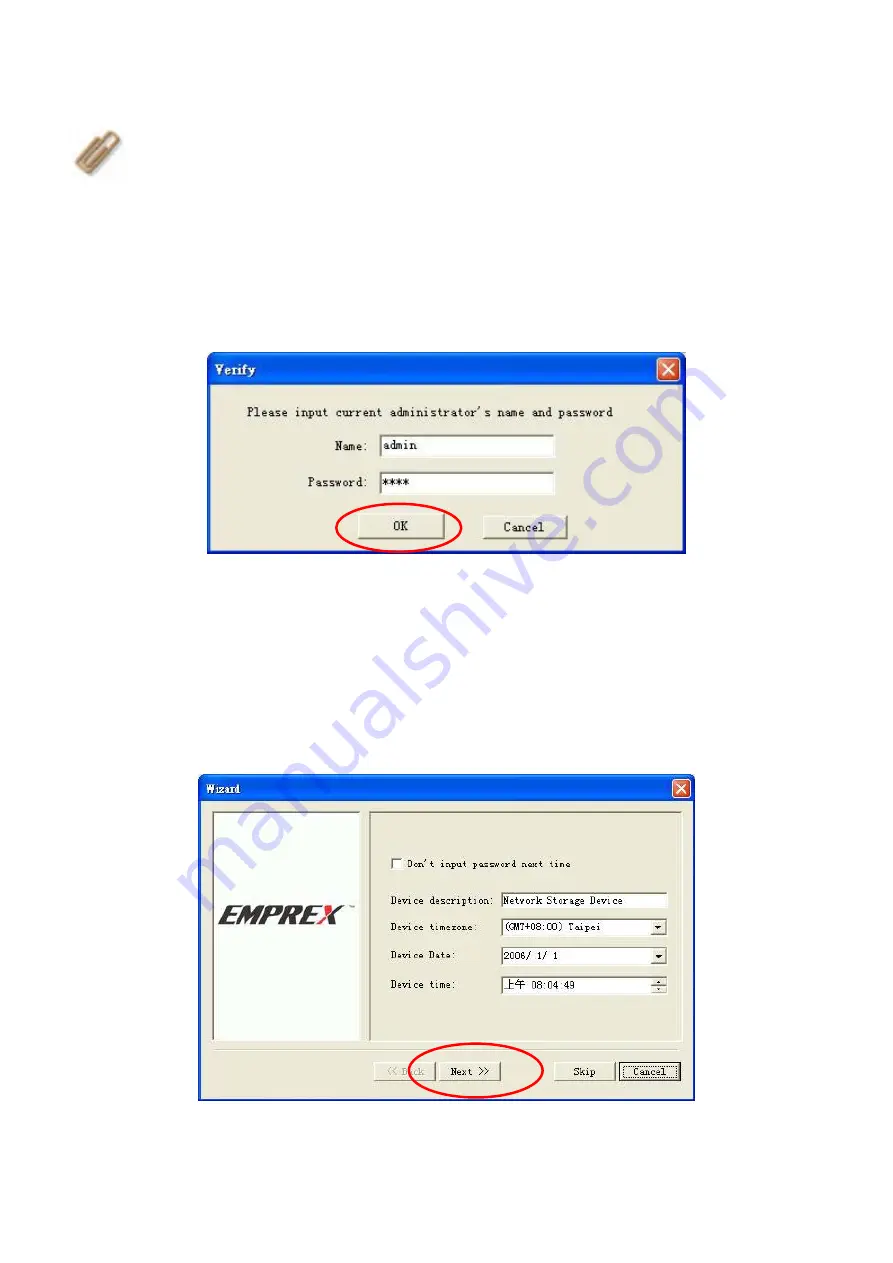
Step 7.   
a. When the “Verify” window pops up, enter the username and 

password, the user name and password are “admin” & “root”. 

b.  Click “OK.” and window “Wizard” will automatically appear. 


Step 8.   
a.  Select the time zone that corresponds to your region from the drop 

list “Device time zone”. 

b.  Select the date that corresponds to your local date from the drop 

list “device date”. 

c.  Adjust the time that corresponds to your local time and click “Next”. 

Summary of Contents for NSD-100

Page 1: ...P2P Download Engine NSD 100 User Guide...

Page 2: ......

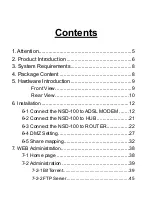
Page 3: ...duction 9 Front View 9 Rear View 10 6 Installation 12 6 1 Connect the NSD 100 to ADSL MODEM 12 6 2 Connect the NSD 100 to HUB 21 6 3 Connect the NSD 100 to ROUTER 22 6 4 DMZ Setting 27 6 5 Share mappi...

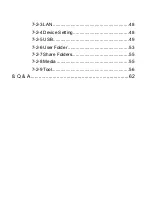
Page 4: ...7 2 3 LAN 48 7 2 4 Device Setting 48 7 2 5 USB 49 7 2 6 User Folder 53 7 2 7 Share Folders 55 7 2 8 Media 55 7 2 9 Tool 56 8 Q A 62...

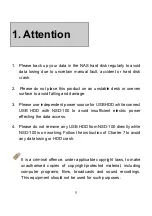
Page 5: ...HDD while connect USB HDD with NSD 100 to avoid insufficient electric power effecting the data access 4 Please do not remove any USB HDD from NSD 100 directly while NSD 100 is on working Follow the i...

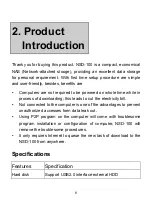
Page 6: ...me while in process of downloading this leads to cut the electricity bill Not connected to the computer is one of the advantages to prevent unauthorized accesses form data leak out Using P2P program o...

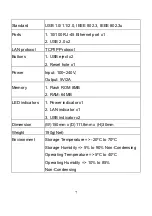
Page 7: ...e x1 Power Input 100 240V Output 5V 2A Memory 1 Flash ROM 8MB 2 RAM 64MB LED indicators 1 Power indicator x1 2 LAN indicator x1 3 USB indicator x2 Dimension W 150mm x D 111 8mm x H 30mm Weight 190g Ne...

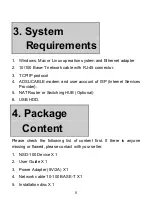
Page 8: ...E modem and user account of ISP Internet Services Provider 5 NAT Router or Switching HUB Optional 6 USB HDD 4 Package Content Please check the following list of content first If there is anyone missin...

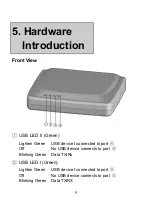
Page 9: ...LED II Green Lighten Green USB device I connected to port Off No USB device connects to port Blinking Green Data TX Rx USB LED I Green Lighten Green USB device I connected to port Off No USB device co...

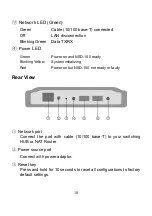
Page 10: ...SD 100 ready Blinking Yellow System initializing Red Power on but NSD 100 not ready or faulty Rear View Network port Connect the port with cable 10 100 base T to your switching HUB or NAT Router Power...

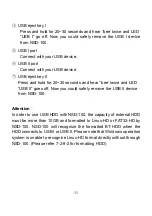
Page 11: ...hear bee twice and LED USB II goes off Now you could safely remove the USB II device from NSD 100 Attention In order to use USB HDD with NSD 100 the capacity of external HDD must be more than 10GB and...

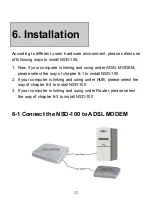
Page 12: ...is linking and using under ADSL MODEM please select the way of chapter 6 1 to install NSD 100 2 If your computer is linking and using under HUB please select the way of chapter 6 2 to install NSD 100...

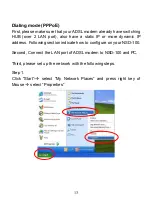
Page 13: ...have a static IP or more dynamic IP address Following section indicate how to configure on your NSD 100 Second Connect the LAN port of ADSL modem to NSD 100 and PC Third please set up the network wit...

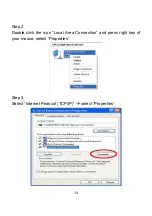
Page 14: ...14 Step 2 Double click the icon Local Area Connection and press right key of your mouse select Properties Step 3 Select Internet Protocol TCP IP select Properties...

Page 15: ...o below dialog box NOTE 1 Default IP of NSD 100 is 192 168 16 1 2 Please make sure your PC and NSD 100 in the same LAN Finally please set up the NetTool with following steps Step 5 The bundled program...

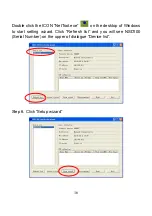
Page 16: ...Double click the ICON NetTool exe on the desktop of Windows to start setting wizard Click Refresh list and you will see NSD100 Serial Number on the upper of dialogue Device list Step 6 Click Setup wiz...

Page 17: ...nd password are admin root b Click OK and window Wizard will automatically appear Step 8 a Select the time zone that corresponds to your region from the drop list Device time zone b Select the date th...

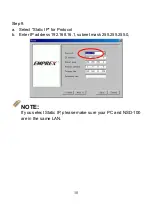
Page 18: ...18 Step 9 a Select Static IP for Protocol b Enter IP address 192 168 16 1 subnet mask 255 255 255 0 NOTE If you select Static IP please make sure your PC and NSD 100 are in the same LAN...

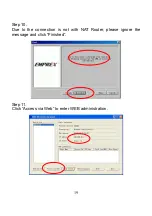
Page 19: ...19 Step 10 Due to the connection is not with NAT Router please ignore the message and click Finished Step 11 Click Access via Web to enter WEB administration...

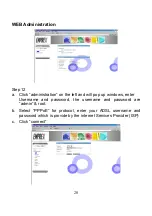
Page 20: ...ation on the left and will pop up windows enter Username and password the username and password are admin root b Select PPPoE for protocol enter your ADSL username and password which is provide by the...

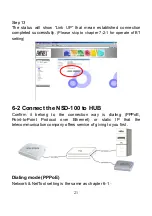
Page 21: ...er 7 2 1 for operate of BT setting 6 2 Connect the NSD 100 to HUB Confirm it belong to the connection way is dialing PPPoE Point to Point Protocol over Ethernet or static IP that the telecommunication...

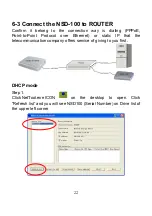
Page 22: ...PPPoE Point to Point Protocol over Ethernet or static IP that the telecommunication company offers service of giving to you first DHCP mode Step 1 Click NetTool exe ICON on the desktop to open Click R...

Page 23: ...23 Step 2 Click Setup Wizard Step 3 Enter the default setting Name admin Password root and click OK...

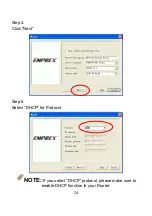
Page 24: ...24 Step 4 Click Next Step 5 Select DHCP for Protocol NOTE If you select DHCP protocol please make sure to enable DHCP function in your Router...

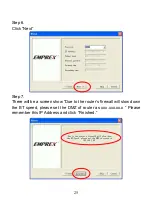
Page 25: ...tep 6 Click Next Step 7 There will be a screen show Due to the router s firewall will slow down the BT speed please set the DMZ of router as xxx xxx xx x Please remember this IP Address and click Fini...

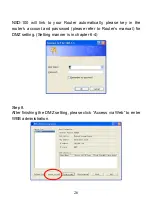
Page 26: ...utomatically please key in the router s account and password please refer to Router s manual for DMZ setting Setting manner is in chapter 6 4 Step 8 After finishing the DMZ setting please click Access...

Page 27: ...obs Some Routers provide DMZ function If your NSD 100 is located behind the NAT router you can forward LAN IP address specified by DMZ to NSD 100 When this setting is done all ports from WAN to LAN wi...

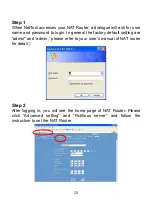
Page 28: ...to login In general the factory default setting are admin and admin please refer to your user s manual of NAT router for detail Step 2 After logging in you will see the home page of NAT Router Please...

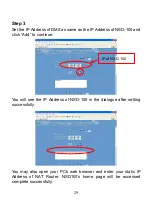
Page 29: ...00 and click Add to continue You will see the IP Address of NSD 100 in the dialogue after setting successfully You may also open your PC s web browser and enter your static IP Address of NAT Router NS...

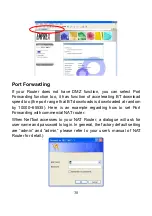
Page 30: ...rt range that BT downloads is downloaded at random by 10000 65535 Here is an example regarding how to set Port Forwarding with commercial NAT router When NetTool accesses to your NAT Router a dialogue...

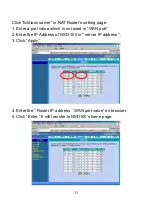
Page 31: ...setting page 1 Enter a port value which is not used in WAN port 2 Enter the IP Address of NSD 100 in server IP address 3 Click Apply 4 Enter the Router IP address WAN port value on browser 5 Click En...

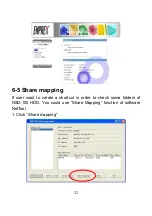
Page 32: ...32 6 5 Share mapping If user want to create a shortcut in order to check some folders of NSD 100 HDD You could use Share Mapping function of software NetTool 1 Click Share mapping...

Page 33: ...password on left up side of the page 4 Select the folder and drive letter you want to build for the network drive and click Map But if you changed this user s name and password please input the amend...

Page 34: ...to local drive are the same as those were configured in following page 7 2 5 To get supervisor authority to manage you may enter administrator name and password the username and password admin admin...

Page 35: ...35 6 You can see network disk Z in following page Confirm if the LAN drive setting is the same as NetTool s...

Page 36: ...36 If the LAN drive disappear each time restart the computer you may try the following setting to exist the drive Click My Computer Tool Map Network Drive...

Page 37: ...37 After setting the drive and folder please check the option Reconnect at logon Click Unmap to remove LAN drive...

Page 38: ...ion page supports three languages interface English Traditional Chinese Simple Chinese for users 7 1 Home page Users may select language and check the information of NSD 100 and connecting USB device...

Page 39: ...ms LAN Device Setting FTP server USB Users Share Media Bit Torrent list on left side of window It also supplies some tools to help users 7 2 1 BitTorrent First please connect USB HD to any USB PORT of...

Page 40: ...40 Please click Bit Torrent from MENU on the left 7 2 1 1 BitTorrent Global setting 1 Place the torrent file in folder Public or other folder 2 You may set the download upload speed and job procedure...

Page 41: ...unable to connect with peer in internet For example if there is no data downloaded from this job within 4 hours NSD 100 will jump to process next job That means if there is no one share and upload the...

Page 42: ...job automatically if there is an uncompleted job and NSD 100 confirms to upload setting of item b 7 2 1 2 Create New Job 1 Put the seed file into the folder of computer 2 Click Browse to find directo...

Page 43: ...43 The new job will be listed in BitTorrent table Click Start will launch to download file...

Page 44: ...44 Click Details will display the detailed progress of download 7 2 1 3 Refresh Click Refresh will show latest status of the download file...

Page 45: ...er to upload or download NOTE Since most FTP clients do not support Unicode currently we recommend user to disable Unicode supported here and select language the same as your OS in client PC s Languag...

Page 46: ...46 2 Confirm that user name and password is the same as NSD 100 setting...

Page 47: ...47 3 Enter the IP Address of NSD 100 and click Connect...

Page 48: ...automatically Static IP To use fixed IP for network connection enter fixed IP address subnet and default gateway primary DNS and secondary DNS PPPoE To build ADSL dial up connection enter username an...

Page 49: ...to your location NTP NTP server NTP Server is an internet time server that enables NSD 100 to show the same time as your computer You may check NTP Enable to synchronize the system time Http port Ente...

Page 50: ...BT HDD when the HDD connects to USB I or USB II Please note that Windows system cannot recognize Linux HD format directly without NSD 100 Please refer to 7 2 9 2 format hard disk for more detail 7 2 5...

Page 51: ...Click USB from MENU on the left Step 2 Select USB Storage Devices Share Name NSD 100 HD and click twice Step 3 It will show the connected printer s name on your computer Please click the printer s ic...

Page 52: ...52 Step 4 There will be a pop up window asking the installation program Step 5 After you find the printer s driver please select Have Disk and click OK...

Page 53: ...uld use the printer after installation NOTE 1 If each computer needs to share printer under the same LAN each computer must install driver first 2 If there are more than two printers please set NSD 10...

Page 54: ...folder to other user or not Modify the password Delete a user 1 Leave user s share folder for administrator read write Leave user s folder in sub directory of admin 2 Remove user s share folder compl...

Page 55: ...dify Properties You may set the properties not accessible to other users read only to other users or read write to other users 7 2 8 Media Once enable UPNP AV server function and assign AV sharing fol...

Page 56: ...DD the capacity of HDD must be more than 10GB and formatted into Linux HD or FAT32 HD by NSD 100 Note1 Windows system cannot recognize Linux HD format directly without through NSD 100 Note2 Windows sy...

Page 57: ...ownload You may download the new firmware to PC After completed download click FW upgrade Browse for firmware located directory and click Start upgrade Bee twice shows the upgrade is completed 7 2 9 4...

Page 58: ...58 Save to the desired directory Click Restore to restore previous setting Select Browse to find the previous directory and click Open...

Page 59: ...59 7 2 9 5 Factory Default Users may click Restore Default Settings key to restore factory default setting or press the Reset button on the rear panel of NSD 100 for 10 seconds...

Page 60: ...Name admin Password root 7 2 9 7 System Log NSD 100 can store recent event logs for analyzing system problem 7 2 9 8 E Mail Sending Once the following events happened NSD 100 will send e mail to info...

Page 61: ...61 6 Format USB HDD completely...

Page 62: ...my printer print more than two pages of document A Please confirm if the printer has installed original factory driver and HD is well connected The capacity for HDD must be over 10GB and formated via...

Page 63: ...eed to open DMZ function in NAT router Please refer to chapter 6 4 for DMZ setting 2 If you are using your NSD 100 without being behind an NAT router you can also configure to use the DDNS function on...

Page 64: ...ormat will be Read only when it connects to NSD 100 12 Q Why do I browse folder via ftp user password ipaddress will display the folder name in disorder A This is language decoding problem of web brow...

Page 65: ...65 2 Click My Computer Tool Map Network Drive...

Page 66: ...download rate slow down or download error A Some users stopped sharing file lead to torrent decrease or error The error may slow down BT download rate or download error If your NSD 100 is located beh...

Page 67: ......
Page 68: ...3100553880 Version 1 0 July 2007...

Reviews: