Emprex LM-2202 User Manual Download Page 6

- 3 -

Identifying parts and controls

1.The LED light indicates the state of working. During operation, the LED Light is bright 

green. When dormant, the LED Light is orange.

2.The power button       is used to identify the state of power. You can use the power 

button to control on & off.

3.The function keys are used for adjusting all settings. When you need some adjustment, 

you can achieve the goals by pressing any of the function menus. Details for all the 

function menus are subsequently described.

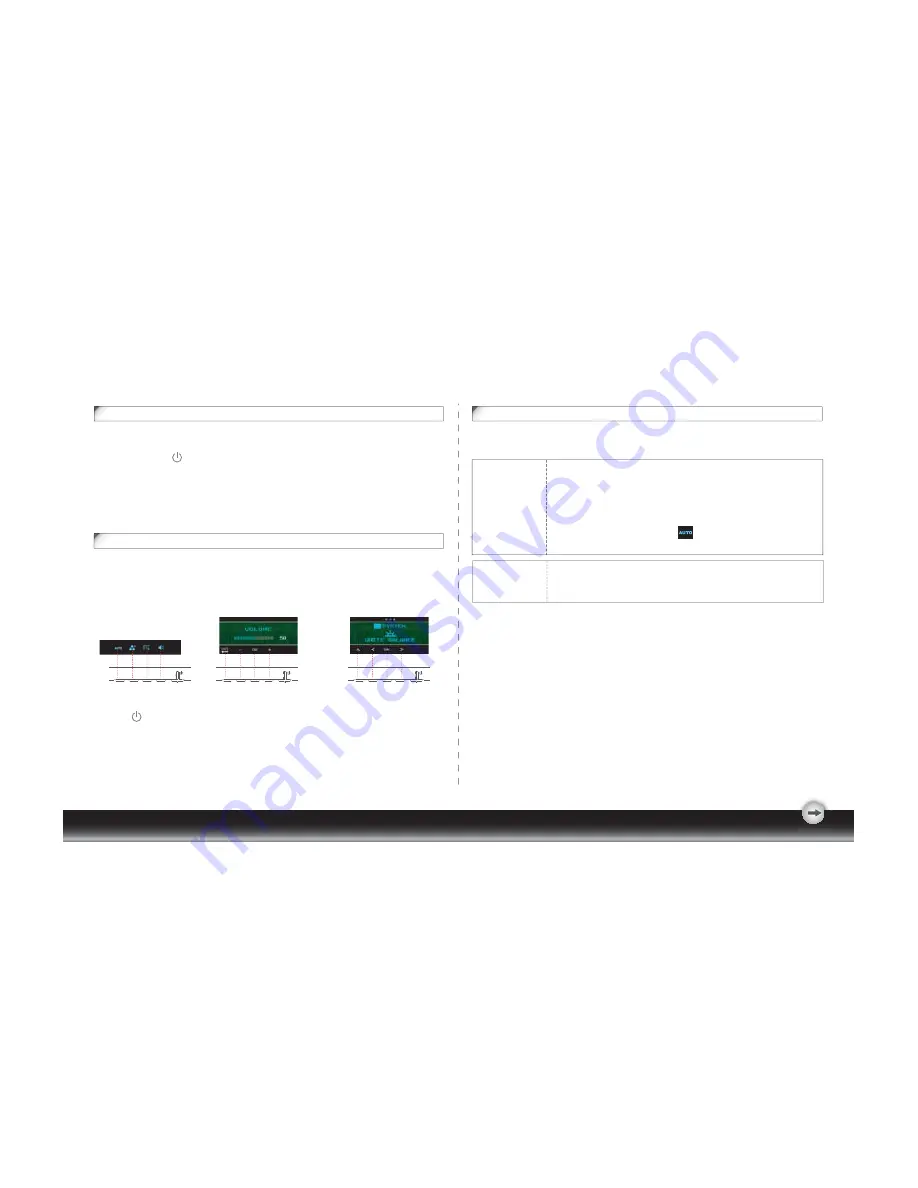
Working with OSD Group

You will find that the OSD is very easy to use. You can identify the function of a button 

through the corresponding icon displayed on the pop-up window of OSD. Now there are 3 

pictures, which show that a button represents different functions in different levels of the 

architecture.

Customizing your Monitor

Important:

Important:

The On Screen Display (OSD) system provides a full range of customizable tools to 

optimize your display.

Although you could perform comprehensive customization, we 

strongly recommend that you use the “AUTO ADJUSTMENT” 

function.

It can utilize the default values to thoroughly optimize the 

performance of the display. Activate the OSD munu.

Select the first button on the left          to activate the “ATUO 

ADJUSTMENT” function.

In addition, we have also prepared other relatively simple methods to 
change the display modes. There are 4 modes, which include: 
GENERAL, MOVIE, PICTURE, GAME.

First Level

Third Level

Second Level

1. Press       button to start.

2. Press any of the rest 4 buttons to activate the OSD menu.

3. Press the corresponding function icon button on the pop-up window of the OSD.

Summary of Contents for LM-2202

Page 1: ...22 wide LCD Monitor User Manual English Deutsch Fran ais Italiano Espa ol 3 FF Svenska Suomi Dansk Polski Nederlands...

Page 2: ...1 Transporting the monitor 1 GETTING STARTED Package contents 2 Monitor installation 2 Identifying parts and controls 3 Customizing your Monitor 3 3 Introduction to Hotkeys 4 OSD icon list 5 Troubles...

Page 3: ...rgy saving mode after a certain time beneficial both for the user and the environment Electrical safety Emissions Electromagnetic fields Noise emissions Ecology The product must be prepared for recycl...

Page 4: ...ion or shock 3 The apparatus shall only be used between 5 tilted forward and 20 tilted backward as normal operation position If the tilt angle exceeds 20 it shall be used for wall mounting or packagin...

Page 5: ...audio cable into the AUDIO port at the rear of the monitor 3 2 Plug the other end of the audio cable into the audio port of your computer or other audio source Monitor installation Package contents Be...

Page 6: ...show that a button represents different functions in different levels of the architecture Customizing your Monitor Important Important The On Screen Display OSD system provides a full range of customi...

Page 7: ...s like a map This tree like directory can help you to become aware of the whole system During the whole process you need to know the following actions 1 Activate the OSD main menu Under the energized...

Page 8: ...en adjust and enlarge the display screen to full screen size 16 10 Native keep the display format as the input signal 4 3 5 4 etc and enlarge the display screen to the maximum w o losing any content p...

Page 9: ...s display INFORMATION DEMO RECALL Reset monitor parameters back to factory preset values 2 seconds after activation of this function some of the menus will stimulate feature grading effects 2 times ov...

Page 10: ...ress a key on the keyboard to wake up the computer 3 Check if the video signal cable is properly connected to the monitor and computer Symptom Check Items 1 Check if your computer is turned on 2 Check...

Page 11: ...of the supported timing is not requested exactly 4 Normalization of VGA card s deviation will be acceptable 5 Horizontal Frequency 6 Vertical Frequency 8 Technical Features and Specifications Interfa...

Page 12: ...not only save electricity but extend the life of the lights 3 Working principle of the Monitor Life Extension function To minimize the impact of frequent turn on and turn off of LCD monitor the Life...

Page 13: ...mode Even though comparing the advantages of both conditions we still recommend you strongly to set your monitor in Advanced Power S aving mode 5 l How to engage the Monitor Life Extension function Y...

Page 14: ...ctions may cause harmful interference to radio communications However there is no guarantee that interference will not occur in a particular installation If this equipment does cause harmful interfere...

Reviews: