7
Setting the Pressure Unit/Pressure Value/Weather Forecast Icon
Long-press the SNOOZE/LIGHT button.
Set the pressure unit (hPa, inHg) using the + and – buttons.
Confirm by pressing SNOOZE/LIGHT.
You can then set the pressure value using the + and – buttons.
This value is used to make pressure calculation more accurate.
You can find the pressure value at your location on the Internet, for example.
Confirm the value by pressing SNOOZE/LIGHT.
The weather forecast icon will start flashing.
Set the icon based on the current weather using the + and – buttons.
This is used to make the forecast calculation more accurate.
Confirm by pressing SNOOZE/LIGHT.
Mould/Dew Point/Heat Indication
1. Press the – button
An indicator of the risk of indoor mould will appear on the screen:
0 – no risk
LOW – low risk
MED – medium risk
HI – high risk
2. Press the – button 2×
An indicator of the risk of outdoor mould (MOLD) will appear on the screen:
0 – no risk
LOW – low risk
MED – medium risk
HI – high risk
3. Press the – button 3×
The outdoor drew point (DEW) value will appear on the screen.
Dew point is the temperature at which air becomes fully saturated with water vapour, which then
start condensing in the form of water droplets.
4. Press the – button 4×
The outdoor heat index (HEAT) will appear on the screen.
The value is only displayed if outdoor temperature is over 28 °C.
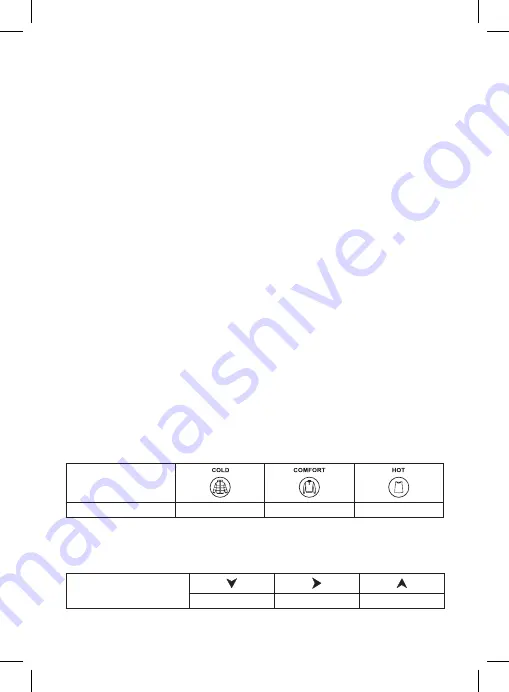
Outdoor Clothing Index
The icon for recommended clothes changes based on outdoor temperature.
It is displayed in field no. 19.
It is displayed separately for each connected sensor.
Outdoor temperature
<18 °C
18 °C to 28 °C
>28 °C
Temperature/Humidity/Pressure (Weather) Trend
The icon for outdoor temperature and humidity trend is shown in field no. 8 and 17.
The icon for indoor temperature and humidity trend is shown in field no. 24 and 22.
The pressure trend icon is shown in field no. 7.
Temperature, humidity and
pressure trend indicator
falling
constant
rising


