


1 Getting Started
1.1 Power ON/OFF
To turn the unit ON, simply push the Power ON/OFF button (the unit is battery operated).
The unit starts in Single channel mode, showing the signal on the meter. To turn the unit OFF,
push and hold down the ON/OFF button.
1.2 Power supply and battery
DIGIAIR PRO
CATV
can be fed by an external power-supply through the VDC port, by an
external power-source (12v dc, max 1A). This is useful in case that the battery goes empty
during an installation. Connect the power-source and hold down the ON button for a couple
of seconds (until the unit turns On).
To turn the unit OFF when the unit is fed by an external power-supply, simply disconnect the
power-source.
A discharged battery takes about 14 hours to recharge. The recharging is controlled by the
units microprocessor and is indicated on the display. Please notice that to obtain full capacity
of new batteries it is necessary to recharge and run down the battery-pack a couple of times.
The meter has 8 x AA rechargeable NiMh batteries in the battery-compartment. Apart from
recharging the battery the unit does not need any particular maintenance. The unit should be
recharged when the battery is empty (indicated with a battery-indicator symbol on the display
in Single channel mode). It is preferably done with one of the enclosed chargers (the power-
supply or the car-charger).
A fully charged battery is operational for more than two hours (depending on the external
antenna load).
1.3 How to use the meter
Start by connecting the antenna and then turn the meter On.
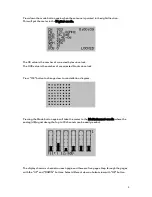
The userinterface works as a “revolver” where the meter starts in
Single channel- mode
(and the latest channel selected), readout of the signallevel in dBuV, dBm or dBmV.
3


