background image

50

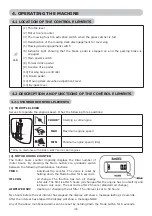
6.3.2 ENGINE


X

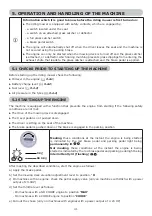
CHANGING OIL

Before changing the oil, prepare a container with a volume of at least 

2 litres

. So that all the oil flows out of the engine we recommend that 

you place something (e.g. wooden blocks) under the side opposite the 

drain screw. Drain the oil while it is still warm.

X

  Unscrew the filler opening of the oil so that the oil flows better and 

faster out of the engine.

X

  Unscrew the drain screw and allow the oil to fully flow out into the 

prepared container.

X

  Screw the drain screw back on and fill the engine with the correct 

amount of the recommended oil (  

User's manual for the engine

and close the oil filler cap.

X

  Use the dipstick to check the correct oil level. If necessary fill up the 

oil so that the oil is at the correct level.

Further details about replacing oil as well as its type and amount are included in a separate 

user's manual supplied by the engine's manufacturer.

-  If you come into contact with used oil, we recommend that you thoroughly wash your hands 

with soap and water.

-  Dispose of used oil according to environment protection laws. It is appropriate to deliver 

the oil in a closed container to a used oil collection point. Under no circumstances should 

dispose of the used oil with other waste or pour it down the drain, on to waste or on the 

floor.


X

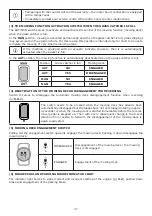
MAINTENANCE OF THE AIR FILTER

Never allow the engine to run without an air filter. This rapidly wears out the engine.

Maintain the air filter according to the instructions contained in the user's manual for the 

engine supplied by its manufacturer.


X

MAINTENANCE OF THE SPARK PLUG

For the engine to run perfectly the spark plug must be correctly set and clean from deposits. 

-  

Always use only the spark plug specified by the engine's manufacturer!

-  If the engine was running shortly before the inspection or replacement, then the spark plug 

will be very hot. So be very careful not to burn yourself.

X

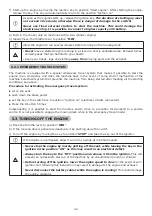
  Take off the spark plug cable and remove the spark plug using a wrench key.

X

  Visually inspect the exterior appearance of the spark plug. If the spark plug 

is visibly significantly worn out or if the insulator is cracked or it is peeling, 

it is necessary to replace it.

X

  If the spark plug is soiled or only slightly worn, it is necessary to carefully 

clean it with a suitable wire brush (copper).

X

  Using a gauge measure set the distance of the electrodes (  

User's manual 

for the engine

).

X

  After performing maintenance on or replacing the spark plug, pull it tight in 

position. An incorrectly tightened spark plug heats up significantly and may 

cause serious damage to the engine.

Check, maintain and replace spark plugs according to the instructions contained in the 

user's manual for the engine supplied by its manufacturer.


X

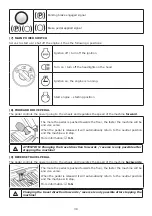
REPLACEMENT OF THE FUEL FILTER

Never allow the engine to run without an air filter. This rapidly wears out the engine.

Summary of Contents for EF 92

Page 1: ...R S INSTRUCTION BOOK D BETRIBS UND WARTUNGSANLEITUNG F MANUEL D UTILISATION ET D ENTRETIEN I MANUALE USO E MANUTENZIONE NL GEBRUIKS EN ONDERHOUDSHANDLEIDING E MANUAL DE USO Y MANTENIMIENTO PL INSTRUKCJA OBSŁUGI I KONSERWACJI ...

Page 2: ......

Page 3: ...3 GB User s manual 21 D Bedienungsanleitung 63 F Manuel Utilisateur 105 I Manuale di istruzioni 147 NL Gebruikershandleiding 189 E Manual de usuario 231 PL Instrukcja obsáugi 273 ...

Page 4: ...4 ...

Page 5: ...EAR OF PRODUCTION XXX WEIGHT 216kg FABRICATION Seco GROUP a s BRANCH PLANT 02 Jicin Jungmannova 11 Czech Republic MADEINEUROPE 1 2 3 4 5 6 7 8 9 CE CONFORMITY 2006 42 EC 2004 108 EC 2000 14 EC 2002 88 EC L 1 3 2a 100dB EMAK spa via Fermi 4 42011 Bagnolo in Piano RE ITALY ...

Page 6: ...6 1 3 2b MAX 10 o 1 3 2c 1 3 2d R N F 1 3 2e ...

Page 7: ...7 3 1 3 3 1a 3 3 1b ...

Page 8: ...8 3 3 1c 3 3 1d ...

Page 9: ...9 3 3 2a 2 4 5 6 1 9 3 7 8 10 12 11 3 3 2b 1 2 3 5 6 7 8 12 4 4 3 3 2c 11 10 ...

Page 10: ...10 3 3 2d M5 x 16 M5 6x 3 3 2e M5 x 16 M5 2x 3 3 2f M5 x 25 M5 4x ...

Page 11: ...11 3 3 2g 3 3 2h M5 x 25 M5 2x ...

Page 12: ...12 3 3 2i M10 2x 11mm Ø 3 3 2j M5 x 12 M5 1x ...

Page 13: ...13 3 3 2k ST6 3x32 6x 3 3 2l 3 3 2m ...

Page 14: ...14 4 1 5 6 7 8 3 4 2 10 11 12 13 1 9 5 4 3 ...

Page 15: ...15 5 6a 2 1 5 6b 6 2 2 6 3 3a 6 3 6a ...

Page 16: ...16 6 3 6b 6 3 7a A B C C 6 3 7b ...

Page 17: ...17 6 3 7c 6 3 7d 6 3 9a ...

Page 18: ...18 6 3 9b 6 3 9c 6 3 10 1 2 ...

Page 19: ...19 6 3 11 6 3 13 ...

Page 20: ...20 6 4 ...

Page 21: ...u have questions do not hesitate to contact one of our more that 100 authorised professionally equipped service centres located all over Europe where trained and tested experts will be ready to assist you Symbols used in this user s manual SYMBOL MEANING These symbols mean ATTENTION and WARNING they inform you about things that may damage your machine and or cause serious injury to the user This s...

Page 22: ...per The frame with bumpers serves as a bearing element for most of the main parts of the machine 2 Front axle with wheels including steering The front axle enables the wheels to turn A steering wheel is used for steering 3 Mowing deck The mowing deck mows and collects the grass It is located under the machine It consists of a cover main plate and two mowing blades 4 Grass ejection chute It connect...

Page 23: ...OTHER LABELS AND THEIR MEANINGS The following labels and stickers are attached to the machine X Labels on the left and right side of the mowing deck 1 3 2a Danger Do not step on Rotating tools Guaranteed noise level X Labels on the fairing under the seat 1 3 2b Danger Do not touch during operation Before cleaning or repairing the mower stop the engine and disconnect the spark plug lead Do not leav...

Page 24: ...nd right side of the machine s frame under the hood 1 3 2c Attention Hot surface Risk of burns X Labels at the travel pedal 1 3 2d R Travel in reverse N Neutral F Travel forward Fast Slow X Label at the brake pedal 1 3 2e Brake ...

Page 25: ...x width x height mm 2480 x 950 x 1120 Weight of the machine kg 255 Speed forward reverse km h 9 7 Mowing height mm 30 90 Mowing coverage mm 92 Volume of the grass catcher l 300 Full grass collector indicator Buzzer Wheel di mensions Front 15 x 6 6 Rear 18 x 8 5 8 Fuel tank capacity l 7 Type of battery 12V 24 Ah ...

Page 26: ...teed emission level of acoustic power LWA dB Aggregate acceleration value of vibrations m s 2 according to EN 1033 A1 Value of vibration acceleration on the all body avd Aggregate value of vibration acceleration on the hand arm avd BS 3130 2700 85 1 100 1 0 0 5 7 0 3 0 BS 4155 2700 86 4 100 1 2 0 5 2 5 BS 4175 2700 85 4 100 0 8 0 4 5 0 2 0 BS 7160 2700 84 2 100 0 9 0 4 2 9 1 4 K 1600 2700 86 0 4 0...

Page 27: ...re safety 2 4 Do not remove safety stickers or labels from the machine Check that they are in their proper locations Do not stay in the vicinity of the machine or under it if it is lifted and is not sufficiently secured against falling or tipping over in the lifted position The components of the grass catcher are subject to strain and may suffer damage the function of the grass catcher may deterio...

Page 28: ...ire machine particularly the steering mechanism If necessary perform repairs before starting up the engine again Whenever possible avoid using the machine in wet grass Reduced traction may lead to skidding Avoid obstacles e g sudden change in the incline of a slope trenches etc on which the machine could roll over Do not attempt to maintain the stability of the machine by stepping on the ground On...

Page 29: ...you wish to mow in advance Select such a speed so that you do not need to stop when on a hill Be very careful when attaching the grass catcher or making other connections It may lead to a reduced stability of the machine Perform all movements on a slope slowly and smoothly Do not make sudden changes to speed or direction Avoid starting up or stopping on a slope In the event that the wheels lose tr...

Page 30: ...ol tank cap and refill with petrol while the engine is running if the engine is hot or if the machine is in a closed location Check the petrol lines before using and do not fill the petrol all the way up to the bottleneck of the tank The heat generated by the engine sun and the expansion of the fuel may lead to the petrol overflowing and a subsequent fire For storing flammable substances use conta...

Page 31: ...for damage that may have occurred during transport Unpack all separately packed assemblies and inspect them 3 1 1 Crate packaging 2 Ramps 3 Grass catcher 4 Documentation 5 Seat 6 Steering wheel The basic package includes X Riding mower X Steering wheel 6 X Seat 5 X The grass catcher 3 is partially disassembled in the cardboard box with a hitch and joining material X Documentation 4 packed parts li...

Page 32: ... bolt X Place the rubber caps on to both leads X Put the storage space cover back and secure with the lever Connecting the wires in opposite to that described above will damage the machine When disconnecting the battery always disconnect the negative pole of the battery first When putting the battery into operation and when performing maintenance on it proceed according to the instructions in the ...

Page 33: ...inge 11 on to the rear plate 3 3 2c On some machines the hinges 10 are already pre mounted on the rear plate Install the hinge 11 only if a trailer is used X Attach the front tube to the top holes in the brackets using M5x16 nuts and bolts Screw the grass catcher hitch switch on to the left bracket of the frame using two M5x16 bolts and fasten using nuts 3 3 2d X Screw on the side struts of the gr...

Page 34: ...t out and retighten the bolts 3 3 2m On a properly adjusted grass catcher the space between the rear plate of the machine and the front frame tube 8 3 3 2b is no greater than 5 mm X If it is not possible to align using the above described method perform the adjustment by sliding the grass catcher hitch on the rear plate or the bolts and brackets on the top side of the hitch 3 4 CHECKS PRIOR TO STA...

Page 35: ...pen it slowly because there may be overpressure in the fuel tank caused by petrol vapours X Insert a funnel into the fuel tank opening and start to pour the fuel from the canister X After filling up the fuel tank always wipe dry the area around the fuel tank opening as well as the fuel tank opening itself It is good to check the condition of the fuel lines It is recommended to regularly also clean...

Page 36: ...AX Maximum engine speed MIN Minimum engine speed idle Only on machines with a BS15 BS17 and K 1600 engines 2 MOTOR HOURS COUNTER The motor hours counter implicitly displays the total number of motor hours By pressing the Mode button you gradually switch between the following maintenance functions TMR 1 individual trip counter The value is reset by holding down the Mode button for 6 seconds OIL CHG...

Page 37: ...s catcher is full Mowing deck AUT NO ENGAGED AUT YES DISENGAGED MAN NO ENGAGED MAN YES ENGAGED 4 DEACTIVATION OF THE MOWING DECK DISENGAGEMENT FOR REVERSING Switch R serves to disengage the automatic mowing deck disengagement function when reversing 5 5 1 R The switch needs to be pressed when the mowing deck has already been automatically disengaged but the blades have not yet stopped rotating app...

Page 38: ... will be and vice versa When the pedal is released it will automatically return to the neutral position and the machine will stop More information 5 5 ATTENTION Changing the travel direction forwards reverse is only possible after stopping the machine 9 REVERSE TRAVEL PEDAL The pedal controls the power going to the wheels and regulates the speed of the machine backwards The more the pedal is pushe...

Page 39: ...TMENT LEVER The lever serves to set the elevation height of the mowing deck from the ground The lever has 6 work positions which correspond to a mowing height of 3 to 9 cm The higher the number of the lever position the higher vegetation height remains after mowing When travelling without mowing the lever must be set to position 7 13 BY PASS LEVER FREE MOVEMENT OF THE REAR WHEELS The by pass lever...

Page 40: ...a cold engine Machines with a BS15 BS17 KO15 TE17 and HO16 engines are not equipped with independent chokes 2 BUZZER The buzzer makes a sound signal when the grass catcher is full After the sound signal indicating a full grass catcher the mowing deck is not disengaged ...

Page 41: ...E The machine is equipped with a function that prevents the engine from starting if the following safety conditions are not met X The drive of the mowing deck is disengaged X The travel pedal is not pushed down X The driver is sitting on the seat of the machine X The brake pedal is pushed down or the brake is engaged in the parking position STOP OK NO OK P P Meeting these conditions at the instant...

Page 42: ... being started after meeting all the starting conditions see above Procedure for activating the emergency travel system X sit on the seat X push down the brake pedal X set the key in the switch box to position ignition on electrical circuits connected X Press the R button 5 times Subsequently it is possible to start the machine and to drive to a location for transport to a service centre It is not...

Page 43: ...the grass catcher is empty the AUT MAN switch optional accessory is in position MAN 5 4 2 DISENGAGING THE MOWING DECK X Disengage the mowing deck by pushing down the engagement switch If the driver leaves the seat the engine will automatically shut down and thereby the rotation of the mowing blades also However never turn off the mowing deck by simply leaving the seat If you do not move the key in...

Page 44: ...travelling at a high speed 5 5 1 TRAVELLING FORWARD REVERSING X Slowly move the throttle lever to position MIN This will lower the engine speed X Slowly step on the drive pedal depending on the desired direction of travel forward or reverse Attention Risk of injury if the pedal is pushed down quickly Changing the direction of travel forward reverse is possible only after stopping the machine If th...

Page 45: ...tions Condition of vegetation Recommended speed High dense and wet 2 km hour Average conditions 3 5 km hour Low dry vegetation 5 km hour Travelling without the mowing deck engaged 8 km hour 5 5 4 TRAVELLING ON A SLOPE The OM EF 92 ride on mower may work on slopes with an incline of up to 10 17 When working on a slope it is necessary to adhere to the following fundamentals X Pay increased attention...

Page 46: ...is switch in position AUT X Set the throttle lever to position MIN X On machines with manual lifting and tilting of the grass catcher Slide the grass catcher lifting lever handle completely upwards 1 and tilt it down 2 to tip out the grass catcher allow it to empty freely slowly release it and tilt it back 5 6b X On machines equipped with a mechanical grass catcher lifting and tilting device Press...

Page 47: ... and adjustment of the travel belts 4 Inspection of the brake controls Inspection of tyre pressure Inspection of cable fasteners loose quick coupling parts Cleaning of the mowing deck Inspection of bolt connections Inspection of tension of the cogged blade drive belt 4 Inspection of the correct tension of the mowing deck drive V belt 4 Inspection and adjustment of play between the front axle and t...

Page 48: ... and screw in Then again screw it out and take the oil level reading The oil level must be between the two marks on the dipstick If it is not fill up with motor oil so that it reaches the FULL mark Further details about checking and filling of oil are included in a separate user s manual supplied by the engine s manufacturer X INSPECTION OF CABLES AND BOLT CONNECTIONS Visually inspect the conditio...

Page 49: ...refore regularly check its condition according to the manual supplied by the battery s manufacturer X Keep the battery contacts clean If dirt accumulates on them or they are rusty clean them according to the recommendations of the battery s manufacturer Interruption of the circuit caused by the oxidation of the contacts may lead to the malfunction of the recharging function of the engine X Regular...

Page 50: ... AIR FILTER Never allow the engine to run without an air filter This rapidly wears out the engine Maintain the air filter according to the instructions contained in the user s manual for the engine supplied by its manufacturer X MAINTENANCE OF THE SPARK PLUG For the engine to run perfectly the spark plug must be correctly set and clean from deposits Always use only the spark plug specified by the ...

Page 51: ... the same rating as the initial fuse i e 15A or 5A If even after replacing the fuse the engine or the mowing deck will not work contact an authorised service centre X Certain machine models are equipped with a central switchboard Under no condition should you tamper with the switchboard The only exception is the replacement of fuses 6 3 5 LIFTING THE MACHINE If you wish to lift the riding mower us...

Page 52: ...lade into a horizontal position If the blade remains in this position it is balanced If one of the ends is weighs down grind this side until it is balanced When balancing by grinding do not shorten the length of the blade The permitted static imbalance may not exceed 2g If you are not certain about the procedure please contact an authorised service centre where they will gladly provide advice X RE...

Page 53: ...wing deck 6 3 7d When adjusting distance C it is recommended to place something under both sides of the mowing deck cover use underlays of the same size e g wooden boards etc and use them to level the deck so that the distance from the ground is the same on both the left and right hand side X After setting the correct distances of the mowing deck pull tight all loose nuts and bolts using a torque ...

Page 54: ...nce may result in damage to steering components Procedure for limiting adjusting looseness X Open the hood of the machine X Loosen two nuts M12 1 on the bolt of the eccentric X Place a suitable wrench on to the hexagon of the eccentric 2 and turn it until looseness is limited to a minimum X Tighten both nuts M12 1 using a torque of 35 45 Nm 6 3 11 CHECKING AND ADJUSTING THE TRAVEL DRIVE BELT Regul...

Page 55: ...eco machine service centre 6 3 15 MAINTENANCE OF THE HYDROSTATIC TRANSMISSION For the reliable operation of the transmission it is necessary to maintain the correct oil level The filling openings on the transmissions are accessible after taking the ejection chute off the machine 6 3 9 The prescribed values are included in the manual of the manufacturer that supplied the machine part In the event o...

Page 56: ... bar in the vicinity of the bolt hole X angle joints connecting the steering draw bars remove lubricate X wheel pin angle joints remove lubricate X front wheel bearings X wheel pins passing through the axle X central pivot pin of the front axle using a lubricating nipple X steering wheel shaft bearings lubricate X cogged steering segment and eccentric lubricate X front axle wheel pins for seating ...

Page 57: ...6 3 8 If necessary adjust the tension X Check particularly after replacing blades that the blade is installed correctly The mowing deck drive belt stops during operation X The mowing deck drive belt may be damaged when it jumps out of the pulley while the machine is running If it jumps out even after rechecking according to the following steps it is necessary to replace the belt X Check the belt t...

Page 58: ... and transmission with respect to cut off or damaged grooves Replace it if necessary Extreme vibrations occur when travelling X Check whether any pulleys are damaged or deformed Replace them if necessary X Check whether the belt has any burned spaces or other irregularities Replace it if necessary X Check the tension of the travel drive belt 6 3 11 If necessary adjust its tension X Check that the ...

Page 59: ...nces of defects in the machine 2 Technical personnel will undertake the necessary repairs in the minimum time possible compatible with organisational needs 3 To make any claim under the warranty this certificate of warranty fully completed bearing the dealer s stamp and accompanied by the invoice or receipt showing the date of purchase must be displayed to the personnel authorised to approve work ...

Page 60: ...e the engine for storage according to the user s manual for the operation and maintenance of the engine X Lubricate all lubrication locations according to the lubrication diagram 6 4 X Take out the battery clean it fill it up with distilled water all the way to the bottom parts of the rings of the filling openings and charge fully A battery that is not charged may freeze and crack Store the batter...

Page 61: ...dom E Type of cutting device rotary blade Cutting width 92 cm F We confirm that this mechanical equipment defined above complies with the requirements in the above technical regulations and under normal operating conditions it is s a f e measures have been taken to ensure the compliance of all products introduced to the market with the technical documentation and the requirements contained in tech...

Page 62: ...ogy may appear in this manual when compared with the actual product No claims can be deduced from this Print duplication publication and translation even in part must not be performed without the written consent of Emak S p A The manufacturer reserves the right to change technical parameters of the product without prior customer notification ...

Page 63: ...cht sich an eine unserer mehr als 100 autorisierten professionell ausgestatteten Kundendienststellen in ganz Europa zu wenden wo geschulte und geprüfte Experten bereit stehen um Ihnen zu helfen In diesem Handbuch verwendete Symbole SYMBOL BEDEUTUNG Diese Symbole bedeuten ACHTUNG und WARNUNG Sie informieren Sie über Dinge die Ihre Maschine beschädigen und oder zu schweren Verletzungen für den Benut...

Page 64: ... 1 2 1 Chassis mit Stoßstange Das Chassis mit den Stoßstangen dient als tragendes Element für die meisten Hauptteile der Maschine 2 Vorderachse mit Rädern einschließlich Lenkung Die Lenkung erfolgt über die Räder der Vorderachse Zum Steuern dient ein Lenkrad 3 Mähwerk Das Mähwerk mäht und sammelt das Gras Es befindet sich unter der Maschine Es besteht aus Abdeckung Hauptplatte und zwei Mähmessern ...

Page 65: ... folgenden Etiketten und Aufkleber sind an der Maschine angebracht X Schilder links und rechts am Mähwerk 1 3 2a Gefahr Nicht auf die Maschine steigen Rotierende Werkzeuge Garantierter Schallleis tungspegel X Etiketten an der Verkleidung unter dem Sitz 1 3 2b Gefahr Nicht wäh rend des Betriebs berühren Bevor Sie den Mäher reinigen oder reparie ren ziehen Sie den Zündkerzen stecker ab Maschine nich...

Page 66: ...und rechts am Maschinenrahmen unter der Haube 1 3 2c Achtung Heiße Ober fläche Verbren nungsgefahr X Etiketten auf dem Fahrtpedal 1 3 2d R Rückwärts N Neutral F Vorwärts Schnell Langsam X Schild am Bremspedal 1 3 2e Bremse ...

Page 67: ...e mm 2480 x 950 x 1120 Gewicht der Maschine kg 255 Geschwindigkeit vorwärts rückwärts km h 9 7 Schnitthöhe mm 30 90 Mähbreite mm 92 Inhalt der Grasfangvorrichtung l 300 Anzeige für volle Grasfangvorrichtung Summer Ra dabmes sungen Vorne 15 x 6 6 Hinten 18 x 8 5 8 Fassungsvermögen des Kraftstofftanks l 7 Batterietyp 12V 24 Ah ...

Page 68: ...Schallleis tungspegel LWA dB Gesamtwert der Beschleunigung m s 2 gemäß EN 1033 A1 Gesamtwert der Schwingungsbe schleu nigung der ganze Körper avd Gesamtwert der Schwingungsbe schleunigung an Hand Arm avd BS 3130 2700 85 1 100 1 0 0 5 7 0 3 0 BS 4155 2700 86 4 100 1 2 0 5 2 5 BS 4175 2700 85 4 100 0 8 0 4 5 0 2 0 BS 7160 2700 84 2 100 0 9 0 4 2 9 1 4 K 1600 2700 86 0 4 0 100 1 1 0 4 4 7 2 3 Erläute...

Page 69: ...r vorzunehmen Unerlaubte Modifikationen können zu gefährlichen Arbeitsbedingungen führen und die Garantie erlöschen lassen Beachten Sie alle Auflagen zur Brandsicherheit 2 4 Entfernen Sie keine Sicherheitsaufkleber oder Etiketten von der Maschine Überprüfen Sie dass sie sich am richtigen Ort befinden Bleiben Sie nicht in der Nähe der Maschine oder unter ihr wenn sie angehoben ist und nicht ausreic...

Page 70: ...er eines Grabens oder über eine Kante fährt die zusammenbricht Bei der Arbeit Maulwurfshügel Betonstützen Baumstümpfe Gartenbeet und Fußwegrandsteine vermeiden die nicht mit den Messern in Kontakt kommen dürfen da sie sonst Schäden am Mähwerk und dem Maschinenmechanismus verursachen können Beim Aufprall auf einen festen Gegenstand Mähwerk und Motor anhalten und ausschalten und die gesamte Maschine...

Page 71: ...4 Antriebs an Hängen mit einer maximalen Neigung von 15 27 und nur in Richtung der Falllinie also nach oben oder unten eingesetzt werden Weitere Informationen 5 5 4 Bei der Richtungsänderung ist erhöhte Vorsicht geboten Nicht an einem Hang drehen wenn es nicht absolut notwendig ist Achten Sie auf Löcher Wurzeln unebenes Gelände Unebenes Gelände kann dazu führen dass die Maschine umkippt Hohes Gras...

Page 72: ...sitzmähers abkühlen bevor Sie ihn an einem geschlossenen Ort parken Seien Sie besonders aufmerksam bei der Arbeit mit Benzin Öl und anderen brennbaren Substanzen Diese sind sehr leicht entzündliche Stoffe und ihre Dämpfe sind explosiv Bei dieser Arbeit nicht rauchen Nie den Tankdeckel abdrehen und Benzin nachfüllen während der Motor läuft wenn der Motor heiß ist oder wenn sich die Maschine an eine...

Page 73: ...ng der Maschine auf Schäden durch die während des Transports entstanden sein könnten Entpacken Sie alle separat verpackten Baugruppen und überprüfen Sie sie 3 1 1 Kistenverpackung 2 Rampen 3 Grasfangvorrichtung 4 Dokumentation 5 Sitz 6 Lenkrad Die Grundverpackung enthält X Aufsitzmäher X Lenkrad 6 X Sitz 5 X Die Grasfangvorrichtung 3 teilweise demontiert im Karton mit Scharnier und Verbindungsmate...

Page 74: ... X Setzen Sie die Gummikappen auf die beiden Kabel X Setzen Sie die Abdeckung des Aufbewahrungsbereichs wieder ein und sichern Sie sie mit dem Hebel Anschließen der Kabel entgegen der obigen Beschreibung führt zur Beschädigung der Maschine Beim Abklemmen der Batterie immer den Minuspol der Batterie zuerst abklemmen Gehen Sie bei der Inbetriebnahme der Batterie und bei Wartungsarbeiten an ihr gemäß...

Page 75: ...ntere Platte 3 3 2c Bei einigen Maschinen sind die Scharniere 10 bereits an der hinteren Platte vormontiert Bringen Sie das Scharnier 11 nur an wenn ein Anhänger verwendet wird X Befestigen Sie das vordere Rohr mit M5x16 Schrauben und Muttern in den oberen Bohrungen in den Halterungen Schrauben Sie die Scharniere Grasfangvorrichtung mit zwei M5x16 Schrauben an die linke Halterung des Rahmens und s...

Page 76: ...an der Maschinenabdeckung Passen Sie Unterschiede durch Lösen der Schrauben am vorderen Rohr und oder der Schrauben an den Seitenstützen an dann gleichen Sie sie aus und ziehen die Schrauben wieder an 3 3 2m Bei richtig eingestellter Grasfangvorrichtung ist der Platz zwischen der hinteren Platte der Maschine und dem vorderen Rahmenrohr 8 3 3 2b nicht größer als 5 mm X Wenn die beschriebene Ausrich...

Page 77: ...icht Feuer fangen Wenn Kraftstoff verschüttet wird die Stelle gründlich trocken wischen Kraftstoffe außerhalb der Reichweite von Kindern aufbewahren Vorgehen beim Tanken X Öffnen Sie den Tankdeckel Öffnen Sie ihn langsam da aufgrund von Benzindämpfen im Tank Überdruck herrschen kann X Setzen Sie einen Trichter in die Tanköffnung ein und beginnen Sie Kraftstoff aus dem Kanister zu gießen X Nach dem...

Page 78: ... MIN Minimale Drehzahl Leerlauf Nur bei Maschinen mit den Motoren BS15 BS17 und K 1600 2 BETRIEBSSTUNDENZÄHLER DES MOTORS Der Betriebsstundenzähler zeigt auch die Gesamtzahl der Motorstunden an Drücken Sie die Modus Taste um zwischen den folgenden Wartungsfunktionen umzuschalten TMR 1 Tageskilometerzähler Wird zurückgesetzt wenn die Modus Taste 6 Sekunden lang gedrückt wird OIL CHG Ölwechsel Die F...

Page 79: ...vorrichtung voll ist Stellung Grasfangvorrichtung ist voll Mähwerk AUT NEIN AKTIVIERT AUT JA DEAKTIVIERT MAN NEIN AKTIVIERT MAN JA AKTIVIERT 4 DEAKTIVIERUNG DER RÜCKZUGSFUNKTION DES MÄHWERKS BEIM RÜCKWÄRTSFAHREN Schalterdientdazu dieautomatischeRückzugsfunktiondesMähwerksbeimRückwärtsfahrenzudeaktivieren 5 5 1 R Der Schalter muss betätigt werden wenn das Mähwerk bereits automatisch deaktiviert wur...

Page 80: ...umgekehrt Wenn das Pedal losgelassen wird kehrt es automatisch in die neutrale Position zurück und die Maschine stoppt Weitere Informationen 5 5 ACHTUNG Das Ändern der Fahrtrichtung vorwärts rückwärts ist erst möglich nachdem die Maschine gestoppt wurde 9 PEDAL RÜCKWÄRTSFAHRT Das Pedal steuert die Kraftübertragung auf die Räder und regelt die Geschwindigkeit der Maschine rückwärts Je stärker das P...

Page 81: ... dient dazu die Höhe des Mähwerks über dem Boden einzustellen Der Hebel besitzt 6 Arbeitspositionen die einer Schnitthöhe von 3 bis 9 cm entsprechen Je höher die Zahl der Hebelposition ist desto höher bleibt die Wuchshöhe nach dem Mähen Wenn Sie den Mäher fahren ohne zu mähen muss der Hebel in Position 7 sein 13 BYPASSHEBEL FREIE BEWEGUNG DER HINTERRÄDER Der Leerlaufhebel dient dazu die Übertragun...

Page 82: ...alten Motors Maschinen mit den Motoren BS15 BS17 KO15 TE17 und HO16 sind nicht mit unabhängigem Choke ausgestattet 2 SUMMER Der Summer ertönt wenn die Grasfangvorrichtung voll ist Nachdem der Summer eine volle Grasfangvorrichtung anzeigt wird das Mähwerk nicht deaktiviert ...

Page 83: ... X Luftdruck in den Reifen 3 4 4 5 2 STARTEN DES MOTORS Die Maschine ist mit einer Funktion ausgestattet die den Start des Motors verhindert wenn die folgenden Sicherheitsbedingungen nicht erfüllt werden X Der Antrieb des Mähwerks ist deaktiviert X Das Fahrpedal wird nicht gedrückt X Der Fahrer sitzt auf dem Sitz der Maschine X Das Bremspedal wird gedrückt oder die Bremse steht sich in der Parkpos...

Page 84: ...nicht gestartet werden kann obwohl alle oben genannten Startbedingungen erfüllt sind Verfahren zur Aktivierung des System zum Fahren im Notfall X Setzen Sie sich auf den Sitz X Betätigen Sie das Bremspedal X Stellen Sie den Schlüssel auf die Position Ignition on Zündung an Stromkreise angeschlossen X Drücken Sie die Taste R 5 Mal Anschließend lässt sich die Maschine starten und kann an einem Ort g...

Page 85: ... leer Der Schalter AUT MAN optionales Zubehör befindet sich in Position MAN 5 4 2 DEAKTIVIEREN DES MÄHWERKS X Deaktivieren Sie das Mähwerk durch Herunterdrücken des Aktivierungsschalters Wenn der Fahrer den Sitz verlässt schaltet sich der Motor automatisch ab und dadurch wird auch die Drehung der Mähmesser abgestellt Schalten Sie aber nie das Mähwerk ab indem Sie einfach den Sitz verlassen Wenn Si...

Page 86: ...dere wenn die Maschine mit hoher Geschwindigkeit fährt 5 5 1 VORWÄRTS RÜCKWÄRTSFAHREN X Schieben Sie den Gashebel langsam in Stellung MIN Dadurch wird die Motordrehzahl gesenkt X Treten Sie langsam auf das Fahrpedal für die gewünschte Fahrtrichtung vorwärts oder rückwärts Achtung Verletzungsgefahr wenn das Pedal zu schnell getreten wird Das Ändern der Fahrtrichtung vorwärts rückwärts ist erst mögl...

Page 87: ...ohlene Geschwindigkeit Hoch dicht und nass 2 km h Durchschnittliche Bedingungen 3 5 km h Niedriger trockener Bewuchs 5 km h Fahren ohne aktiviertes Mähwerk 8 km h 5 5 4 FAHREN AM HANG Der Aufsitzmäher OM EF 92 kann auf Hängen mit einer Neigung bis 10 17 eingesetzt werden Beim Arbeiten am Hang sind folgende Grundsätze zu beachten X Seien Sie beim Fahren an einem Hang besonders aufmerksam X Verwende...

Page 88: ...n Stellung AUT X Stellen Sie den Gashebel in die Stellung MIN X Bei Maschinen mit manuellem Heben und Kippen der Grasfangvorrichtung Schieben Sie den Auskipphebel Grasfangvorrichtung nach oben 1 und kippen ihn nach unten 2 um die Grasfangvorrichtung zu entladen Lassen Sie sie locker entleeren Lassen Sie sie langsam los und kippen sie zurück 5 6b X Bei Maschinen mit mechanischer Hebe und Kippvorric...

Page 89: ...stoff filters Batteriewartung Elektrolyt prüfen Reinigung Überprüfen und Justieren der Fahrriemen 4 Überprüfen der Bremsen steuerungen Überprüfen des Reifen drucks Überprüfen der Kabelb inder lose Schnellkupp lungsteile Reinigen des Mähwerks Überprüfen der Schraub verbindungen Prüfung der Spannung des Zahnantriebsriemen der Messer 4 Inspektion der richtigen Spannung des Antriebskeil riemen des Mäh...

Page 90: ...den Ölmessstab heraus wischen Sie ihn ab setzen ihn wieder ein und schrauben ihn ein Schrauben Sie ihn dann wieder heraus und lesen den Ölstand ab Der Ölstand muss sich zwischen den beiden Markierungen auf dem Messstab befinden Wenn er es nicht ist füllen Sie Motoröl nach bis die FULL Marke erreicht ist Weitere Details über Kontrolle und Befüllung von Öl werden in einem separaten Bedienungsanleitu...

Page 91: ...e richtige und regelmäßige Wartung der Batterie verlängert deren Lebensdauer Kontrollieren Sie daher regelmäßig ihren Zustand gemäß dem mitgelieferten Handbuch des Batterieherstellers X Halten Sie die Batteriekontakte sauber Wenn sich Schmutz auf ihnen sammelt oder sie rostig sind reinigen Sie sie gemäß den Empfehlungen des Batterieherstellers Die Unterbrechung des Stromkreises durch Oxidation der...

Page 92: ...er auf den Boden schütten X WARTUNG DES LUFTFILTERS Lassen Sie niemals den Motor ohne Luftfilter laufen Dies führt zu schnellem Motorverschleiß Warten Sie den Luftfilter gemäß den Anweisungen in der Bedienungsanleitung des Motorherstellers X WARTUNG DER ZÜNDKERZE Damit der Motor perfekt läuft muss die Zündkerze richtig eingestellt und frei von Ablagerungen sein Verwenden Sie immer nur die vom Moto...

Page 93: ...ng ein d h 15A oder 5A Wenn auch nach dem Ersetzen der Sicherung der Motor oder das Mähwerk nicht funktioniert wenden Sie sich an eine autorisierte Kundendienststelle X Bestimmte Maschinenmodelle sind mit einer zentralen Schalttafel ausgestattet Sie dürfen unter keinen Umständen die Schalttafel manipulieren Die einzige Ausnahme ist der Austausch von Sicherungen 6 3 5 HEBEN DER MASCHINE Wenn Sie de...

Page 94: ...etzen Sie zum Ausgleichen den Schraubendreher in die Zentrieröffnung und stellen Sie das Messer waagerecht ein Wenn das Messer in dieser Position bleibt ist es ausgewuchtet Wenn ein Ende nach unten hängt diese Seite so lange abschleifen bis das Messer ausgewuchtet ist Wenn beim Auswuchten geschliffen wird dabei nicht die Länge des Messers verkürzen Das zulässige statische Ungleichgewicht darf 2g n...

Page 95: ...n Sie zwei Muttern und Unterlegscheiben vom Spannmechanismus des Antriebsriemens am Mähwerk Hierdurch werden Feder und Riemen gelöst Nehmen Sie den Riemen von den Riemenscheiben 6 3 7c X Drehen Sie die Riemenscheibe so dass Sie Zugriff auf die Schrauben an der Rückseite des Mähwerks erhalten X Stellen Sie die richtigen Abstände A B und C durch Verstellen der Schrauben im vorderen und hinteren Teil...

Page 96: ...ben an der Rückseite des Mähwerks erhalten Lösen Sie die Schrauben 6 3 7d X Es ist nicht nötig die Schrauben an der Vorderseite des Mähwerks zu entfernen ist reicht das Deck von dem Haltebügel abzunehmen 6 3 9b X Ziehen Sie das Mähwerk langsam aus der Maschine 6 3 9c 6 3 10 WARTUNG DER LENKUNG Überprüfen Sie regelmäßig auf übermäßiges Spiel zwischen dem Lenkungszahnbereich und dem Lenkradritzel We...

Page 97: ...unststoff Schmiermittel fetten Speziell bei den Rädern an der Hinterachse ist diese Schmierung für die anschließende Entfernung des Rades notwendig Sollte keine Schmierung erfolgen kann die anschließende Befestigung sehr schwierig sein Achten Sie beim Anbringen des Hinterrads auf die gegenseitige Ausrichtung des Stifts an der Welle und der Nut am Rad 6 3 14REPARATUREINERREIFENPANNE Die Maschine is...

Page 98: ...unststoff Schmiermittel zur Schmierung von X Winkelgelenke zur Verbindung der Zugstangen der Lenkung entfernen schmieren X Bolzen der Bremsenzugstange Schmieren der Zugstange in der Nähe der Bohrung X Bolzen der Zugstange des Mähwerks Schmieren der Zugstange in der Nähe der Bohrung X Winkelgelenke zur Verbindung der Zugstangen der Lenkung entfernen schmieren X Winkelgelenke der Radachse entfernen ...

Page 99: ... nicht mit ganz geöffnetem Gasventil laufen Mähen Sie bei hohem Gras zunächst einmal mit einer hohen Schnitthöhe Dann noch einmal mit der normalen Höhe Befolgen Sie die Hinweise in Kapitel 5 5 3 X Spannung des Antriebsriemens prüfen 6 3 8 Bei Bedarf stellen Sie die Spannung ein X Überprüfen Sie insbesondere nach Messerwechsel dass das Messer korrekt installiert ist Der Antriebsriemen des Mähwerk b...

Page 100: ...es Fahrantriebsriemens 6 3 11 Bei Bedarf stellen Sie die Spannung ein X Überprüfen Sie den Verlauf des Riemens Ggf einstellen X Prüfen Sie ob Riemenscheiben beschädigt sind Ersetzen Sie sie bei Bedarf X Überprüfen Sie die Lücke im Fahrkupplungsmechanismus Abweichungen können dazu führen dass der Kupplungslagerhalter verbogen wird Bei Bedarf ersetzen Die Maschine bewegt sich nicht wenn das Fahrpeda...

Page 101: ...sche Servicenetz die durch Material Bearbeitungs und Fertigungsmängel fehlerhaften Teile kostenlos aus Die Garantie hebt die vom Bürgerlichen Gesetzbuch geregelten Käuferansprüche bei Folgeschäden durch Fehler oder Mängel des verkauften Sachwerts nicht auf 2 Das technische Personal wird die Eingriffe im Rahmen der hierfür erforderlichen organisatorischen Maßnahmen schnellstmöglich durchführen 3 Z ...

Page 102: ...uttern an X Bereiten Sie den Motor für die Lagerung gemäß Bedienungsanleitung für den Betrieb und die Wartung des Motors vor X Schmieren Sie alle Schmierstellen gemäß Schmierplan 6 4 X Entfernen Sie die Batterie reinigen Sie sie füllen Sie sie bis zu den unteren Teilen der Ringe der Einfüllöffnungen mit destilliertem Wasser und laden Sie sie vollständig auf Eine nicht aufgeladene Batterie kann ein...

Page 103: ...E Schneidvorrichtung Drehmesser Schnittbreite 92 cm F Wir bestätigen Folgendes Die oben definierte mechanische Ausrüstung erfüllt die Anforderungen in den oben genannten technischen Vorschriften und ist unter normalen Betriebsbedingungen s i c h e r Es wurden Maßnahmen ergriffen um die Compliance aller auf den Markt gebrachten Produkte mit der technischen Dokumentation und den in den technischen V...

Page 104: ...buch geben wenn sie mit dem eigentlichen Produkt verglichen wird Hieraus können keinerlei Ansprüche abgeleitet werden Druck Vervielfältigung Veröffentlichung und Übersetzung auch auszugsweise ist ohne schriftliche Zustimmung der Emak S p A verboten Der Hersteller behält sich das Recht vor technische Parameter der Produkte ohne vorherige Benachrichtigung des Kunden zu ändern ...

Page 105: ...elque chose n est pas clair ou si vous avez des questions n hésitez pas à contacter l un de nos centres de services équipés de manière professionnelle plus de 100 où des experts qualifiés et confirmés seront prêts à vous aider Symboles utilisés dans ce manuel d utilisation SYMBOLE SIGNIFICATION Ces symboles signifient ATTENTION et AVERTISSEMENT Ils vous informent de ce qui peut endommager votre ma...

Page 106: ...c les pare chocs sert d élément de support pour la plupart des parties principales de la machine 2 Essieu avant avec roues directionnelles L essieu avant permet aux roues de pivoter Un voyant est utiliser pour conduire 3 Plaque de tonte La plaque de tonte tond et récolte l herbe Il se trouve sous la machine Elle se compose d un capot d une plaque principale et de deux lames de coupe 4 Descente d é...

Page 107: ...et autocollants suivants sont apposés sur la machine X Étiquettes à gauche et à droite de la plaque de tonte 1 3 2a Danger Ne montez pas dessus Outils rotatifs Niveau de bruit garanti X Étiquettes sur le carénage sous le siège 1 3 2b Danger Ne touchez pas pendant l utilisation Arrêter le moteur et débrancher le fil de la bougie avant de nettoyer le carter de lame d ins pecter ou de réparer la tond...

Page 108: ...ssis de la machine sous le capot 1 3 2c Attention Surface chaude Risque de brûlures X Étiquettes sur la pédale de déplacement 1 3 2d R Marche arrière N Point mort F Marche avant Rapide Lent X Étiquette au niveau de la pédale de frein 1 3 2e Frein ...

Page 109: ... mm 2480 x 950 x 1120 Poids de la machine kg 255 Vitesse marche avant marche arrière km h 9 7 Hauteur de tonte mm 30 90 Couverture de coupe mm 92 Volume du récupérateur d herbe l 300 Indicateur de bac de ramassage plein Sonnerie Dimen sions des roues Avant 15 x 6 6 Arrière 18 x 8 5 8 Capacité du réservoir à carburant l 7 Type de batterie 12V 24 Ah ...

Page 110: ...norme EN ISO 11201 Niveau d émission garanti de puissance acoustique LWA dB Valeur globale de l accélération des vibrations m s 2 selon la norme EN 1033 A1 Valeur de l accélération des vibrations tout le corp avd Valeur cumulée de l accélération des vibrations sur la main bras avd BS 3130 2700 85 1 100 1 0 0 5 7 0 3 0 BS 4155 2700 86 4 100 1 2 0 5 2 5 BS 4175 2700 85 4 100 0 8 0 4 5 0 2 0 BS 7160 ...

Page 111: ...annule la garantie Respectez toutes les exigences liées à la sécurité incendie 2 4 Ne retirez pas les autocollants de sécurité ou les étiquettes de la machine Vérifier qu elles se trouvent au bons endroits Ne restez pas à proximité de la machine ou au dessous de celle ci dans le cas où elle serait soulevée et qu elle ne serait pas suffisamment fixée pour empêcher sa chute ou son basculement Les co...

Page 112: ...e de tonte et le mécanisme de la machine En cas d impact avec un objet rigide arrêtez et éteignez la plaque de tonte et le moteur puis inspectez toute la machine notamment le mécanisme de direction Si nécessaire effectuez les réparations avant de redémarrer le moteur Évitez dans la mesure du possible l utilisation de la machine sur l herbe mouillée La traction réduite pourrait la faire patiner Évi...

Page 113: ...aux trous aux racines et au terrain irrégulier Un terrain irrégulier peut faire retourner la machine L herbe haute peut masquer des obstacles Par conséquent retirez à l avance tous les corps étrangers de la zone que vous voulez tondre Sélectionnez une vitesse suffisante pour ne pas vous arrêter en côte Soyez très prudent lorsque vous fixez le récupérateur d herbe ou pendant les autres raccordement...

Page 114: ...ont les vapeurs sont explosives Ne fumez pas durant cette opération Ne dévissez jamais le bouchon du réservoir d essence et ne faites pas le plein d essence lorsque le moteur est en marche s il est chaud ou si la machine se trouve dans un endroit clos Vérifiez les tuyaux d essence avant l utilisation et ne remplissez pas le réservoir d essence jusqu au col La chaleur générée par le moteur le solei...

Page 115: ... produire pendant le transport Déballer tous les ensembles emballés séparément et inspectez les 3 1 1 Emballage en caisse 2 Rampes 3 Récupérateur d herbe 4 Documentation 5 Siège 6 Volant Le colis de base comprend X Tracteur à pelouse X Volant 6 X Siège 5 X Récupérateur d herbe 3 il est partiellement désassemblé dans la boîte en carton avec un attelage et du matériel pour l assemblage X Documentati...

Page 116: ...l marron Placez le sur la borne de la batterie et fixez le en position avec le boulon X Placez les caches en caoutchouc sur les deux bornes X Réinstallez le cache de l espace de rangement et fixez le levier Le branchement des fils dans le sens contraire à ce qui est décrit ci dessus endommagera la machine Lors du débranchement de la batterie débranchez toujours le pôle négatif de la batterie en pr...

Page 117: ...ignée 7 Sac filet 8 Tube avant 13 Bouton d attelage du récupérateur d herbe 3 3 2b X INSTALLATION DU RÉCUPÉRATEUR D HERBE X Vissez les charnières du récupérateur d herbe 10 et la charnière 11 sur la plaque arrière 3 3 2c Sur certaines machines les charnières 10 sont déjà pré montées sur la plaque arrière N installez la charnière 11 que si la remorque est utilisée X Fixez le tube avant dans les tro...

Page 118: ...es estampées sur le couvercle du récupérateur d herbe et le capot de la machine Corrigez les éventuelles irrégularités en desserrant les boulons sur le tube avant et ou les boulons sur les montants latéraux puis rectifiez l alignement et resserrez les boulons 3 3 2m Sur un récupérateur d herbe correctement réglé l espace entre la plaque arrière de la machine et le tube du châssis avant 8 3 3 2b ne...

Page 119: ...us de ne pas renverser de carburant lors du remplissage Le carburant renversé peut prendre feu très facilement Si vous renversez du carburant essuyez le soigneusement Conservez les carburants hors de portée des enfants Procédure de remplissage X Ouvrez le bouchon du réservoir de carburant Ouvrez le lentement car le réservoir peut être en surpression à cause des vapeurs d essence X Insérez un enton...

Page 120: ...rage d un moteur froid MAX Régime moteur maximum MIN Régime moteur minimum ralenti Uniquement sur les machines avec moteur BS15 BS17 et K 1600 2 COMPTEUR HORAIRE DU MOTEUR Le compteur horaire du moteur affiche le nombre total d heures du moteur Appuyez sur la touche Mode pour commuter entre les fonctions de service suivantes TMR 1 compteur de trajet individuel La remise à zéro est effectuée en ten...

Page 121: ...t plein Plaque de tonte AUT NON ENCLENCHE AUT OUI DESENCLENCHE MAN NON ENCLENCHE MAN OUI ENCLENCHE 4 DESACTIVATION DU DESENGAGEMENT DE LA PLAQUE DE TONTE EN MARCHE ARRIERE L interrupteur R permet de désactiver la fonction de désengagement automatique de la plaque de tonte pendant la marche arrière 5 5 1 R L interrupteur doit être enfoncé lorsque la plaque de tonte a déjà été désengagée automatique...

Page 122: ...us la machine progresse rapidement et inversement Lorsque la pédale est relâchée elle revient automatiquement au point mort et la machine s arrête Plus d informations 5 5 ATTENTION Le changement de direction de déplacement avant arrière n est possible qu après avoir immobilisé la machine 9 PÉDALE DE MARCHE ARRIÈRE La pédale contrôle la puissance transmise aux roues et régule la vitesse de la machi...

Page 123: ...VATION DE LA PLAQUE DE TONTE Le levier sert à régler la hauteur d élévation de la plaque de tonte par rapport au sol Le levier possède 6 positions de travail qui correspondent à une hauteur de coupe de 3 à 9 cm Plus le numéro de position du levier est élevé plus la hauteur de la végétation restant après la tonte est élevée Lorsque vous vous déplacez sans tondre le levier doit être en position 7 13...

Page 124: ...machines avec moteur BS15 BS17 KO15 TE17 et HO16 ne sont pas équipés d un starter indépendant 2 BUZZER Le buzzer émet un signal sonore lorsque le récupérateur d herbe est plein Après le signal sonore indiquant que le récupérateur d herbe est plein la plaque de tonte n est pas désenclenchée ...

Page 125: ...carburant 3 4 3 X Pression des pneus 3 4 4 5 2 DÉMARRAGE DU MOTEUR La machine est équipée d une fonction qui empêche le démarrage du moteur si les conditions de sécurité suivantes ne sont pas présentes X L entraînement de la plaque de tonte est débrayé X La pédale de déplacement n est pas enfoncée X Le conducteur est assis sur le siège de la machine X La pédale de frein est enfoncée ou le frein es...

Page 126: ...stème électrique de la machine qui empêcherait sont démarrage même si les conditions préalables au démarrage sont présentes voir plus haut Procédure pour activer le système de déplacement d urgence X asseyez vous sur le siège X enfoncez la pédale de frein X placez la clé dans le démarreur en position allumage circuit électrique connecté X Appuyez 5 fois sur le bouton R Il est ensuite possible de d...

Page 127: ...on est installé l interrupteur AUT MAN accessoire en option est en position AUT et le récupérateur d herbe est vide l interrupteur AUT MAN accessoire en option est en position MAN 5 4 2 DÉBRAYAGE DE LA PLAQUE DE TONTE X Débrayez la plaque de tonte en enfonçant l interrupteur d embrayage Si le conducteur quitte le siège le moteur est automatiquement arrêté et il en est de même pour les lames de cou...

Page 128: ...ampes afin d éviter d endommager la plaque de tonte et la transmission X Évitez les forts impacts des roues avant contre des obstacles rigides car cela peut endommager l essieu avant notamment lorsque la machine se déplace à grande vitesse 5 5 1 AVANCER EN MARCHE AVANT ARRIERE X Déplacez lentement la manette des gaz à la position MIN pour faire baisser le régime moteur X Appuyez lentement sur la p...

Page 129: ...nditions État de la végétation Vitesse recommandée Haute dense et mouillée 2 km heure Conditions moyennes 3 à 5 km heure Végétation basse sèche 5 km heure Déplacement sans que la plaque de tonte soit enclenchée 8 km heure 5 5 4 DÉPLACEMENT EN PENTE Le tracteur à pelouse OM EF 92 peut être utilisé sur des pentes ayant une inclinaison maximum de 10 17 Lors du travail en pente il est nécessaire de re...

Page 130: ... machines avec levage et basculement manuels du récupérateur d herbe Levez la poignée levier de déversement du récupérateur d herbe complètement 1 et inclinez la vers le bas 2 pour faire basculer le récupérateur d herbe laissez le se vider complètement puis relâchez doucement et réinstallez le en place 5 6b X Sur les machines équipées d un système de levage et de basculement mécanique du récupérat...

Page 131: ...ctrolyte nettoyage Inspection et réglage des ceintures 4 Inspection des commandes de freinage Inspection de la pression des pneus Inspection des raccords de câbles raccords rapides Nettoyage de la plaque de tonte Inspection des raccords boulonnés Inspection de la tension de la courroie dentelée d entraînement de la lame 4 Inspection de la tension correcte de la courroie d entraînement en V de la p...

Page 132: ... bouchon de l orifice de remplissage Dévissez la jauge à huile essuyez la remettez la en position et revissez la Dévissez la ensuite à nouveau pour effectuer la lecture du niveau d huile Le niveau d huile doit se trouver entre les deux repères sur la jauge Si ce n est pas le cas faites le plein d huile moteur afin d atteindre le repère PLEIN Davantage de détails sur le contrôle et le remplissage d...

Page 133: ...rrect et régulier de la batterie permet de prolonger sa durée de vie Par conséquent vérifiez régulièrement son état conformément au manuel fourni par le constructeur de la batterie X Maintenez les bornes de la batterie propres Si la saleté s y accumule ou si elles sont rouillées nettoyez les conformément aux recommandations du constructeur de la batterie L interruption du circuit provoquée par l o...

Page 134: ...agée ne doit en aucun cas être mise au rebut avec les autres déchets ni être déversée dans les égouts les poubelles ou sur le sol X ENTRETIEN DU FILTRE À AIR Ne laissez jamais le moteur tourner sans filtre à air Il risquerait de s user rapidement Entretenez le filtre à air conformément aux instructions contenues dans le manuel d utilisation du moteur fourni par son constructeur X ENTRETIEN DE LA B...

Page 135: ...sible grillé et insérez un nouveau fusible de la même valeur que le fusible d origine c est à dire 15A ou 5A Si après le remplacement du fusible le moteur ou la plaque de tonte ne fonctionnent pas contactez un centre d assistance agréé X Certains modèles de machines sont équipés d un tableau de distribution central Vous ne devez sous aucun prétexte altérer ce tableau de distribution La seule excep...

Page 136: ... plaque de tonte Lors de l équilibrage insérez le tournevis dans le trou central et placez la lame dans une position horizontale Si la lame reste dans cette position elle est équilibrée Si l une des extrémités retombe meulez ce côté jusqu à atteindre l équilibrage Lors de l équilibrage par meulage ne raccourcissez pas la longueur de la lame Le déséquilibre statique admis ne doit pas dépasser 2 g S...

Page 137: ... X Desserrez les deux écrous et les rondelles du mécanisme de tension de la courroie d entraînement sur la plaque de tonte Cela libère le ressort et la courroie Retirez la courroie des poulies 6 3 7c X Tournez l ensemble de la poulie de manière à pouvoir accéder aux boulons à l arrière de la plaque de tonte X Réglez les distances A B et C correctement en ajustant les boulons à l avant et à l arriè...

Page 138: ...6 3 7d X Il n est pas nécessaire de retirer les boulons sur le côté avant de la plaque de tonte il suffit de décrocher le carter du support de retenue 6 3 9b X Tirez lentement la plaque de tonte hors de la machine 6 3 9c 6 3 10 MAINTENANCE DE LA DIRECTION Vérifiez régulièrement qu il n y a pas de jeu excessif entre le segment de direction dentelé et le pignon du volant En cas de jeu important il e...

Page 139: ...tage qui suit pourra être très difficile Lors du montage de la roue arrière faites attention à l alignement entre la goupille sur l axe et de la rainure sur la roue 6 3 14 REPARATION D UNE CREVAISON La machine est équipée de pneus sans chambre à air En cas de crevaison faites réparer par un atelier de réparation de pneus spécialisé ou dans un centre d assistance agréé pour les machines Seco 6 3 15...

Page 140: ...ection démonter lubrifier X boulon de la barre de traction des freins lubrifier la tige de traction au niveau de l orifice du boulon X boulon de la barre de traction pour l élévation de la plaque de tonte lubrifier la tige de traction au niveau de l orifice du boulon X articulations angulaires raccordant les barres de traction de la direction démonter lubrifier X raccords angulaires des goupilles ...

Page 141: ...onctionner avec la vanne des gaz complètement ouverte Lorsque vous tondez de l herbe haute tondez d abord à une hauteur élevée puis une nouvelle fois à une hauteur normale Respectez les informations du chapitre 5 5 3 X Vérifiez la tension de la courroie de direction 6 3 8 Réglez la tension si nécessaire X Vérifiez et particulièrement après leur remplacement que les lames sont installées correcteme...

Page 142: ...Vérifiez le cheminement de la courroie Ajustez le au besoin X Vérifiez si les poulies sont endommagées Remplacez les si nécessaire X Vérifiez le jeu dans le mécanisme d embrayage Des dérivations peuvent entraîner la courbure la déformation du support des roulements d embrayage Remplacez le si nécessaire La machine n avance pas lorsque la pédale est enfoncée X Vérifiez la tension de la courroie d e...

Page 143: ...La garantie ne prive pas l acheteur des droits qui lui sont octroyés par le code civil contre les conséquences ou les vices causés par la chose vendue 2 Le personnel technique interviendra le plus rapidement possible dans les délais concédés par les nécessités organisationnelles 3 Pour demander l assistance sous garantie il est nécessaire de présenter au personnel agréé le certificat de garantie c...

Page 144: ...usagées et serrez tous les écrous et les boulons X Préparez le moteur pour l entreposage conformément au manuel d utilisation et d entretien du moteur X Lubrifiez tous les points de lubrification conformément au diagramme de lubrification 6 4 X Retirez la batterie nettoyez la remplissez la d eau distillée jusqu à la partie inférieure des bagues des orifices de remplissage et rechargez la complètem...

Page 145: ...E Type de dispositif de tonte lame rotative Largeur de coupe 92 cm F Nous confirmons que cet équipement mécanique défini ci dessus est conforme aux exigences des règlements techniques ci dessus et qu il est s û r d utilisation dans des conditions normales des mesures ont été prises pour assurer la conformité de tous les produits introduits sur marché avec la documentation technique et les exigence...

Page 146: ...euvent apparaître dans ce manuel par rapport au produit réel Cela ne donne droit à aucune réclamation L impression la reproduction la publication et la traduction même partielle ne peuvent être réalisées sans l autorisation écrite de Emak S p A Le constructeur se réserve le droit de modifier les paramètres techniques du produit sans avertir au préalable le client ...

Page 147: ...ivolga senza esitazioni a uno tra i nostri oltre 100 centri di assistenza autorizzati dotati di tutte le idonee apparecchiature sparsi in tutta Europa La metteranno in contatto con consulenti dell assistenza formati presso la fabbrica e sottoposti a test Simboli usati nel manuale SIMBOLO SIGNIFICATO Questi simboli significano ATTENZIONE e AVVERTENZA e mettono in evidenza fattori che potrebbero dan...

Page 148: ... per sostenere la maggior parte dei componenti principali della macchina 2 Asse anteriore e ruote comprendenti il meccanismo di sterzo L asse anteriore consente di girare le ruote Viene utilizzato un volante per lo sterzo 3 Piatto di taglio L elemento tagliaerba taglia e raccoglie l erba Si trova sotto la macchina Si compone di una protezione una piastra principale e due lame di taglio 4 Scivolo d...

Page 149: ...LTRE ETICHETTE E RELATIVO SIGNIFICATO Sulla macchina sono applicate le etichette e gli adesivi seguenti X Etichette sul lato sinistro e destro del piatto di taglio 1 3 2a Pericolo Tenere lon tani i piedi Strumenti rotanti Livello di rumore ga rantito X Etichette sulla calotta dietro il sedile 1 3 2b Pericolo Non toccare durante il funziona mento Prima di effettuare qualsiasi pulizia o riparazione ...

Page 150: ...stro del telaio della macchina sotto il cofano 1 3 2c Attenzione Superficie incandescen te Rischio di ustioni X Etichette sul pedale di marcia 1 3 2d R Retromarcia N Folle F Avanti Veloce Lento X Etichetta sul pedale del freno 1 3 2e Freno ...

Page 151: ...2480 x 950 x 1120 Peso della macchina kg 255 Marcia avanti retromarcia km h 9 7 Altezza di taglio mm 30 90 Larghezza di taglio mm 92 Volume del contenitore dell erba l 300 Indicatore contenitore di erba pieno Segnale acustico Dimen sioni delle ruote Avanti 15 x 6 6 Retro 18 x 8 5 8 Capacità del serbatoio del carburante l 7 Tipo di batteria 12V 24 Ah ...

Page 152: ...ndo EN ISO 11201 Livello di emissione di potenza acu stica garantito LWA dB Valore aggregato di accelerazione delle vibrazioni m s 2 secondo EN 1033 A1 Valore di accelerazione delle vibrazioni del corpo avd Valore aggregato di accelerazione delle vibrazioni mano braccio a vd BS 3130 2700 85 1 100 1 0 0 5 7 0 3 0 BS 4155 2700 86 4 100 1 2 0 5 2 5 BS 4175 2700 85 4 100 0 8 0 4 5 0 2 0 BS 7160 2700 8...

Page 153: ...e qualsiasi modifica tecnica Le modifiche non autorizzate possono determinare condizioni di lavoro pericolose e rendono nulla la garanzia Rispettare tutte le normative per la sicurezza antincendio 2 4 Non rimuovere dalla macchina gli adesivi e le etichette sulla sicurezza Verificare che si trovino nelle posizioni corrette Non andare vicino o sotto la macchina se è stata sollevata e non è sufficien...

Page 154: ...etra di giardini e strade Potrebbero venire a contatto con le lame e danneggiare il piatto di taglio e il meccanismo della macchina Se si incontra un oggetto solido occorre arrestare la macchina arrestare le lame e il motore e quindi controllare l intera macchina in particolare meccanismo di sterzo Se occorre riparare eventuali danni prima di riavviare la macchina Ove possibile evitare di lavorare...

Page 155: ...cessario Fare attenzione alle buche alle radici e al terreno ineguale Il terreno ineguale può causare il ribaltamento della macchina L erba alta può nascondere ostacoli pericolosi Pertanto occorre prima rimuovere gli ostacoli dalla superficie di taglio Selezionare una velocità che non richieda l arresto su una pendenza Prestare la massima attenzione quando si attacca il sacco di raccolta dell erba...

Page 156: ...abili i cui fumi possono provocare esplosioni Non fumare durante il lavoro Non svitare mai il tappo del carburante e non aggiungere carburante mentre il motore è in funzione o ancora caldo né quando la macchina si trova in spazi chiusi Primadell uso controllareilflussodelcarburante nonriempireilserbatoiofinoalcollo Ilcaloredelmotore il sole e l espandibilità del carburante potrebbero determinare u...

Page 157: ...l trasporto Disimballare anche tutti i componenti smontati e controllarli 3 1 1 Imballo di trasporto con cassa 2 Scivoli di accesso 3 Sacco di raccolta dell erba 4 Documentazione 5 Sedile 6 Volante La confezione base comprende X Rasaerba ride on X Volante 6 X Sedile 5 X Il sacco di raccolta dell erba 3 è parzialmente smontato nella scatola di cartone insieme ai materiali di aggancio e raccordo X D...

Page 158: ...sizionare i tappi di gomma su entrambi i cavi X Risistemare il coperchio del vano portaoggetti e fissarlo con la leva Se si collegano in modo inverso i cavi la macchina potrebbe esserne danneggiata Quando si scollega la batteria scollegare sempre per primo il terminale negativo Quando si installa si utilizza e si esegue la manutenzione sulla macchina procedere secondo le istruzioni descritte nel m...

Page 159: ...DELL ERBA XAvvitare i ganci del sacco di raccolta dell erba 10 e il gancio 11 alla piastra posteriore 3 3 2c Su alcune macchine i ganci 10 sono già pre montati sulla piastra posteriore Installare il gancio 11 solo se si utilizza un rimorchio X Fissare il tubo anteriore ai fori superiori nelle staffe utilizzando dadi e bulloni M5x16 Avvitare l interruttore del dispositivo di aggancio del sacco di r...

Page 160: ...amente regolato lo spazio tra la piastra posteriore della macchina e il tubo della struttura anteriore 8 3 3 2b non deve essere superiore a 5 mm X Se non è possibile eseguire l allineamento utilizzando la procedura descritta di sopra eseguire la regolazione facendo scorrere il dispositivo di aggancio del contenitore dell erba sulla piastra posteriore o i bulloni e i supporti sul lato superiore del...

Page 161: ...l tappo del serbatoio del carburante Aprirlo con lentezza poiché il serbatoio potrebbero contenere vapori di benzina sotto pressione X Inserire l imbuto nella bocchetta di rifornimento e versare il carburante da una tanica X Dopo aver riempito il serbatoio asciugare sempre completamente il tappo e l area circostante È opportuno controllare le linee del livello di carburante Si consiglia di pulire ...

Page 162: ...assima del motore MIN Velocità minima del motore inattivo Solo su macchine con motore BS15 BS17 e K 1600 2 INDICATORE DELLE ORE DEL MOTORE L indicatore delle ore del motore visualizza in modo implicito il numero totale di ore del motore Premendo il pulsante Modalità è possibile passare gradualmente tra le seguenti funzioni di manutenzione TMR 1 contatore dei singoli giri Il valore viene azzerato t...

Page 163: ...eno Posizione Contenitore dell erba pieno Piatto di taglio AUT NO INSERITO AUT SÌ DISINSERITO MAN NO INSERITO MAN SÌ INSERITO 4 DISATTIVAZIONE DEL DISINNESTO DEL PIATTO DI TAGLIO PER L INVERSIONE L interruttore R serve per disattivare il disinnesto del piatto di taglio automatico durante l inversione 5 5 1 R L interruttore deve essere premuto quando il piatto di taglio è già stato automaticamente ...

Page 164: ...della macchina e vice versa Quando il pedale viene rilasciato tornerà automaticamente alla posizione neutra e la macchina si arresterà Per ulteriori informazioni 5 5 ATTENZIONE è possibile cambiare la direzione di marcia avanti retromarcia solo dopo aver arrestato la macchina 9 PEDALE MARCIA INDIETRO Il pedale controlla la potenza trasmessa alle ruote e regola la velocità della macchina indietro P...

Page 165: ...La leva serve per regolare l altezza di sollevamento del piatto di taglio rispetto al terreno La leva ha 6 posizioni di funzionamento che corrispondono a un altezza di taglio da 3 a 9 cm Maggiore è il numero della posizione della leva più alta sarà l altezza della vegetazione dopo il taglio Quando si guida la macchina senza tagliare la leva deve essere impostata sulla posizione 7 13 LEVA DI ESCLUS...

Page 166: ...e a freddo Non tutte le machine sono dotate di avviamenti a parte 2 CICALINO Il cicalino emette un segnale acustico quando il sacco di raccolta dell erba è pieno Dopo il segnale acustico che indica un sacco di raccolta dell erba pieno le lame non vengono disinnestate ...

Page 167: ... dell aria negli pneumatici 3 4 4 5 2 AVVIO DEL MOTORE La macchina è dotata di una funzione che impedisce l avvio del motore se le seguenti condizioni di sicurezza non sono soddisfatte X La trasmissione dell elemento di taglio è disinnestata X Il pedale di marcia non è premuto X Il conducente è seduto sul sedile della macchina X Il pedale del freno è premuto o il freno è innestato nella posizione ...

Page 168: ...ento del sistema elettrico della macchina che impedisce l avvio della macchina dopo aver soddisfatto tutte le condizioni di partenza vedi sopra Procedura per l attivazione del sistema di marcia di emergenza X sedersi sul sedile X premere il pedale del freno X inserire la chiave nella scatola del cambio in posizione accensione circuiti elettrici collegati X Premere il pulsante R 5 volte Successivam...

Page 169: ...to l interruttore AUT MAN accessorio opzionale è in posizione MAN 5 4 2 DISINNESTO DELLE LAME TAGLIAERBA X Disinnestare delle lame tagliaerba premendo l interruttore di innesto Se il guidatore lascia il sedile il motore si arresta automaticamente e tale condizione arresta anche la rotazione delle lame Tuttavia non si deve mai spegnere il meccanismo di taglio solo lasciando il sedile Se non si comm...

Page 170: ...ostacoli soldi che potrebbero danneggiare gli assi anteriori specialmente ad alte velocità 5 5 1 MARCIA IN AVANTI INDIETRO X Muovere lentamente la leva dell aria in posizione MIN Questo ridurrà la velocità del motore X Spingere lentamente sul pedale di marcia a seconda della direzione di marcia desiderata avanti o retromarcia Attenzione Se si preme rapidamente il pedale si possono provocare incide...

Page 171: ...oni medie 3 5 km ora Vegetazione corta secca 5 km ora Marcia senza l elemento tagliaerba inserito 8 km ora 5 5 4 MARCIA SU PENDENZA Il rasaerba ride on OM EF 92 è in grado di funzionare su pendenze con un gradiente fino a 10 17 Quando si lavora su pendenze occorre attenersi ai seguenti principi X Prestare la massima attenzione quando si lavora su una pendenza X Guidare sempre a una velocità inferi...

Page 172: ...e sulla posizione MIN X Sulle macchine con sollevamento e inclinazione manuale del contenitore dell erba Far scorrere completamente la leva di scarico del sacco di raccolta 1 e inclinarla verso il basso 2 per svuotare il sacco di raccolta dell erba Lasciare che si svuoti liberamente allentandolo gradualmente e inclinandolo di nuovo 5 6b X Sulle macchine con dispositivo di sollevamento e inclinazio...

Page 173: ...lle cinghie di trasmissione 4 Ispezione dei comandi del freno Controllo della pressione dei pneumatici Controllo dei collegamenti dei cavi connettori allentati Pulizia del piatto tagliaerba Controllo delle connessioni dei bulloni Controllo della tensione della cinghia di trasmissione della lama dentata 4 Controllo della tensione corretta della cinghia trapezoidale della trasmissione del piatto tag...

Page 174: ... dell olio deve trovarsi tra i due segni presenti sull astina In caso contrario aggiungere olio motore fino a raggiungere il segno FULL PIENO Ulteriori informazioni sul controllo e il rabbocco dell olio sono riportate in un manuale di istruzioni a parte fornito dal produttore del motore X CONTROLLO DEI CAVI E DEI FISSAGGI CON I BULLONI Ispezionare visivamente lo stato dei cavi e controllare manual...

Page 175: ...rata della batteria Pertanto occorre controllarla secondo quanto indicato nel manuale di istruzioni della batteria fornito dal produttore X Mantenere puliti i contatti della batteria Se si sporcano o si corrodono occorre pulirli secondo le istruzioni del produttore della batteria L interruzione del circuito causata dall ossidazione dei contatti può causare il malfunzionamento della funzione di ric...

Page 176: ...ti domestici e non versarlo in fognature nell immondizia o sul terreno X MANUTENZIONE DEL FILTRO DELL ARIA Non far mai funzionare il motore senza il filtro dell aria Altrimenti si rischia di usurare rapidamente il motore Eseguire la manutenzione del filtro dell aria secondo le istruzioni indicate nel manuale fornito dal produttore del motore X MANUTENZIONE DELLA CANDELA D ACCENSIONE Per ottenere u...

Page 177: ...zione dei fusibili X Rimuovere il fusibile e inserire quello nuovo con lo stesso valore nominale dell originale vale a dire 15A o 5A Se non è possibile avviare il motore o l elemento tagliaerba dopo la sostituzione del fusibile occorrerà rivolgersi al centro di assistenza di fiducia X Determinati modelli sono muniti di una centralina Non manomettere la centralina per nessuna ragione L unica eccezi...

Page 178: ... impostare la lama in posizione orizzontale Se la lama rimane in questa posizione è bilanciata Se una delle estremità pende verso il basso affilare questo lato finché non è bilanciato Durante il bilanciamento tramite affilatura non accorciare la lunghezza della lama Lo sbilanciamento statico consentito non può superare 2g Se non si è sicuri della procedura contattare un centro di assistenza autori...

Page 179: ...lloni nella parte anteriore e posteriore dell elemento tagliaerba 6 3 7d Durante la regolazione della distanza C si consiglia di posizionare qualcosa sotto entrambi i lati del coperchio del piatto di taglio utilizzare sottostrati delle stesse dimensioni es travi in legno ecc e utilizzarli per mettere in piano il piatto di taglio in modo tale che la distanza dal pavimento sia la stessa sia a sinist...

Page 180: ...un gioco eccessivo tra il segmento dello sterzo dentato e il pignone del volante Se viene rilevato un gioco superiore è necessario limitarlo 6 3 10 Se non si provvede a questo intervento di manutenzione possono prodursi danni ai componenti dello sterzo Procedura per la limitazione regolazione del gioco X Aprire il cofano della macchina X Allentare due dadi M12 1 sul bullone dell eccentrico X Sull ...

Page 181: ...era d aria Se presentano difetti affidarsi per la riparazione a un gommista professionista o a un centro di assistenza autorizzato 6 3 15 MANUTENZIONE DELLA TRASMISSIONE IDROSTATICA Per garantire un funzionamento affidabile della trasmissione occorre mantenere un adeguato livello dell olio Le bocchette di riempimento della trasmissione sotto accessibili dopo aver tolto lo scivolo di espulsione dal...

Page 182: ...X giunzioni angolari dei tiranti dello sterzo rimuovere lubrificare X giunzioni angolari del perno della ruota rimuovere lubrificare X cuscinetti della ruota anteriore X perni della ruota che passano attraverso l asse X perno di cardine centrale dell asse anteriore per mezzo di un ingrassatore X cuscinetti dell albero del volante lubrificare X segmento ed eccentrico dello sterzo ostruiti lubrifica...

Page 183: ...e aperta Durante il taglio dell erba alta tagliare innanzitutto a un altezza di taglio elevata poi ancora all altezza normale Seguire le informazioni contenute nel capitolo 5 5 3 X Controllare la tensione della cinghia di trasmissione 6 3 8 Se occorre regolare la tensione X Verificare in particolare dopo aver sostituito le lame che la lama sia installata correttamente La cinghia di trasmissione de...

Page 184: ...ificare il percorso della cinghia Se occorre procedere alla regolazione X Controllare l eventuale presenza di pulegge danneggiate Se occorre procedere alla sostituzione X Verificare lo spazio del meccanismo della frizione di marcia Possono risultare deviazioni nel portacuscinetto della frizione se viene piegato fino a perdere la forma Se occorre procedere alla sostituzione La macchina non avvia la...

Page 185: ...enza tecnica sostituisce gratuitamente le parti difettose dovute a materiale lavorazioni e produzione La garanzia non toglie all acquirente i diritti legali previsti dal codice civile contro le conseguenze dei difetti o vizi causati dalla cosa venduta 2 Il personale tecnico interverrà il più presto possibile nei limiti di tempo concessi da esigenze organizzative 3 Per richiedere l assistenza in ga...

Page 186: ...X Preparare il motore per il deposito secondo le indicazioni del manuale per l utente sul motore X Lubrificare tutti i punti da oliare secondo il programma di lubrificazione 6 4 X Togliere la batteria pulirla riempirla di acqua distillata fino alla parte inferiore del cerchio nella bocchetta di riempimento e caricarla completamente Le batterie scariche possono congelare ed esplodere Se occorre dep...

Page 187: ...egno Unito E Tipo di dispositivo di taglio lama rotativa Larghezza di taglio 92 cm F Si conferma che la presente macchina secondo la definizione che emerge dai dati forniti è conforme ai requisiti prescritti dalle suddette normative tecniche ed è sicura in condizioni di uso normale sono state assunti i provvedimenti per assicurare la conformità di tutti i prodotti immessi sul mercato con una docum...

Page 188: ...nte manuale possono differire dall effettivo prodotto Tale differenza non può costituire causa di reclamo Sono vietate la stampa la duplicazione la pubblicazione o la traduzione totale o parziale senza autorizzazione scritta di Emak S p A Il produttore si riserva il diritto modificare parametri tecnici del prodotto senza preavviso al cliente ...

Page 189: ...of als u vragen hebt neem dan contact op met een van de meer dan 100 officiële professioneel uitgeruste servicecentra die overal in Europa zijn gevestigd waar opgeleide en geteste experts klaarstaan om u te assisteren Symbolen die in deze handleiding worden gebruikt SYMBOOL BETEKENIS Deze symbolen betekenen ATTENTIE en WAARSCHUWING zij geven u informatie over mogelijke oorzaken van beschadiging va...

Page 190: ... 1 2 1 Frame met een bumper Het frame met de bumpers dient als een draagelement voor de meeste van de hoofdonderdelen van de machine 2 Vooras met wielen inclusief stuurinrichting De vooras maakt dat de wielen kunnen draaien Er een stuur is voor de besturing 3 Maaimechanisme Het maaimechanisme maait en verzamelt het gras Het bevindt zich onder de machine Het bestaat uit een kap een hoofdplaat en tw...

Page 191: ...LABELS en hun betekenis De volgende labels en stickers zijn op de machine bevestigd X Labels aan de linker en rechterzijde het maaimechanisme 1 3 2a Gevaar Niet op staan Roterende messen Gegaran deerd ge luidsniveau X Labels op de carrosserie onder de zitting van de stoel 1 3 2b Gevaar Niet aanra ken tijdens gebruik Voor iedere schoon maakbeurt of reparatie de motor stoppen en de bou gie aanslui t...

Page 192: ...n rechterzijde van het chassis van de machine onder de kap 1 3 2c Voorzichtig Heet opper vlak Risico van brandwon den X Labels bij het rijpedaal 1 3 2d R Achteruit N Vrij F Vooruit Snel Langzaam X Label op het rempedaal 1 3 2e Rem ...

Page 193: ...eedte x hoogte mm 2480 x 950 x 1120 Gewicht van de machine kg 255 Snelheid vooruit achteruit km u 9 7 Maaihoogte mm 30 90 Maaibereik mm 92 Volume van der grasopvangbak l 300 Indicator voor volle grasopvangbak Zoemer Wielafme tingen Voor 15 x 6 6 Achter 18 x 8 5 8 Capaciteit brandstoftank l 7 Type accu 12V 24 Ah ...

Page 194: ...eerd emissieniveau van akoestisch vermogen LWA dB Samengestelde acceleratiewaarde van vibraties m s 2 volgens EN 1033 A1 Waarde van trilling acceleratie op de het hele lichaam avd Geaccumuleerde waarde van trilling acceleratie op de hand arm avd BS 3130 2700 85 1 100 1 0 0 5 7 0 3 0 BS 4155 2700 86 4 100 1 2 0 5 2 5 BS 4175 2700 85 4 100 0 8 0 4 5 0 2 0 BS 7160 2700 84 2 100 0 9 0 4 2 9 1 4 K 1600...

Page 195: ...erde modificaties kunnen leiden tot gevaarlijke werkcondities en maken de garantie ongeldig Neem alle eisen die worden gesteld met betrekking tot brandveiligheid in acht 2 4 Verwijder de veiligheidsstickers en labels niet van de machine Controleer dat zij op de juiste plaats zitten Blijf niet staan in de buurt van de machine of onder de machine als deze wordt opgetild en als deze opgetild niet vol...

Page 196: ...schadiging van het maaimechanisme en het mechanisme van de machine Stop als u op een massief voorwerp botst en schakel het maaimechanisme en de motor uit en inspecteer de gehele machine vooral de stuurinrichting Voer zo nodig reparaties uit voordat u de motor weer start Werk als dat mogelijk is niet met de machine in nat gras Verminderde tractie kan slippen tot gevolg hebben Blijf uit de buurt van...

Page 197: ...p een helling als het werkelijk niet anders kan Kijk goed uit voor gaten wortels en ongelijk terrein Oneffen terrein kan ertoe leiden dat uw machine omvalt Hoog gras kan obstakels aan het zicht onttrekken Verwijder daarom van tevoren alle ongewenste voorwerpen uit het terrein dat u wilt maaien Kies een zodanige snelheid dat u niet hoeft te stoppen op een heuvel Ga zeer voorzichtig te werk wanneer ...

Page 198: ...dampen ervan zijn explosief Rook niet tijdens deze werkzaamheden Draai nooit de dop van de benzinetank los en vul nooit benzine bij wanneer de motor loopt de motor heet is of de machine in een gesloten ruimte staat Controleer voor gebruik de benzineleidingen en vul geen benzine bij tot in de hals van tank De hitte die wordt gegenereerd door de motor en door de zon en het uitzetten van de brandstof...

Page 199: ...dens het vervoer kunnen zijn opgetreden Pak alle afzonderlijk verpakte onderdelen uit en inspecteer ze 3 1 1 Verpakking van de krat 2 Rijplanken 3 Grasopvangbak 4 Documentatie 5 Stoel 6 Stuurwiel De verpakking bevat X Tractormaaier X Stuurwiel 6 X Stoel 5 X De grasopvangbak 3 is gedeeltelijk gedemonteerd in de kartonnen doos met bindmateriaal X Documentatie 4 lijst van verpakte onderdelen gebruike...

Page 200: ...endel Wanneer u de draden anders vastzet dan hierboven wordt beschreven zal dat beschadiging van de machine tot gevolg hebben Wanneer u de accu loskoppelt maak dan altijd eerst de negatieve pool los van de accu Wanneer u de accu in gebruik neemt en wanneer u onderhoudswerkzaamheden aan de accu uitvoert ga dan te werk volgens de instructies in de gebruikershandleiding voor de accu Houd u ook aan al...

Page 201: ...arnieren van de grasopvangbak 10 en scharnier 11 op de achterplaat 3 3 2c Op sommige machines zijn de scharnieren 10 al op de achterplaat gemonteerd Bevestig scharnier 11 alleen als een aanhanger wordt gebruikt X Bevestig de voorste buis op de bovenste gaten in de beugels met M5x16 bouten en moeren Schroef de schakelaar van de grasopvangbak op de linker beugel van het frame met twee M5x16 bouten e...

Page 202: ...Corrigeer een eventuele ongelijke verdeling door de bouten aan de voorste buis en of de bouten in de zijbeugels los te draaien de verdeling te herstellen en de bouten weer vast te draaien 3 3 2m Op een goed afgestelde grasopvang is de ruimte tussen de achterplaat van de machine en de voorste buis van het frame 8 3 3 2b niet meer dan 5 mm X Als uitlijnen volgens de hierboven beschreven methode niet...

Page 203: ...kkelijk vlam vatten Als u brandstof morst veeg de gemorste brandstof dan grondig droog Sla brandstof op buiten het bereik van kinderen Procedure voor het tanken van brandstof X Draai de tankdop los Open de tanktop langzaam want er kan overdruk in de brandstoftank heersen die wordt veroorzaakt door benzinedampen X Plaats een trechter in de opening van de brandstoftank en begin de brandstof uit de v...

Page 204: ... de motor MIN Minimumsnelheid van de motor stationair Alleen bij machines met motoren BS15 BS17 en K 1600 2 MOTORURENTELLER De urenteller van de motor laat het totaalaantal uren zien dat de motor heeft gedraaid Door op de knop Mode te drukken kunt u geleidelijk overschakelen tussen de volgende onderhoudsfuncties TMR 1 ritteller U kunt de waarde resetten door de knop Mode 6 seconden ingedrukt te ho...

Page 205: ...AUT JA UITGESCHAKELD MAN NEE INGESCHAKELD MAN JA INGESCHAKELD 4 DEACTIVERING VAN DE ONTKOPPELING VAN HET MAAIMECHANISME VOOR ACHTERUITRIJDEN Schakelaar R dient om de functie van de automatische ontkoppeling van het maaimechanisme bij achteruitrijden uit te schakelen 5 5 1 R De schakelaar moet worden ingedrukt wanneer het maaimechanisme al automatisch is ontkoppeld maar de bladen nog niet zijn gest...

Page 206: ...ice versa Wanneer u het pedaal loslaat zal het automatisch teruggaan naar de neutrale stand en zal de machine stoppen Meer informatie 5 5 ATTENTIE U kunt de rijrichting pas veranderen van vooruit in achteruit of van achteruit in vooruit als u de machine hebt stilgezet 9 PEDAAL ACHTERWAARTSE RIJRICHTING Het pedaal regelt het vermogen dat op de wielen wordt overgebracht en de snelheid van de machine...

Page 207: ...AIMECHANISME Met deze hendel stelt u de hoogte af van het maaimechanisme tot de grond De hendel heeft 6 werkstanden die overeenkomen met een maaihoogte van 3 tot 9 cm Hoe hoger het getal van de positie van de hendel des te hoger is de begroeiing na het maaien Wanneer u rijdt zonder te maaien moet de hendel in positie 7 staan 13 BY PASSHENDEL VRIJLOOP VAN DE ACHTERWIELEN De functie van de by passhe...

Page 208: ...motor Machines met motoren BS15 BS17 KO15 TE17 en HO16 zijn niet uitgerust met aparte chokes 2 ZOEMER De zoemer geeft een geluidssignaal wanneer de grasopvangbak vol is Wanneer het geluidssignaal heeft geklonken ten teken dat de grasopvangbak vol is wordt het maaimechanisme niet uitgeschakeld ...

Page 209: ... 3 X Bandenspanning 3 4 4 5 2 DE MOTOR STARTEN De machine is voorzien van een functie die voorkomt dat de motor wordt gestart als niet aan de volgende veiligheidscondities wordt voldaan X De aandrijving van het maaimechanisme is ontkoppeld X Het rijpedaal is niet ingeduwd X De berijder zit in de stoel van de machine X Het rempedaal is ingeduwd of de rem is in de parkeerstand gezet STOP OK NO OK P ...

Page 210: ...e maakt dat de machine niet kan worden gestart nadat aan de startcondities is voldaan zie hierboven Procedure voor het activeren van het noodrijsysteem X ga op de stoel zitten X duw het rempedaal in X draai de sleutel in de schakelkast in de stand ignition on contact aan elektrische circuits aangesloten X Druk 5 keer op de knop R Vervolgens kunt u de machine starten en naar een plaats rijden waar ...

Page 211: ...ie verkrijgbaar accessoire staat in de stand MAN 5 4 2 HET MAAIMECHANISME UITSCHAKELEN X Schakel het maaimechanisme uit door de aan uit schakelaar omlaag te duwen Als de berijder uit de stoel opstaat wordt de motor automatisch uitgezet en daarbij ook de rotatie van de maaimessen stilgezet Maar u mag nooit het maaimechanisme uitschakelen door gewoon uit de stoel op te staan Als u niet de sleutel in...

Page 212: ...de vooras zou kunnen beschadigen vooral wanneer u met hoge snelheid rijdt 5 5 1 VOORUIT ACHTERUITRIJDEN X Verplaats de gashendel langzaam naar positie MIN De motorsnelheid neemt daardoor af X Trap langzaam het rijpedaal in afhankelijk van de gewenste rijrichting vooruit of achteruit Attentie U loopt het risico u te bezeren als u het pedaal snel intrapt U kunt de rijrichting alleen wijzigen van voo...

Page 213: ...itie van de begroeiing Aanbevolen snelheid Hoog dicht en nat 2 km uur Gemiddelde condities 3 5 km uur Lage droge vegetatie 5 km uur Rijden zonder dat het maaimechanisme is ingeschakeld 8 km uur 5 5 4 RIJDEN OP EEN HELLING De OM EF 92 tractormaaier kan werken op hellingen van maximaal 10 17 Wanneer werkt op een helling moet u zich houden aan de volgende beginselen X Let extra goed op wanneer u op e...

Page 214: ...ines waarbij de grasopvangbak met de hand omhoog moet worden gebracht en gekanteld Schuif de handgreep van de lifthendel van de grasopvangbak helemaal omhoog 1 en kantel omlaag 2 zodat de bak wordt leeggemaakt laat de bak ongehinderd leegstromen laat vervolgens langzaam los zodat de bak terugkantelt 5 6b X Op machines voorzien van een mechanische voorziening voor het omhoogbrengen en kantelen van ...

Page 215: ...andstoffilter Accuonderhoud controleer elektrolytniveau reiniging Inspectie en afstelling van de aandrijfriemen 4 Inspectie van de rembedieningsfuncties Inspectie van bandenspanning Inspectie van de kabelbevestigingen losse snelkoppeling van onderdelen Het maaimechanisme reinigen Inspectie van de boutbevestigingen Inspectie van spanning van de getande aandrijfriem van de maaimessen 4 Inspectie van...

Page 216: ...de peilstok los veeg deze droog plaats de peilstok weer en draai vast Draai de peilstok weer uit en lees het oliepeil af Het oliepeil moet tussen de twee markeringen op de peilstok staan Zo niet voeg dan motorolie toe totdat de FULL markering wordt bereikt Nadere bijzonderheden over het controleren en bijvullen van olie vindt u in de aparte gebruikershandleiding die door de fabrikant van de motor ...

Page 217: ...tie van de accu in overeenstemming met de instructies in de handleiding van de fabrikant X Houd de polen van de accu schoon Als er zich vuil op verzamelt of zij worden roestig maak ze dan schoon volgens de aanbevelingen van de fabrikant van de accu Onderbreking van het circuit die wordt veroorzaakt door oxidatie van de contacten kan ertoe leiden dat de accu niet meer wordt opgeladen door de motor ...

Page 218: ...lie wegdoen bij het huishoudelijk afval of de gebruikte olie door de afvoer of in de grond gieten X ONDERHOUD VAN HET LUCHTFILTER Laat de motor nooit draaien zonder een luchtfilter De motor zal dan snel slijten Onderhoud het luchtfilter volgens de instructies in de gebruikershandleiding die door de fabrikant van de motor is geleverd X ONDERHOUD VAN DE BOUGIE De motor kan alleen perfect lopen als d...

Page 219: ...X Verwijder de zekering en vervang deze door een zekering van hetzelfde type als de eerste zekering bijv 15A of 5A Als de motor of het maaimechanisme nog niet werkt als u de zekering hebt vervangen neem dan contact op met een geautoriseerde servicewerkplaats X Enkele machinemodellen zijn voorzien van een centraal schakelbord U mag onder geen enkele voorwaarde knoeien aan het schakelbord De enige u...

Page 220: ...nnen de motor of het maaimechanisme beschadigen Steek wanneer u gaat uitbalanceren een schroevendraaier in de centrale opening en plaats het mes in een horizontale stand Als het mes in deze positie blijft is het uitgebalanceerd Als één van de uiteinden van het mes zwaarder is slijp deze kant dan tot het mes uitgebalanceerd is Wanneer u het mes uitbalanceert door middel van slijpen mag u het niet k...

Page 221: ...c X Draai de riemschijf zo dat u bij de bouten aan de achterzijde van het maaimechanisme kunt komen X Stel de juiste afstanden A B en C in door de bouten in het voorste en achterste gedeelte van het maaimechanisme af te stellen 6 3 7d Bij het afstellen van afstand C wordt u geadviseerd iets onder beide zijden van de kap van het maaimechanisme te plaatsen gebruik een onderplaat van dezelfde afmetin...

Page 222: ...ussen het getande stuursegment en het rondsel van het stuurwiel Neemt u meer speling waar dan moet die worden verholpen 6 3 10 Wanneer dit onderhoud wordt verwaarloosd kan dat leiden tot beschadiging van de componenten van het stuurmechanisme Procedure voor het beperken aanpassen van speling X Open de kap van de machine X Draai twee M12 moeren 1 op de bout van de excenterschijf los X Plaats een ge...

Page 223: ... lekke band repareren door een gespecialiseerd bandencentrum of bij een geautoriseerde servicewerkplaats voor Seco machines 6 3 15 ONDERHOUD VAN DE HYDROSTATISCHE TRANSMISSIE De transmissie kan alleen betrouwbaar zijn werk doen als het juiste oliepeil gehandhaafd blijft U kunt de vulopeningen van de overbrengingen bereiken wanneer u de afvoerbuis van de machine haalt 6 3 9 De voorgeschreven waarde...

Page 224: ... het maaimechanisme smeer de trekstang in de buurt van het boutgat X hoekverbindingen van de stuurtrekstangen verwijderen smeren X wielpen hoekverbindingen verwijderen smeren X voorwiellagers X wielpennen die door de as gaan X centrale draaiende pen van de vooras via de smeernippel X lager stuurwielas smeren X getand stuursegment en excenterschijf smeren X wielpennen van de vooras voor de bevestig...

Page 225: ...Wanneer u lang gras maait maai dan eerst met een hoge afstelling en daarna pas op de gewone hoogte Volg de informatie in hoofdstuk 5 5 3 X Controleer de spanning van de aandrijfriem 6 3 8 Pas de spanning aan als dat nodig is X Controleer vooral na het vervangen van de messen dat de messen goed zijn geïnstalleerd De aandrijfsnaar van het maaimechanisme stopt tijdens het werken X Wanneer de aandrijf...

Page 226: ...s dat nodig is X Controleer de loop van de riem Pas deze aan als dat nodig is X Controleer of de riemschijven zijn beschadigd Vervang ze als dat nodig is X Controleer de ruimte in het rij koppelmechanisme Afwijkingen kunnen het gevolg zijn van het verbuigen van de houder van het koppelingslager Vervang deze als dat nodig is De machine gaat rijden wanneer u het gaspedaal indrukt X Controleer regelm...

Page 227: ...De garantie ontneemt de gebruiker niet de wettelijke rechten van het burgerlijk wetboek tegen de consequenties van de defecten of fouten veroorzaakt door het verkochte voorwerp 2 Het technische personeel zal de defecte onderdelen zo snel als organisatorisch mogelijk is repareren 3 Om een aanvraag tot technische assistentie onder garantie in te dienen dient u aan het bevoegde personeel het ondersta...

Page 228: ...or klaar voor de stalling volgens de gebruikershandleiding voor de bediening en het onderhoud van de motor X Smeer alle plaatsen die moeten worden gesmeerd en volg daarbij het schema voor de smering 6 4 X Neem de accu uit maak deze schoon vul gedistilleerd water bij tot aan de onderste gedeelten van de ringen van de vulopeningen en laad de accu volledig op Een accu die niet is opgeladen kan bevrie...

Page 229: ... mes Maaibreedte 92 cm F Wij bevestigen dat de mechanische apparatuur die hierboven wordt gedefinieerd voldoet aan de eisen die worden gesteld in de hierboven vermelde technische voorschriften en onder normale bedrijfscondities v e i l i g is maatregelen zijn genomen om naleving van alle producten die op de markt worden gebracht te garanderen met de technische documentatie en de eisen die in de te...

Page 230: ...ding verschijnen vergeleken bij het werkelijke product Dit kan geen reden zijn vorderingen in te stellen Afdrukken kopiëren publiceren en vertalen mag niet worden uitgevoerd ook niet gedeeltelijk zonder de schriftelijke toestemming van de Emak S p A De fabrikant behoudt het recht voor technische parameters van het product te wijzigen zonder afnemers vooraf daarvan in kennis te stellen ...

Page 231: ...ulta clara o tiene alguna duda no dude en ponerse en contacto con uno de los más de 100 centros de servicio autorizados y equipados profesionalmente en toda Europa que contarán con expertos probados y formados que podrán ayudarle Símbolos utilizados en el presente manual de usuario SÍMBOLO SIGNIFICADO Estos símbolos significan CUIDADO y ADVERTENCIA le informan sobre elementos que podrán dañar su m...

Page 232: ...irve como elemento de soporte para la mayoría de las piezas principales de la máquina 2 Eje delantero con ruedas incluyendo la dirección El eje frontal permite el giro de las ruedas El volante de dirección se utiliza para conducir 3 Plataforma de corte La plataforma de corte corta y recoge el césped Está ubicada debajo de la máquina Esta formada por una cubierta un plato principal y dos cuchillas ...

Page 233: ...ADOS Las siguientes etiquetas y pegatinas se han colocado en la máquina X Etiquetas en la parte derecha e izquierda de la plataforma de corte 1 3 2a Peligro No pisar Herramien tas giratorias Nivel de ruido garantizado X Etiquetas ubicadas en el carenado bajo el asiento 1 3 2b Peligro No tocar durante el funciona miento Antes de efectuar la limpieza o reparación del motor pararlo y desconectar el c...

Page 234: ...izquierda del bastidor de la máquina debajo del capó 1 3 2c Atención Superficie caliente Riesgo de quemaduras X Etiqueta en el pedal de marcha 1 3 2d R Marcha atrás N Neutro F Avance Rápido Lento X Etiqueta en el pedal de freno 1 3 2e Freno ...

Page 235: ...0 x 950 x 1120 Peso de la máquina kg 255 Velocidad hacia delante hacia atrás km h 9 7 Altura de corte mm 30 90 Alcance de corte mm 92 Volumen del colector de césped l 300 Indicador de colector de césped lleno Sirena Dimensio nes de la rueda Delante ras 15 x 6 6 Traseras 18 x 8 5 8 Capacidad del depósito de combustible l 7 Tipo de batería 12 V 24 Ah ...

Page 236: ...to LpA dB EN ISO 11201 Nivel de emi sión acústica garantizado LWA dB Valor agregado de aceleración de vibración m s 2 conforme a EN 1033 A1 Valor de aceleración de la vibración de todo el cuerpovd Valor agregado de aceleración de la vibración en brazo mano avd BS 3130 2700 85 1 100 1 0 0 5 7 0 3 0 BS 4155 2700 86 4 100 1 2 0 5 2 5 BS 4175 2700 85 4 100 0 8 0 4 5 0 2 0 BS 7160 2700 84 2 100 0 9 0 4...

Page 237: ...s Los cambios no autorizados pueden comportar condiciones de seguridad peligrosas y anular la garantía Cumple todas las exigencias relativas a la seguridad antiincendios 2 4 No retire las pegatinas de seguridad o etiquetas de la máquina Controlar que estén en el lugar que corresponde No permanezca junto a la máquina ni bajo ella cuando se levante de forma que no esté lo suficientemente fija ante u...

Page 238: ...cto con las cuchillas pues pueden provocar daños a la plataforma de corte y al mecanismo de la máquina Si se registrase un impacto con un objeto rígido detenga y apague la plataforma de corte y el motor e inspeccione toda la máquina y en especial el mecanismo de dirección Si es necesario realice las reparaciones oportunas antes de arrancar de nuevo el motor Cuando sea posible evite trabajar con la...

Page 239: ...os pozos raíces y terrenos no uniformes Los terrenos no uniformes pueden hacer que la máquina se vuelque El césped alto puede ocultar obstáculos peligrosos Por lo tanto retire todos los objetos extraños de la zona en la que desea cortar antes de empezar el corte Seleccione la velocidad adecuada para que no tenga que detenerse en una cuesta Tenga mucho cuidado al unir el colector de césped o al rea...

Page 240: ...amables y sus humos son muy explosivos No fume durante este trabajo No afloje nunca la tapa del depósito de gasolina ni llene el depósito con gasolina cuando el motor esté encendido si está caliente o cuando la máquina se encuentre ubicada en un espacio cerrado Compruebe las líneas de gasolina antes de utilizar la máquina y no llene el depósito hasta su cuello El calor generado por el motor el sol...

Page 241: ...rte Desembale todas las piezas separadas e inspecciónelas 3 1 1 Jaula de embalaje 2 Rampas 3 Colector de césped 4 Documentación 5 Asiento 6 Volante de dirección El paquete básico incluye X Tractor cortacésped X Volante de dirección 6 X Asiento 5 X El colector de césped 3 viene parcialmente desmontado en la caja de cartón con un asa y material de conexión X Documentación 4 lista de piezas empaqueta...

Page 242: ... caucho en ambos plomos X Vuelva a colocar el espacio de almacenamiento y fíjelo con la palanca Si conecta los cables de forma contraria a la descrita previamente dañará la máquina Cuando desconecte la batería desconecte siempre primero el terminal negativo de la batería Cuando ponga la batería en funcionamiento y cuando realice operaciones de mantenimiento en ella proceda con arreglo a las instru...

Page 243: ... y las bisagras 11 en el plato trasero 3 3 2c En algunas máquinas las bisagras 10 ya están premontadas en la placa trasera Instalar la bisagra 11 solamente si se usa un remolque X Fije el tubo frontal en los agujeros superiores de los soportes usando tuercas y tornillos M5x16 Atornille el interruptor del asa del colector de césped en soporte izquierdo del bastidor usando dos tornillos M5x16 y apri...

Page 244: ...le el desequilibrio y vuelva a apretar los pernos 3 3 2m En un colector de césped correctamente ajustado el espacio entre la placa trasera de la máquina y el tubo frontal 8 3 3 2b no supera los 5 mm X Si no se puede alinear usando el método descrito efectuar el ajuste haciendo deslizar el asa del colector de césped en el plato trasero o los pernos y soportes en la parte superior del asa 3 4 COMPRO...

Page 245: ... combustible Ábrala lentamente pues puede haber un exceso de presión en el depósito de combustible causado por los vapores de la gasolina X Introduzca un embudo en la boca del depósito de combustible y empiece a verter el combustible del bote X Una vez que haya rellenado el depósito de combustible seque la zona que rodea la boca del depósito de combustible y la boca Conviene comprobar el estado de...

Page 246: ...n motor en frío MÁX Velocidad máxima del motor MÍN Velocidad mínima del motor ralentí Sólo en las máquinas con motores BS15 BS17 y K 1600 2 CONTADOR DE HORAS DEL MOTOR El contador horario del motor muestra implícitamente el número total de horas del motor Pulse el botón de Modo para cambiar gradualmente entre las siguientes funciones de mantenimiento TMR 1 contador de trayecto individual El valor ...

Page 247: ...ESCONECTADO MAN NO CONECTADO MAN SÍ CONECTADO 4 INHIBICIÓN DE LA DESACTIVACIÓN DE LA PLATAFORMA DE CORTE PARA MOVERSE MARCHA ATRÁS El interruptor R permite inhibir la función de desactivación automática de la plataforma de corte al moverse marcha atrás 5 5 1 R El interruptor debe pulsarse después de que la plataforma de corte ya se haya desactivado automáticamente pero antes de que las hojas hayan...

Page 248: ...el pedal hacia el suelo más veloz irá la máquina y viceversa Cuando lo suelte el pedal volverá automáticamente a la posición neutra y se detendrá la máquina Más información en 5 5 CUIDADO Cambiar el sentido de marcha hacia adelante atrás es posible solo después de detener la máquina 9 PEDAL DE MARCHA ATRÁS El pedal controla la energía suministrada a las ruedas y regula la velocidad de la máquina h...

Page 249: ...lanca sirve para fijar la altura de la plataforma de corte desde el suelo La palanca tiene 6 posiciones de trabajo que corresponden a una altura de corte de 3 a 9 cm Cuanta más alto sea el número de la posición de la palanca más alta será la vegetación que permanezca después del cortado Cuando se traslade sin cortar la palanca debe fijarse en la posición 7 13 PALANCA DE BY PASS MOVIMIENTO LIBRE DE...

Page 250: ...máquinas con motores BS15 BS17 KO15 TE17 y HO16 no están equipadas con estárter independiente 2 TIMBRE El timbre emite una señal sonora cuando el colector de césped está lleno Después de la señal de sonido que indica que el colector de césped está lleno la plataforma de corte no está desconectada ...

Page 251: ...una función que impide que el motor se ponga en marcha si no se cumplen las condiciones de seguridad que se indican a continuación X El accionamiento de la plataforma de corte está desactivado X El pedal de marcha no está pisado X El conductor está sentado en el asiento de la máquina X El pedal del freno está pisado o el freno está en la posición de estacionamiento STOP OK NO OK P P Si se cumplen ...

Page 252: ...todas las condiciones de arranque mencionadas arriba Procedimiento de activación del sistema de desplazamiento de emergencia X siéntese en el asiento X pise el pedal del freno X coloque la llave en la posición Contacto puesto circuitos eléctricos activados X Pulse 5 veces el botón R Después de esto la máquina se puede poner en marcha para llevarla hasta un lugar seguro desde el cual se deberá tran...

Page 253: ...MAN accesorio opcional está en posición MAN 5 4 2 DESACTIVACIÓN DE LA PLATAFORMA DE CORTE X Desactive la plataforma de corte pulsando el interruptor de activación Si el conductor abandona el asiento el motor se apagará automáticamente y por consiguiente también se detendrá el giro de las cuchillas de corte Sin embargo no apague nunca la plataforma de corte abandonando simplemente el asiento Si no ...

Page 254: ...anteras con obstáculos rígidos ya que pueden dañar el eje delantero especialmente cuando la máquina circula a alta velocidad 5 5 1 MARCHA HACIA ADELANTE ATRÁS X Mueva lentamente la palanca del acelerador a la posición MÍN Esto disminuirá la velocidad del motor X Apriete lentamente el pedal de marcha dependiendo de la dirección deseada de marcha adelante o atrás Atención Riesgo de lesiones si el pe...

Page 255: ...2 km hora Condiciones medias 3 5 km h Vegetación baja y seca 5 km hora Desplazamiento con la plataforma de corte desactivada 8 km hora 5 5 4 CONDUCCIÓN EN CUESTAS El tractor cortacésped OM EF 92 puede trabajar en pendientes que tengan una inclinación de hasta 10 17 Cuando opere en una pendiente deberá cumplir las siguientes instrucciones fundamentales X Preste especial atención cuando se desplace ...

Page 256: ...que la palanca del acelerador en la posición MÍN X En máquinas con elevación y volcado manual del colectora de césped Deslice el asa de la palanca de elevación del colector de césped completamente hacia arriba 1 e inclínela hacia abajo 2 para dejar caer el colector de césped deje que se vacíe suéltelo lentamente e inclínelo de nuevo a su posición 5 6b X En máquinas equipadas con dispositivo mecáni...

Page 257: ...ción de electrolito y limpieza Inspección y ajuste de la correa de traslación 4 Inspección de los controles de freno Inspección de la presión de los neumáticos Inspección de los sujetacables piezas de acoplamiento rápido flojas Limpieza de la plataforma de corte Inspección de las conexiones de pernos Inspección de la tensión de la correa de conducción de la cuchilla dentada 4 Inspección de la tens...

Page 258: ...rta y afloje la tapa del orificio de relleno Afloje la varilla de aceite séquela vuelva a introducirla y apriétela A continuación vuelva a sacarla y observe el nivel de aceite El nivel de aceite debe estar comprendido entre las dos marcas de la varilla En caso contrario añada aceite al motor hasta llegar a la marca LLENO Podrá obtener más información sobre la comprobación y el relleno del aceite e...

Page 259: ...ente de la batería aumentará su duración Por lo tanto compruebe regularmente su estado con arreglo al manual suministrado por el fabricante de la batería X Mantenga limpios los contactos de la batería Si se acumula suciedad en ellos o si se oxidan límpielos con arreglo a las recomendaciones del fabricante de la batería La interrupción del circuito provocada por la oxidación de los contactos podrá ...

Page 260: ...e utilizado junto con otros residuos ni tirarlo por el desagüe con desechos o al suelo X MANTENIMIENTO DEL FILTRO DE AIRE No deje nunca que el motor funcione sin un filtro de aire Esto desgastará rápidamente el motor Mantenga el filtro de aire de conformidad con las instrucciones contenidas en el manual de usuario del motor suministrado por el fabricante X MANTENIMIENTO DE LA BUJÍA Para un funcion...

Page 261: ...o tipo que el anterior por ejemplo de 15 A o de 5 A Si incluso después de sustituir el fusible el motor o la plataforma de corte no funcionan póngase en contacto con un centro de reparación autorizado X Algunos modelos de máquina están equipados con un conmutador central No manipule bajo ningún concepto el conmutador La única excepción es el recambio de fusibles 6 3 5 ELEVACIÓN DE LA MÁQUINA Si de...

Page 262: ...ataforma de corte Cuando realice el equilibrado introduzca un destornillador en el orificio central y coloque la cuchilla en posición horizontal Si la cuchilla permanece en su posición está equilibrada Si uno de los extremos de la cuchilla es más pesado amole dicho lado hasta que quede equilibrado Cuando balancee por amolado no acorte el largo de la cuchilla El desequilibro estático permitido no p...

Page 263: ... X Desatornille las dos tuercas y la arandela del mecanismo de tensado de la correa de accionamiento de la plataforma de corte Esto liberará el muelle y la correa Saque la correa de las ruedas de la polea 6 3 7c X Gire la rueda de la polea para poder acceder a los pernos de la parte trasera de la plataforma de corte X Establecer las distancias correctas A B y C ajustando los pernos de la parte del...

Page 264: ...oder acceder a los pernos de la parte trasera de la plataforma de corte Desatornille los pernos 6 3 7d X No es necesario sacar los pernos de la parte delantera de la plataforma de corte es suficiente desenganchar la plataforma de los soportes 6 3 9b X Saque lentamente la plataforma de corte de la máquina 6 3 9c 6 3 10 MANTENIMIENTO DE LA DIRECCIÓN Compruebe con frecuencia que no hay demasiada holg...

Page 265: ...las ruedas del eje trasero esta lubricación es indispensable para retirar posteriormente la rueda Si no realizase la lubricación la unión posterior podrá resultar difícil Cuando instale la rueda trasera preste atención a la alineación mutua de la clavija del eje y del surco en la rueda 6 3 14 REPARACIÓN DE UN PINCHAZO EN EL NEUMÁTICO La máquina está equipada con neumáticos sin cámara de aire En ca...

Page 266: ...X las juntas angulares que conectan las varillas de dirección retire y lubrique X perno de la barra de tracción de frenos lubrique la barra de tracción cerca del agujero del perno X perno de la barra de tracción de la plataforma de corte lubrique la barra de tracción cerca del agujero del perno X las juntas angulares que conectan las varillas de dirección retire y lubrique X las juntas angulares c...

Page 267: ...celerador completamente abierta Cuando corte césped alto corte primero con un ajuste alto de la altura y a continuación vuelva a cortar con la altura normal Véase la información incluida en el capítulo 5 5 3 X Compruebe la tensión de la correa de transmisión 6 3 8 Si es necesario ajuste la tensión X Compruebe especialmente después de cambiar las cuchillas que estas hayan sido instaladas correctame...

Page 268: ...s necesario ajuste la tensión X Compruebe la ruta de la correa Ajústela si es necesario X Compruebe si las poleas están dañadas Cámbielas si es necesario X Compruebe el espacio en el mecanismo de embrague de la marcha Es posible que haya desviaciones en el soporte de cojinetes del embrague que se esté doblando Cámbiela si es necesario La máquina no se mueve cuando se pisa el acelerador X Compruebe...

Page 269: ... de la fecha de compra A través de la red de ventas y asistencia técnica el fabricante sustituirá gratuitamente las partes que presenten defectos de material o de fabricación La garantía no priva al comprador de los derechos legales establecidos por el Código Civil con respecto a las consecuencias de los defectos o vicios del objeto vendido 2 El personal técnico actuará lo más pronto posible dentr...

Page 270: ...tuosas o gastadas y apriete todas las tuercas y tornillos X Prepare el motor para su almacenamiento con arreglo al manual de usuario relativo al funcionamiento y al mantenimiento del motor X Lubrique todos los puntos de lubricación con arreglo al diagrama de lubricación 6 4 X Saque la batería límpiela rellénela con agua destilada hasta las partes inferiores de las anillas de las aperturas de relle...

Page 271: ...s EC3M 4BS Reino Unido E Tipo de dispositivo de corte cuchilla rotativa Anchura de corte 92 cm F Declaramos y confirmamos que el presente equipo mecánico definido previamente cumple con los requisitos recogidos en las normativas técnicas anteriores y en condiciones normales de funcionamiento es s e g u r o se han aplicado las medidas oportunas para garantizar la conformidad de todos los productos ...

Page 272: ...logía utilizada en el presente manual en comparación con el producto real Esto no podrá dar lugar a reclamaciones de ningún tipo Se prohíbe la impresión duplicación publicación y traducción incluso parcial sin el previo consentimiento de Emak S p A El fabricante se reserva el derecho de cambiar los parámetros técnicos del producto sin previo aviso al cliente ...

Page 273: ...aĪy kosiarki W przypadku pytaĔ lub niejasnoĞci prosimy o kontakt z jednym ze 100 profesjonalnie wyposaĪonych autoryzowanych centrów serwisowych w Europie oferujących uĪytkownikom pomoc przeszkolonych ekspertów Symbole uĪyte w instrukcji obsáugi SYMBOL ZNACZENIE Te symbole oznaczają UWAGA i OSTRZEĩENIE i informują uĪytkownika o czynnikach które mogą spowodowaü uszkodzenie maszyny lub powaĪne obraĪe...

Page 274: ...1 2 GàÓWNE CZĉĝCI KOSIARKI SAMOJEZDNEJ Kosiarka samojezdna OM EF 92 skáada siĊ z nastĊpujących podstawowych sekcji 1 2 1 Rama ze zderzakiem Rama ze zderzakami sáuĪy jako element podtrzymujący wiĊkszoĞü gáównych czĊĞci maszyny 2 Przednia oĞ i koáa wraz z ukáadem kierowniczym Przednia oĞ umoĪliwia skrĊt kóá Kierownica sáuĪy do kierowania 3 Mechanizm tnący Mechanizm tnący kosi i zbiera trawĊ Znajduje...

Page 275: ...ZENIE NastĊpujące etykiety oraz naklejki zostaáy umieszczone na maszynie X Etykiety po lewej i prawej stronie mechanizmu tnącego 1 3 2a Niebezpie czeĔstwo Nie stawaü NarzĊdzia obrotowe Gwaranto wany poziom haáasu X Etykiety na osáonie pod fotelem 1 3 2b Niebezpie czeĔstwo Nie dotykaü podczas pracy Przed wyko naniem ja kichkolwiek czynnoĞci konserwacji lub naprawy naleĪy wy áączyç silnik i odáączyç...

Page 276: ...j stronie ramy kosiarki pod pokrywą silnika 1 3 2c Uwaga Gorąca po wierzchnia Ryzyko po parzenia X Etykiety na pedale jazdy 1 3 2d R Jazda wstecz N Bieg jaáowy F Jazda na przód Szybko Wolno X Etykieta na pedale hamulca 1 3 2e Hamulec ...

Page 277: ... szer x wys mm 2480 x 950 x 1120 CiĊĪar maszyny kg 255 PrĊdkoĞü do przodu do tyáu km h 9 7 WysokoĞü koszenia mm 30 90 SzerokoĞü koszenia mm 92 PojemnoĞü kosza na trawĊ l 300 WskaĨnik zapeánienia kosza na trawĊ BrzĊczyk Wymiary kóá Przód 15 x 6 6 Tyá 18 x 8 5 8 PojemnoĞü zbiornika paliwa l 7 Typ akumulatora 12 V 24 Ah ...

Page 278: ...racy LpA dB EN ISO 11201 Gwarantowany poziom emisji mocy akustycznej LWA dB àączna wartoĞü drgaĔ przy przyspieszeniu m s 2 zgodnie z normą EN 1033 A1 WartoĞü drgaĔ caáego organizmu avd Sumaryczna wartoĞü drgaĔ rĊka ramiĊ avd BS 3130 2700 85 1 100 1 0 0 5 7 0 3 0 BS 4155 2700 86 4 100 1 2 0 5 2 5 BS 4175 2700 85 4 100 0 8 0 4 5 0 2 0 BS 7160 2700 84 2 100 0 9 0 4 2 9 1 4 K 1600 2700 86 0 4 0 100 1 ...

Page 279: ...eĪy stosowaü siĊ do wszystkich zasad bezpieczeĔstwa odnoszących siĊ do poĪarów 2 4 Nie wolno usuwaü ostrzegawczych naklejek lub etykiet z maszyny NaleĪy sprawdziü czy znajdują siĊ w odpowiednich miejscach Nie wolno zbliĪaü siĊ ani wchodziü pod maszynĊ jeĪeli zostaáa ona podniesiona ale nie zostaáa odpowiednio zabezpieczona przed upadkiem Komponenty kosza na trawĊ są obciąĪone i mogą ulec uszkodzen...

Page 280: ...Ğci ukáad kierowniczy JeĪeli jest to konieczne naleĪy naprawiü ewentualne usterki przed ponownym uruchomieniem silnika JeĞli jest to moĪliwe naleĪy unikaü pracy na mokrej trawie ObniĪona przyczepnoĞü moĪe spowodowaü poĞlizg kosiarki NaleĪy unikaü przeszkód np nagáych zmian nachylenia terenu rowów itp które mogą spowodowaü przewrócenie siĊ maszyny Nie naleĪy próbowaü zachowaü stabilnoĞci maszyny st...

Page 281: ...kody W związku z tym przed rozpoczĊciem pracy naleĪy usunąü z miejsca w którym ma zostaü przeprowadzone koszenie wszelkie przedmioty NaleĪy wybraü taką szybkoĞü aby nie trzeba byáo zatrzymywaü siĊ na zboczu Podczas zakáadania kosza na trawĊ lub podáączania innych elementów naleĪy zachowaü szczególną ostroĪnoĞü MoĪe to doprowadziü do zmniejszenia stabilnoĞci maszyny Na zboczu naleĪy wykonaü wszystk...

Page 282: ...bardzo áatwopalne substancje których opary są wybuchowe Nie wolno paliü tytoniu w trakcie wykonywania prac z wykorzystaniem kosiarki Nie wolno odkrĊcaü korka wlewu paliwa i nie wolno uzupeániaü paliwa kiedy silnik jest uruchomiony bądĨ ciepáy lub jeĞli maszyna znajduje siĊ w zamkniĊtym pomieszczeniu Przed rozpoczĊciem korzystania z kosiarki naleĪy sprawdziü przewody paliwowe Nie naleĪy napeániaü z...

Page 283: ...elu naleĪy przygotowaü rampy 2 poniewaĪ w przeciwnym wypadku istnieje ryzyko uszkodzenia czĊĞci kosiarki NaleĪy sprawdziü maszynĊ pod kątem uszkodzeĔ które mogáy wystąpiü podczas transportu Rozpakuj wszystkie oddzielnie zapakowane zespoáy i sprawdĨ ich stan 3 1 1 Skrzynia 2 Rampy 3 Kosz na trawĊ 4 Dokumentacja 5 Siedzenie 6 Kierownica Podstawowy komplet zawiera nastĊpujące elementy X Kosiarka samo...

Page 284: ...ubą i nakrĊtką X Brązowy przewód UmieĞciü na ujemnym biegunie akumulatora i zabezpieczyü Ğrubą i nakrĊtką X ZaáoĪyü gumowe kapturki na oba przewody X ZaáoĪyü pokrywĊ schowka na miejsce i zablokowaü pokrĊtáem Odwrotne podáączenie przewodów w odniesieniu do powyĪszego opisu spowoduje uszkodzenie maszyny Podczas odáączania akumulatora naleĪy zawsze najpierw odáączyü przewód ujemnego bieguna Przy rozp...

Page 285: ...dolny 6 Uchwyt 7 Worek siatkowy 8 Przednia rura 13 Przeáącznik zaczepu kosza na trawĊ 3 3 2b X INSTALACJA KOSZA NA TRAWĉ X NaleĪy przykrĊciü zawiasy kosza na trawĊ 10 oraz hak 11 do tylnej páyty przyáączeniowej maszyny 3 3 2c W niektórych modelach zawiasy 10 są juĪ zamontowane na tylnej páycie przyáączeniowej Zamontowaü zawias 11 tylko jeĞli uĪywana bĊdzie przyczepa X Przymocowaü przednią rurĊ do ...

Page 286: ...PozycjĊ kosza naleĪy skorygowaü luzując Ğruby w przedniej rurze oraz lub Ğruby w bocznych usztywniaczach a nastĊpnie wyrównaü kosz i dokrĊciü Ğruby 3 3 2m JeĞli kosz jest prawidáowo ustawiony to odlegáoĞü pomiĊdzy tylną páytą maszyny a przednią rurą 8 3 3 2b nie przekracza 5 mm X JeĞli jego wyrównanie za pomocą powyĪszej metody nie jest moĪliwe naleĪy go wyrównaü przesuwając zaczep kosza na trawĊ ...

Page 287: ...ce áatwopalne JeĪeli paliwo zostanie rozlane naleĪy je wytrzeü do sucha Przechowywane paliwo naleĪy chroniü przed dzieümi Procedura uzupeániania paliwa X NaleĪy odkrĊciü korek wlewu paliwa NaleĪy robiü to powoli poniewaĪ w zbiorniku mogą znajdowaü siĊ opary benzyny pod ciĞnieniem X NaleĪy wáoĪyü lejek do wlewu paliwa i rozpocząü nalewanie paliwa z kanistra X Po uzupeánieniu paliwa naleĪy zawsze wy...

Page 288: ...ne obroty silnika bezczynnoĞü Tylko w maszynach wyposaĪonych w silniki BS15 BS17 oraz K 1600 2 LICZNIK GODZIN PRACY SILNIKA WskaĨnik godzinowego przebiegu silnika wskazuje caákowitą liczbĊ godzin pracy silnika NaleĪy nacisnąü przycisk Mode Tryb aby przeáączaü pomiĊdzy nastĊpującymi funkcjami konserwacyjnymi TMR 1 licznik dzienny Wyzerowanie nastĊpuje po przytrzymaniu przycisku Mode przez 6 sekund ...

Page 289: ...WYàĄCZONY MAN NIE ZAàĄCZONY MAN TAK ZAàĄCZONY 4 WYàĄCZENIE ODàĄCZANIA MECHANIZMU TNĄCEGO W CELU COFANIA Przeáącznik R sáuĪy do wyáączania funkcji automatycznego odáączania mechanizmu tnącego podczas cofania 5 5 1 R Przeáącznik naleĪy nacisnąü jeĞli mechanizm tnący zostaá juĪ automatycznie odáączony ale ostrza jeszcze nie przestaáy siĊ obracaü okoáo 4 sekundy lub gdy mechanizm tnący zostanie urucho...

Page 290: ...lub w tyá jest moĪliwa tylko po zatrzymaniu maszyny 9 PEDAà JAZDY DO TYàU Pedaá kontroluje moc przekazywaną do kóá i reguluje prĊdkoĞü jadącej do tyáu maszyny PrĊdkoĞü jazdy maszyny jest proporcjonalna do siáy nacisku na pedaá Po puszczeniu pedaá automatycznie powraca do pozycji jaáowej i maszyna zatrzymuje siĊ WiĊcej informacji 5 5 Zmiana kierunku jazdy w przód lub w tyá jest moĪliwa tylko po zat...

Page 291: ...7 13 DħWIGNIA ODàĄCZANIA WOLNY RUCH TYLNYCH KÓà DĨwignia odáączania sáuĪy do wyáączania przekáadni napĊdu kóá tylnych i wykorzystuje siĊ ją gdy maszyna jest przepychana lub holowana przy wyáączonym silniku DĨwignia znajduje siĊ na páycie tylnej maszyny i posiada nastĊpujące dwie pozycje Pozycja NapĊd tylnych kóá Zastosowanie 0 WYàĄCZONY DĨwignia jest wyciągniĊta do przepychania maszyny 1 ZAàĄCZONY...

Page 292: ... 5 2 URUCHAMIANIE SILNIKA Maszyna jest wyposaĪona w funkcjĊ uniemoĪliwiającą uruchomienie silnika jeĞli nie są speánione poniĪsze warunki bezpieczeĔstwa X NapĊd mechanizmu tnącego jest odáączony X Pedaá jazdy nie jest wciĞniĊty X Kierowca siedzi na siedzeniu maszyny X Pedaá hamulca jest wciĞniĊty lub hamulec jest wáączony w poáoĪeniu postojowym STOP OK NO OK P P O speánieniu tych wymogów w momenci...

Page 293: ...nij pedaá hamulca X przestaw kluczyk w stacyjce w poáoĪenie zapáon wáączony obwody elektryczne podáączone X NaciĞnij przycisk R 5 razy NastĊpnie moĪna uruchomiü maszynĊ i przejechaü nią do miejsca z którego moĪna ją przewieĨü do serwisu Nie moĪna wáączaü mechanizmu tnącego podczas pracy w trybie jazdy awaryjnej 5 3 WYàĄCZANIE SILNIKA a Przesunąü dĨwigniĊ przepustnicy na pozycjĊ MIN b JeĞli mechani...

Page 294: ... nie naleĪy wyáączaü mechanizmu tnącego przez opuszczenie siedzenia JeĞli uĪytkownik nie przekrĊci kluczyka z pozycji ON Wáączony do pozycji STOP czĊĞü instalacji elektrycznej pozostanie aktywna co moĪe skutkowaü jej uszkodzeniem Aktywny pozostanie takĪe wskaĨnik godzinowego przebiegu silnika 5 4 3 USTAWIANIE WYSOKOĝCI MECHANIZMU TNĄCEGO DO KOSZENIA X Aby ustawiü mechanizm tnący wyĪej przesunąü dĨ...

Page 295: ... W TYà X Powoli przestawiü dĨwigniĊ przepustnicy w poáoĪenie MIN ObniĪy to obroty silnika X Powoli nacisnąü pedaá jazdy zaleĪnie od kierunku jazdy w przód lub w tyá UWAGA Ryzyko obraĪeĔ ciaáa w razie zbyt szybkiego naciĞniĊcia pedaáu Zmiana kierunku jazdy przód tyá jest moĪliwa tylko po zatrzymaniu maszyny Niezatrzymanie maszyny moĪe spowodowaü uszkodzenie przekáadni Nie wolno uĪywaü pedaáu jazdy ...

Page 296: ...rednie warunki 3 5 km h Niska sucha roĞlinnoĞü 5 km h Jazda bez wáączonego mechanizmu tnącego 8 km h 5 5 4 JAZDA PO ZBOCZU Kosiarka samojezdna OM EF 92 moĪe pracowaü na zboczach o nachyleniu do 10 17 Podczas pracy na zboczu naleĪy postĊpowaü zgodnie z nastĊpującymi zasadami X Podczas jazdy po zboczu naleĪy zachowaü szczególną ostroĪnoĞü X NaleĪy zawsze uĪywaü niĪszej prĊdkoĞci jazdy X NaleĪy zawsz...

Page 297: ...wigniĊ przepustnicy na pozycjĊ MIN X W maszynach z rĊcznym podnoszeniem i przechylaniem kosza na trawĊ Przestawiü rączkĊ podnoszenia kosza na trawĊ do koĔca do góry 1 a nastĊpnie przechyliü ją w dóá 2 aby przechyliü kosz na trawĊ na zewnątrz pozwalając na jego caákowite opróĪnienie a nastĊpnie powoli zwolniü rączkĊ i odchyliü kosz z powrotem 5 6b X W maszynach wyposaĪonych w mechanizm podnoszenia ...

Page 298: ...la elektrolitu i czyszczenie Kontrola oraz napiĊcie pasów napĊdowych 4 Kontrola elementów sterujących hamulca Kontrola ciĞnienia w oponach Kontrola elementów mocujących kable luĨne szybkozáącza Czyszczenie mechanizmu tnącego Kontrola poáączeĔ Ğrubowych Kontrola napiĊcia pasa napĊdowego ostrza z wrĊbami 4 Kontrola poprawnoĞci napiĊcia pasa klinowego napĊdu mechanizmu tnącego 4 Kontrola i regulacja ...

Page 299: ...wytrzeü do czysta ponownie umieĞciü i wkrĊciü NastĊpnie odkrĊciü i odczytaü poziom oleju Poziom oleju musi znajdowaü siĊ pomiĊdzy dwoma oznaczeniami na wskaĨniku prĊtowym JeĞli poziom jest zbyt niski dolewaü oleju do czasu gdy osiągnie poziom PEàNY Dodatkowe informacje o kontroli i uzupeánianiu oleju znajdują siĊ w oddzielnej instrukcji zapewnianej przez producenta silnika X KONTROLA POàĄCZEē PRZE...

Page 300: ...dnie z instrukcją obsáugi dostarczoną przez jego producenta X Styki akumulatora muszą byü utrzymywane w czystoĞci JeĞli siĊ zabrudzą lub skorodują naleĪy je wyczyĞciü zgodnie z instrukcjami producenta Przerwanie obwodu elektrycznego spowodowane utlenianiem siĊ styków moĪe prowadziü do uszkodzenia funkcji áadowania silnika X NaleĪy regularnie kontrolowaü stan elektrolitu Poziom elektrolitu powinien...

Page 301: ...a domowego ani wylewaü do Ğcieków na ziemiĊ ani do Ğmieci X KONSERWACJA FILTRA POWIETRZA Silnik nie moĪe pracowaü bez filtra powietrza Powoduje to szybkie zuĪycie silnika KonserwacjĊ filtra powietrza naleĪy przeprowadziü zgodnie z instrukcjami podanymi przez producenta silnika X KONSERWACJA ĝWIECY ZAPàONOWEJ Aby silnik pracowaá prawidáowo Ğwieca zapáonowa musi zostaü prawidáowo zainstalowana i ocz...

Page 302: ...ü nowy o tej samej wartoĞci znamionowej tj 15A lub 5A JeĞli po wymianie bezpiecznika nadal nie moĪna uruchomiü silnika lub mechanizmu tnącego naleĪy skontaktowaü siĊ z autoryzowanym centrum serwisowym X Pewne modele maszyny są wyposaĪone w centralną tablicĊ rozdzielczą Pod Īadnym pozorem nie wolno modyfikowaü tablicy rozdzielczej Jedyny wyjątek do wymiana bezpieczników 6 3 5 PODNOSZENIE MASZYNY Do...

Page 303: ... poziomej pozycji JeĞli ostrze pozostanie w tej samej pozycji jest wywaĪone JeĞli jeden z koĔców ostrza jest ciĊĪszy naleĪy go szlifowaü do czasu prawidáowego wywaĪenia Podczas wywaĪania przez szlifowanie nie naleĪy skracaü ostrza Dozwolone statyczne niewywaĪenie nie moĪe przekraczaü 2 g JeĞli uĪytkownik nie jest pewien jak wykonaü procedurĊ powinien skontaktowaü siĊ z autoryzowanym centrum serwis...

Page 304: ...odpowiednie odlegáoĞci A B i C regulując Ğruby znajdujące siĊ z przodu i z tyáu mechanizmu tnącego 6 3 7d Podczas ustawiania odlegáoĞci C zalecane jest umieszczenie przedmiotu o tym samym rozmiarze z obu stron pokrywy mechanizmu tnącego np drewniana deska itp i wykorzystanie go do wypoziomowania mechanizmu tak aby odlegáoĞü od podáoĪa byáa taka sama po prawej i po lewej stronie X Po ustawieniu odp...

Page 305: ...ny luz pomiĊdzy zĊbatym elementem kierowniczym a zĊbami kolumny kierownicy W przypadku wykrycia nadmiernego luzu naleĪy go zmniejszyü 6 3 10 Zaniechanie tej konserwacji moĪe spowodowaü uszkodzenie elementów ukáadu kierowniczego Procedura ograniczania regulacji luzu X Otworzyü pokrywĊ maszyny X Poluzowaü dwie nakrĊtki M12 1 na Ğrubie mimoĞrodu X UmieĞciü odpowiedni klucz na szeĞciokątnym elemencie ...

Page 306: ...róciü uwagĊ na wzajemną pozycjĊ sworznia na osi i rowka w kole 6 3 14 NAPRAWA USZKODZONYCH OPON Maszyna wyposaĪona jest w opony bezdĊtkowe JeĞli opona zostanie uszkodzona naleĪy zleciü jej naprawĊ profesjonalnemu zakáadowi wulkanizacyjnemu lub autoryzowanemu centrum serwisowemu Seco 6 3 15 KONSERWACJA PRZEKàADNI HYDROSTATYCZNEJ Abyzapewniüprawidáowefunkcjonowanieprzekáadni naleĪydbaüoodpowiednipoz...

Page 307: ...ów X záącza kątowe krzyĪaków ukáadu kierowniczego zdemontowaü nasmarowaü X Ğruba sprzĊgu hamulca nasmarowaü sprzĊg w okolicy otworu na ĞrubĊ X Ğruba sprzĊgu hamulca podnoszenia mechanizmu tnącego nasmarowaü sprzĊg w okolicy otworu na ĞrubĊ X záącza kątowe krzyĪaków ukáadu kierowniczego zdemontowaü nasmarowaü X záącza kątowe sworzni kóá zdemontowaü nasmarowaü X áoĪyska przednich kóá X sworznie kóá ...

Page 308: ...izmu tnącego moĪe zatykaü siĊ trawą Nie kosiü mokrej trawy X PrĊdkoĞü koszenia powinna zostaü dostosowana do panujących warunków poprzez ustawienie odpowiedniego biegu Nie naleĪy wáączaü silnika z w peáni otwartą przepustnicą Podczas koszenia wysokiej trawy pierwsze koszenie naleĪy wykonaü z wysoko ustawionym mechanizmem tnącym a drugie na normalnej wysokoĞci NaleĪy przestrzegaü zasad opisanych w ...

Page 309: ...pada podczas pracy X Sprawdziü napiĊcie pasa napĊdowego 6 3 11 W razie potrzeby wyregulowaü jego napiĊcie X Sprawdziü takĪe prowadzenie pasa Wyregulowaü w razie potrzeby X Sprawdziü czy koáa pasowe są uszkodzone W razie potrzeby naleĪy dokonaü wymiany X Sprawdziü szczelinĊ w mechanizmie sprzĊgáa jazdy Odchylenie mogą wynikaü z wygiĊcia uchwytu áoĪyska sprzĊgáa Wymieniü w razie potrzeby Maszyna nie...

Page 310: ...si prawa nabywcy przewidzianego w kodeksie cywilnym i dotyczącego roszczeĔ w wyniku wad i uszkodzeĔ spowodowanych przez sprzedany przedmiot 2 Personel techniczny przystąpi do naprawy w czasie na który pozwolą wymagania organizacyjne zawsze najszybciej jak to moĪliwe 3 Aby skorzystaü z naprawy gwarancyjnej konieczne jest przedstawienie autoryzowanym pracownikom obsáugi poniĪszej karty g w a r a n c...

Page 311: ...NaleĪy wymieniü uszkodzone lub zuĪyte czĊĞci i dokrĊciü wszystkie poluzowane Ğruby i nakrĊtki X Przygotowaü silnik do przechowywania zgodnie z instrukcją obsáugi silnika X Nasmarowaü punkty smarowania zgodnie z diagramem smarowania 6 4 X NaleĪy wyjąü i wyczyĞciü akumulator napeániü wodą destylowaną do dolnej czĊĞci okrĊgu záącza uzupeániania i caákowicie naáadowaü Pusty akumulator moĪe zamarznąü i...

Page 312: ...lka Brytania E Typ narzĊdzia tnącego nóĪ obrotowy SzerokoĞü koszenia 92 cm F Potwierdzamy Īe urządzenie mechaniczne opisane powyĪej jest zgodne z powyĪszymi przepisami technicznymi i w normalnych warunkach uĪytkowania jest b e z p i e c z n e zostaáy podjĊte odpowiednie kroki aby zapewniü zgodnoĞü wszystkich produktów wprowadzanych na rynek z dokumentacją oraz przepisami technicznymi gwarantowany ...

Page 313: ...ystĊpowaü pewne róĪnice w stosunku do rzeczywistego produktu Na tej podstawie nie moĪna zgáaszaü Īadnych roszczeĔ Druk powielanie publikacja lub táumaczenie caáoĞci lub czĊĞci niniejszego dokumentu bez pisemnej zgody firmy Emak S p A jest zabronione Producent zastrzega sobie prawo do wprowadzania zmian w parametrach technicznych produktu bez informowania o tym fakcie klienta ...

Page 314: ...314 ...

Page 315: ......

Page 316: ...ät während seiner gesamten Lebensdauer begleiten F ATTENTION Le manuel doit accompagner la machine pour toute sa vie I ATTENZIONE Questo manuale deve accompagnare la macchina durante tutta la sua vita NL LET OP Dit handboek moet voor de gehele levensduur bij de machine blijven E ATENCIÓN Este manual debe acompañar a la máquina durante toda su vida útil PL UWAGA Niniejsza instrukcja powinna towarzy...

Reviews: