background image

GB

21

1. SHUTTER (Condition and speed control)

Auto or manual control caan be selected.
When the SETUP menu is on the screen, select “SHUTTER” by the UP or DOWN button.
Select the shutter mode by pressing the LEFT or RIGHT button.

- AUTO:

Auto control of the shutter speed is enabled. The shutter speed is controlled automatically according

to the brightness of the scene.

- FIXED: 

Select fixed shutter speed from 1/50, 1/250, 1/500, 1/200, 1/5000, 1/10,000 1/100,000

- FLK: 

Select “FLK” mode when flickering occurs on the screen due to an imbalance between illumination and

frequency. PAL Model: 1/100, NTSC Model: 1/120

2. BRIGHTNESS

Adjust brightness from 0-255 grade
Choose RETURN and press the ENTER button when the settings are completed.

3. ACG

There are four kinds for optional, HIGH, MID, LOW, OFF, depending on the lightness of surroundings.
When there is a strong backlight behind the object, clear images of the background as well as the object can
still be obtained by using the BACKLIGHT function.
1. Select “BACKLIGHT” on the SETUP menu by the UP or DOWN button.
2. Select the value required by pressing the LEFT or RIGHT button.

4. DWDR

There are two kinds for optional ON, OFF;
ON: Adjust brightness from 0-63 grade depending on the lightness of surroundings.

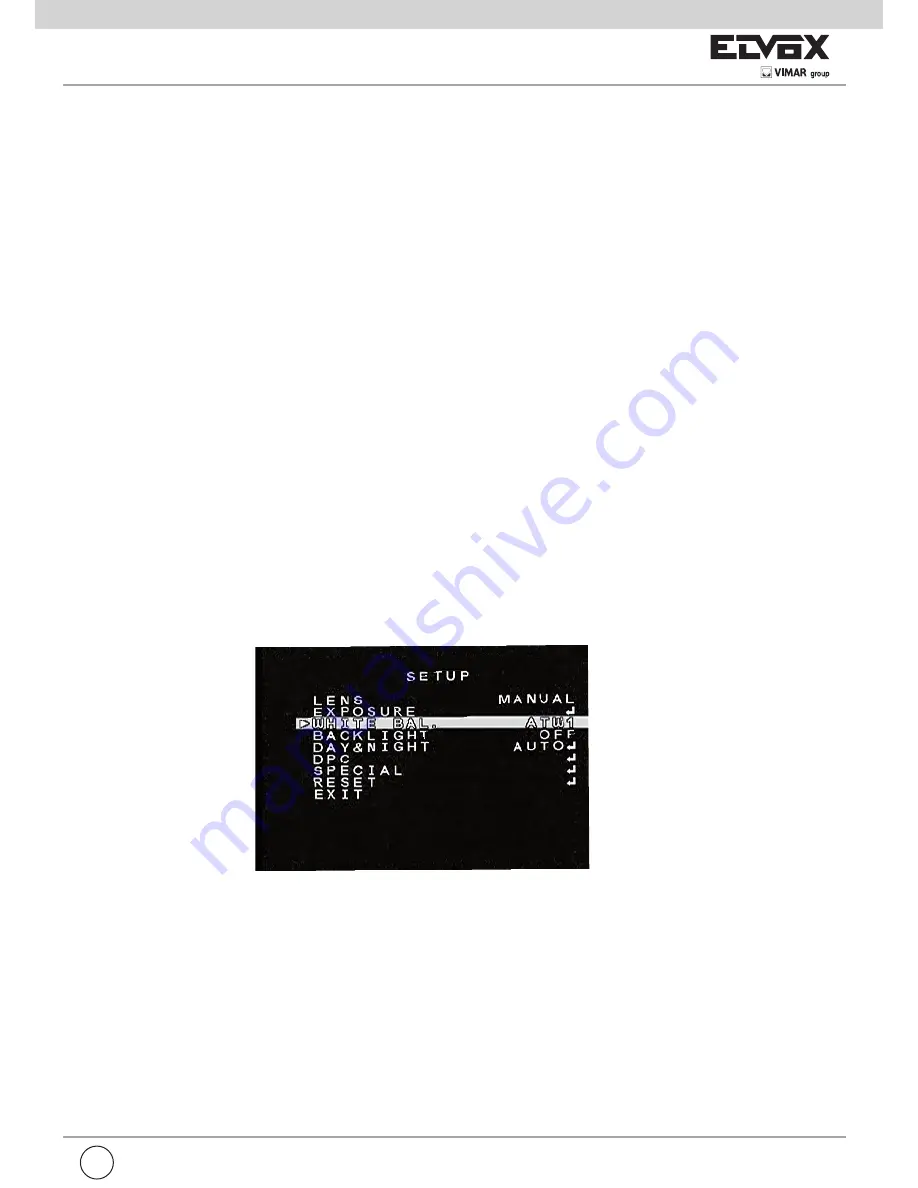
3. WHITE BAL. (White Balance)

1. Select “WHITE BAL” on the SETUP menu by the UP or DOWN button
2. Select the required mode by the LEFT or RIGHT button.

- Select one of the 4 modes below

1.  ATW (Auto Tracking White Balance)

. This mode can be used within the color temperature range 1800°K -

10.500°K (eg. fluorescent light, outdoor, sodium vapour lamp etc.)

2. MANUAL

. The manual adjustment mode enables advanced adjustment. Select ATW or AWC first, change

to manual adjustment mode and press the SET button. SET the appropriate color temperature increase /de-
crease  the red and blue color values and monitor the color changes of the object.

Adjust red from 2-255 grade 
Adjust blue from 2-255 grade 

Summary of Contents for 52L5

Page 1: ...Manuale per il collegamento e l uso Installation and operation manual Art 52L5 Telecamera ad alta risoluzione 600 TVL con obiettivo 2 8 12 mm Hi resolution camera 600 TVL with 2 8 12 mm lens...

Page 2: ...e vibrazioni All interno della telecamera vi sono componenti sofisticati pertanto durante il trasporto e l installazione evi tare di sottoporre il prodotto a sollecitazioni e forti vibrazioni Per mot...

Page 3: ...deve essere posto sull apparecchio L installatore deve assicurarsi che le informazioni per l utente siano presenti sugli apparecchi derivati Tutti gli apparecchi costituenti l impianto devono essere d...

Page 4: ...roluce 9 5 DAY NIGHT giorno e notte 9 6 DPC dpc 10 7 SPECIAL funzioni speciali 10 7 1 Cam title titolo telecamera 10 7 2 Motion movimento 10 7 2 1 AREA zona 11 7 3 PRIVACY privacy 11 7 4 PARK LINE mod...

Page 5: ...ad alta definizione in condizioni di bassa illuminazione Otturatore elettronico automatico AES Funzionalit di otturatore elettronico automatico La velocit AES della telecamera a colori pu arrivare a 1...

Page 6: ...Sistema di sincronizzazione Sinc negativa interna Otturatore elettronico automatico AES NTSC 1 60s 1 100 000s PAL 1 50s 1 100 000s Correzione di gamma 0 45 Portata IR 30 metri con 36 led IR Attivazion...

Page 7: ...1 LENS obiettivo Questa funzione consente di regolare la luminosit dello schermo 1 Quando sullo schermo visualizzato il menu SETUP impostazione selezionare LENS obiettivo tramite i tasti SU e GI 2 Sel...

Page 8: ...to controluce possibile rendere nitidi lo sfondo e l oggetto ripreso utilizzando la funzione BACKLIGHT controluce 1 Selezionare BACKLIGHT controluce nel menu SETUP impostazione tramite i tasti SU e GI...

Page 9: ...ituazioni diverse Sono disponibili 4 modalit automatic mode modalit automatica color mode modalit colore B W mode modalit bianco e nero ed external switch commutazione esterna L utente pu selezionare...

Page 10: ...Delay Time ritardo Questo parametro indica il ritardo di tempo atteso dal sistema quando inizia ad alternarsi un altro stato di il luminazione per garantire che le condizioni di illuminazione rientrin...

Page 11: ...privacy regolando LATO SINISTRO LATTO DESTRO LATO SUPERIORE LATO INFERIORE al di sotto di AREA STATE stato zona 2 AREA STATE stato zona Dopo aver impostato le zone 0 3 selezionare AREA STATE ON stato...

Page 12: ...RSION versione Visualizza la versione corrente del software 1 Selezionare LANGUAGE lingua tramite i pulsanti SU o GI 2 Impostare ENGLISH CHINESE inglese cinese tramite i pulsanti SINISTRA o DESTRA 6 S...

Page 13: ...a tutte le impostazioni effettuate ed esce dal menu principale 9 EXIT esci 8 1 FACTORY preimpostazioni di fabbrica Ripristina le impostazioni iniziali di fabbrica 8 2 RETURN ritorna al menu precedente...

Page 14: ...qualit delle immagini La tensione di alimentazione instabile I cavi di collegamento non sono collegati correttamente oppure l impedenza non corretta impedenza ele vata Note La rispondenza dell alimen...

Page 15: ...rference and vi bration There are some sophisticated parts inside the camera therefore during transportation and installation please avoid the damage cause by stress or severe vibration For the sake o...

Page 16: ...users information All items must only be used for the purposes designed WARNING to prevent injury this apparatus must be securely attached to the floor wall in accordance with the installation instru...

Page 17: ...OSD 20 1 LENS 20 2 EXPOSURE 20 3 WHITE BALANCE 21 4 BACKLIGHT 22 5 DAY NIGHT 22 6 DPC 23 7 SPECIAL 23 7 1 CAM TITLE 23 7 2 MOTION 23 7 2 1 AREA 24 7 3 PRIVACY 24 7 4 PARK LINE 24 7 5 IMAGE ADJ 24 7 6...

Page 18: ...igh definition picture in low Lux condition Auto Electronic Shutter AES Built in auto electronic shutter function The color camera s AES speed can reach 1 100 000s Gamma Characteristic Camera Gamma ch...

Page 19: ...0 Lux with IR LED ON Synchronous System Internal Negative sync Auto Electronic Shutter NTSC 1 60s 1 100 000s PAL 1 50s 1 100 000s Gamma Characteristic 0 45 IR Project Distance 30 Meters with 36 Unit...

Page 20: ...ters OSD 1 LENS This function is used to adjust the brightness of the screen 1 When the SETUP menu is displayed on the screen select LENS by the UP or DOWN button 2 Select the type of the lens setting...

Page 21: ...ehind the object clear images of the background as well as the object can still be obtained by using the BACKLIGHT function 1 Select BACKLIGHT on the SETUP menu by the UP or DOWN button 2 Select the v...

Page 22: ...night only all day 5 DAY NIGHT Day e night Switch is specially designed for oifferent occasions There are four kinds of modes as follows automatic mode color mode B W mode and extrenal switch The user...

Page 23: ...nd reduction of span life of the device 4 Delay Time This time means when the light begin to alternate another state the system make it delay a while for ensu ring the lights fully in this switching r...

Page 24: ...a 0 to area 3 Set dimension of each privacy area by LEFT RIGHT TOP and BOTTOM menus below AREA STATE 2 AREA STATE Once area 0 3 is set select AREA STATE ON to conceal the area on the screen select ARE...

Page 25: ...ON Software version visualisation 1 Select LANGUAGE by UP or DOWN button 2 Setting language from ENGLISH CHINESE by LEFT or RIGHT button 6 SHARPNESS Adjusted from 0 to 255 seconds 7 DISPLAY CTR LCD US...

Page 26: ...26 GB Save all setting menus and exit the main menu 9 EXIT 8 1 FACTORY Return to the camera s initial setting in factory 8 2 RETURN 8 RESET...

Page 27: ...er supply external sync camera can solve it 4 The picture smear too mass The power supply s voltage unstable Connecting cables not connect correctly or have high impedance Notes The power supply must...

Page 28: ...S6I 52L 500 RL 01 13 02 ELVOX Campodarsego Italy Via Pontarola 14 a 35011 Campodarsego PD Tel 39 049 920 2511 Fax 39 049 920 2603 www elvox com...

Reviews: