48
GB
ARRANGING ITEMS FOR DRYING
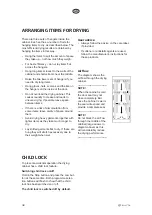
There are three sets of hangers inside the
cabinet. Each set has a number of rails for
hanging items to dry, as described below. The
most efficient drying results are obtained by
hanging the items in this way.
• Hang the items to suit the amount of space
they take up – not how much they weigh.
• For best efficiency – do not lay items flat
across the hangers.
• Hang long items closest to the walls of the
cabinet and shorter items near the middle.
• Raise the two lower sets of hangers if you
need to dry long items.
• Hang gloves, hats, scarves and the like on
the hangers on the inside of the door.
• Do not overload the drying cabinet. This
causes laundry to crease and leads to
uneven drying. If possible leave space
between items.
• If there is a risk of discolouration from
some items, leave plenty of space around
them.
• Avoid drying heavy garments together with
lighter items as they take much longer to
dry.
• Lay knitted garments flat to dry. If these are
hung they will stretch excessively due to
their weight when wet.
User advice
• Always follow the advice on the care label,
if provided.
• If softener or antistatic agents are used,
follow the manufacturer’s instructions for
these products.
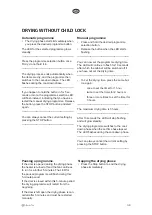
Air flow
The diagram shows the
air flow through the drying
cabinet.
________________
NOTE!
When the cabinet is cold
the door seal may not
close completely. But
once the cabinet is warm
the seal will expand and
provide a complete seal.
________________
NOTE!
Do not block the air flow
through the middle of the
cabinet (large arrows in
diagram above) as this
will considerably reduce
the drying performance.
________________
CHILD LOCK
To prevent accidental operation the drying
cabinet has a child lock feature.
Switching child lock on/off
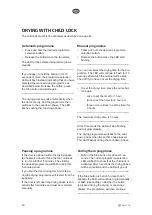
Hold in the Stop button and press the Low but-
ton at the same time. Both programme selec-
tion buttons will flash to show that the child
lock has been switched on or off.
The child lock is switched off by default .

