background image

6

Setting up interfaces, WLAN, app

SOL interface

 • Version: 24.11.2017 • Technical changes and errors excepted.

3.3. Configuring the WLAN

Prerequisite: The 

SOL interface

 status LED must be lit permanently.

Call up the available WLAN networks on your mobile device. Select the "SOL WLAN
interface" network. The mobile device is then connected with the SOL WLAN interface.

Start the app. Input fields will appear, into which you enter the on-site WLAN settings
"network name (SSID)", "encryption" and "code".

Now press "Save" top right in the menu screen. After about 10 seconds, the LED on the

SOL interface

 starts to blink regularly at short intervals. The interface is now connect-

ed with your WLAN router.

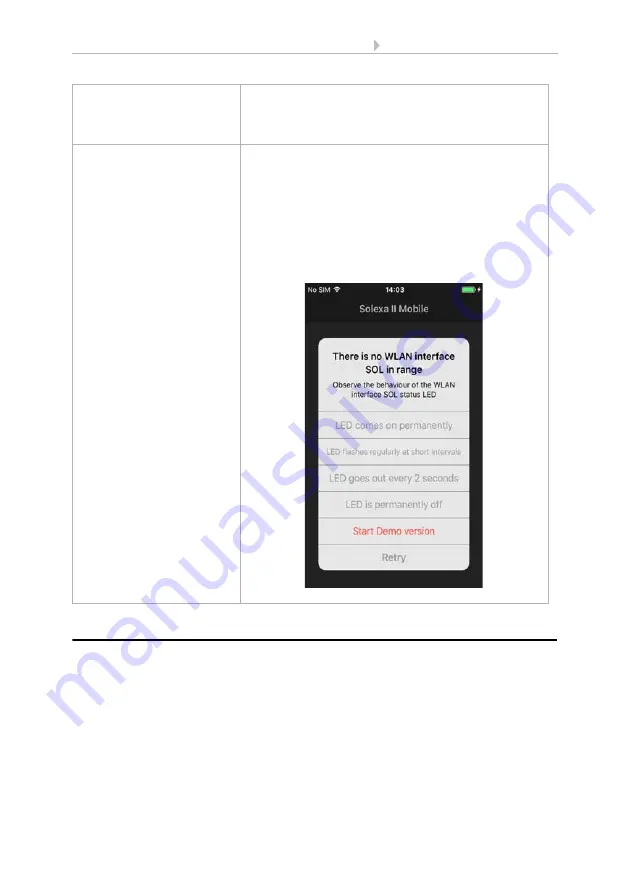
LED flashes regularly at 
short intervals 

Connected with the router
The SOL WLAN interface is connected with your 
router. Log on with your mobile device into the same 
WLAN network and start the app.

LED goes out briefly every 2 
seconds 

No WLAN connection to the router.
A connection to your router could not be established. 
If necessary, position the WLAN interface closer to the 
router. If the access data to your router has been 
changed, reset the SOL to the default factory settings 
(SOL section on resetting to factory settings) and con-
tinue with configuring the WLAN section.

Fig. 3 Screenshot showing No WLAN interface

Summary of Contents for 10154

Page 1: ...ation instructions Item number 10154 EN Technical support 49 0 70 33 30 945 250 Elsner Elektronik GmbH Control and Automation Engineering Sohlengrund 16 75395 Ostelsheim Phone 49 0 70 33 30 945 0 info elsner elektronik de Germany Fax 49 0 70 33 30 945 20 www elsner elektronik de ...

Page 2: ...ted in suc cession in the order of their arrival 1 1 Deliverables Interface in the housing for CEE 7 4 socket 1 2 Technical specifications The product is compliant with the provisions of EC guidelines 2 Instructions for first commissioning 2 1 Installation notes Installation testing operational start up and troubleshooting should only be performed by an electrician The device is only to be used fo...

Page 3: ...evices that communicate via radio adequate radio re ception must be guaranteed The range of wireless control will be limited by legal reg ulation and structural circumstances Avoid sources of interference and obstacles be tween receiver and transmitter that could disturb the wireless communication Those would be for example Walls and ceilings especially concrete and solar protection glazing Metal ...

Page 4: ... changes and errors excepted For iPhone iPad Open the App Store and install the Solexa II mobile app 3 2 Putting the SOL interface into operation The interface is plugged into a mains socket CEE 7 4 The mains voltage must be 230 V AC 50 Hz Fig 1 1 LED 2 Reset key recessed 2 1 ...

Page 5: ... equipment status from the LED status display type on the side LED off Initialising Initialising can take up to 1 minute LED on WLAN configuration mode In order to be able to use the SOL WLAN interface you must first of all configure the settings of the on site WLAN section configuring WLAN Fig 2 Screenshot of WLAN settings ...

Page 6: ...ds the LED on the SOL interface starts to blink regularly at short intervals The interface is now connect ed with your WLAN router LED flashes regularly at short intervals Connected with the router The SOL WLAN interface is connected with your router Log on with your mobile device into the same WLAN network and start the app LED goes out briefly every 2 seconds No WLAN connection to the router A c...

Page 7: ... app The app is now ready for use Alternatively the weather station can be taught by pressing the PRG button on the in side of the housing However this may only be done by a qualified electrician since the PRG button is on the inside of the weather station WARNING Electrical voltage The weather station programming button is on the inside of the housing and thus in the proximity of unprotected live...

Page 8: ... sign Alternatively Swipe the item to the left with your finger The Edit menu opens on the right next to the item Tap on Edit and assign the new name Either confirm with OK or close the input screen using Cancel Changing names in Android Press on the desired item until a text box with a keyboard appears Confirm with OK or touch the display outside the keyboard to cancel 4 2 App operating and displ...

Page 9: ...eration and automatic operation 2 Rocker switch Tap the rocker switch to trigger short movement commands or switching commands If a drive is to move continuously upwards downwards hold the rocker switch down for at least one second 3 Text display Name For shading and windows current movement position For heating and lighting current status if applicable level of dimming For sensors current values ...

Reviews: