34
MODEL:eXperience 660
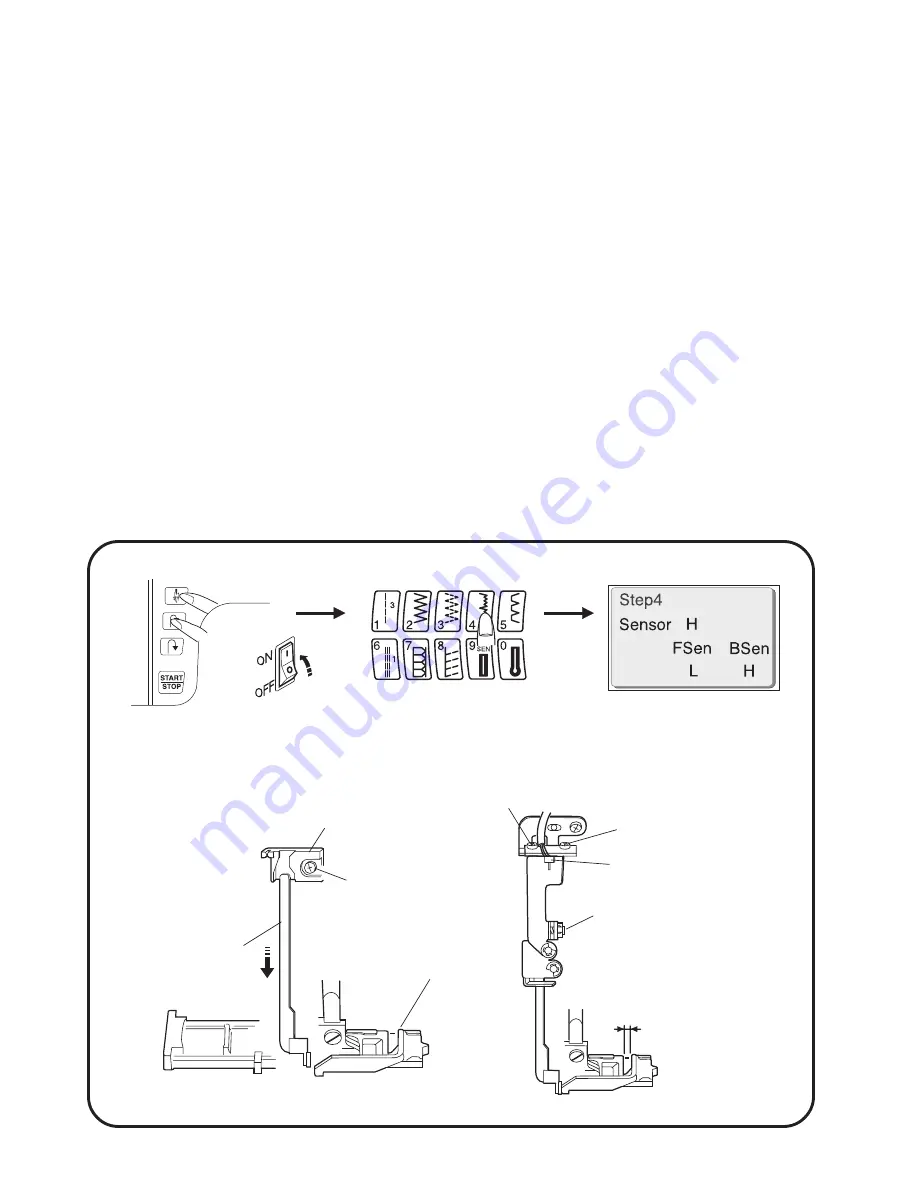
Buttonhole lever guide
Setscrew (A)
BH lever
Adjusting screw
Buttonhole sensor
Clearance
1.6 mm
Setscrew (B)
Setscrew (B)
ADJUSTING BUTTONHOLE LEVER POSITION
TO ADJUST THE BUTTONHOLE LEVER GUIDE:
1. Set the machine in buttonhole sensor adjusting mode.
(See below. The screen should display "H" or "L".)
2. Remove the face cover and loosen setscrew (A).
3. Lower the buttonhole lever. Position the buttonhole lever guide so the screen displays "L". Tighten
setscrew (A).
TO ADJUST THE BUTTONHOLE SENSOR POSITION:
4. Install the buttonhole foot (R).
5. Lower the buttonhole lever to its lowest position, and insert a 1.6 mm thickness gauge.
6. Turn the adjusting screw to the left until the screen display changes from "L" to "H".
7. Then, turn the adjusting screw to the right until the screen display changes from "H" to "L".
8. Check if the lcd screen shows "H" when the clearance of the buttonhole foot is 1.4 mm and "L"
when the clearance is 1.8 mm.
9. Turn off the power switch.
10. Install the face cover.
NOTE:
If there is any lint in the buttonhole sensor slit, clean out with a swab.
TO ENTER ADJUSTING MODE
Turn the power on while pressing the
needle up/down button and auto-lock
button.
Press the button "4".
Buttonhole foot (R)


