background image

6.10    Network Setup


Note

: Users experiencing network issue may find these options useful for diagnosing and fixing network problems. 

1.  The path is: Long press 

MODE/MENU


 < 

Main menu 

 <

 Network >

.   

2.  Turn 

SELECT

 to your selecting network setting option: 


Want to access to another Router? --------- 

Netwotk wizard


Want to set up a WPS encrypted network? ---------

PBC Wlan setup


Want to get MAC address, Wlan region, IP address etc? ---------- 

View settings.


Want to set it to another region? ---------- 

Wlan region


Want to shift your radio connection between wired network (LAN) and wireless?    ---------- 

Manual settings


Want to see the list of registered networks or delete some of unwanted networks? ---------- 

Network profile


3.  Press 

SELECT 

to confirm to enter setting. 

6.11    Software Update 

From time to time, your radio may make software upgrades due to bug fixes and/or additional features. 

If your radio detects that newer software available, it asks if you want to go ahead with an update. If you agree, the new 

software is then downloaded and installed.   

After a software upgrade, all user settings are maintained.   

C    A    U    T    I    O    N


Before starting a software upgrade, ensure that your radio is plugged into a stable mains power 

connection. Disconnecting power during a software update may permanently damage the unit. 

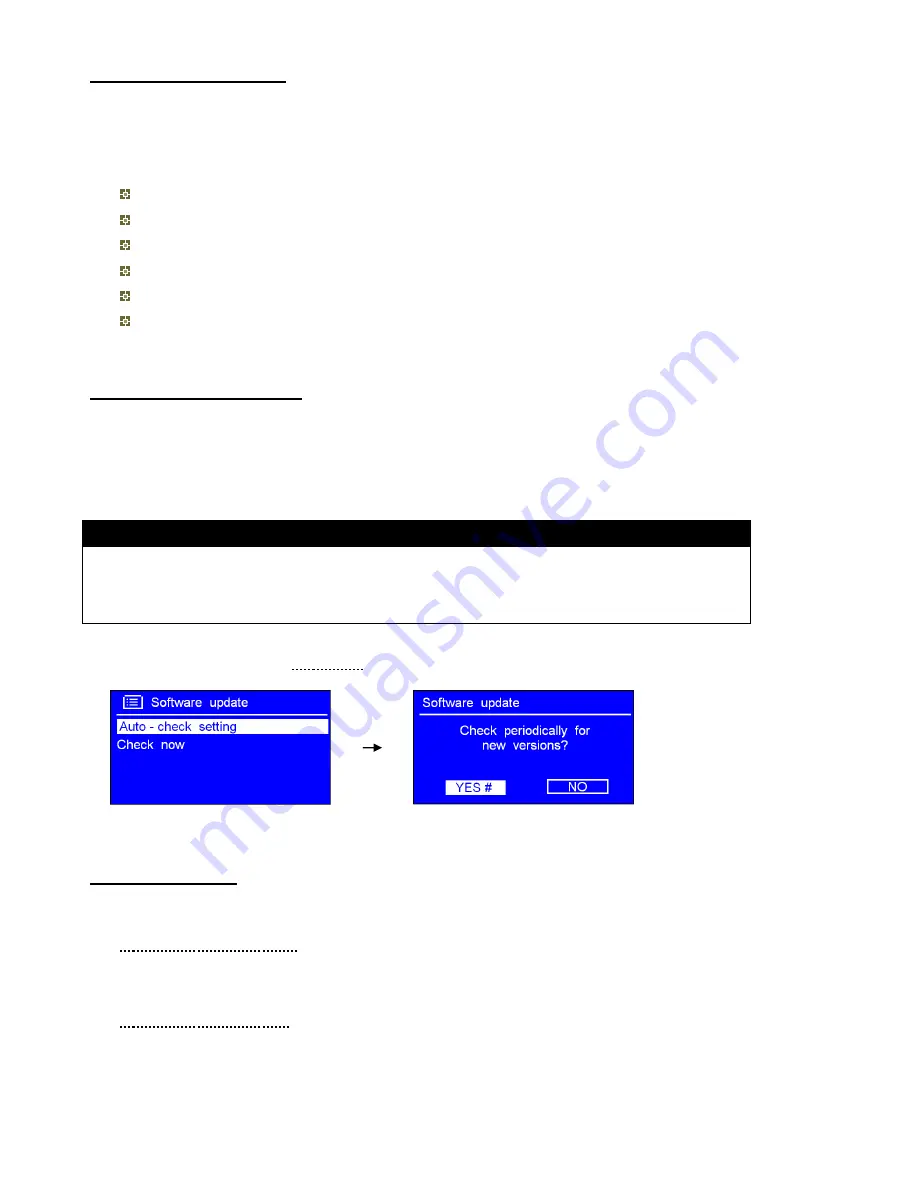
1.    It can be activated by long pressing 

MODE/MENU


 Main menu 


Software update 

 Auto-check setting

press

 SELECT

 to confirm. 

Check now

’ is also a convenient option for your radio to detect new software   


3. Turn 

SELECT 

to < 

YES 

>, press this knob to confirm. 

6.12    Backlight 


Note

: High brightness level can get you pretty easy to view the station information. Set to Low is for energy saving purpose.


·


For Power on condition: 

It can be activated from < 

Main menu 

 < 

Backlight 

 Power on Level 

 Low/Medium/High

. (Setting to high 

level is recommended!) 

·


For Standby condition: 

Its access path is similar to 

‘power on condition’, however, set to ‘Low or Medium’ is recommended. 


Summary of Contents for Penbex

Page 1: ...I n t e r n e t D A B D A B a n d F M R a d i o...

Page 2: ...r objects have fallen into the apparatus the apparatus has been exposed to rain or moisture does not operate normally or has been dropped 15 The apparatus shall not be exposed to dripping or splashing...

Page 3: ...12 1 10 Connecting to Wired Network 13 1 11 Shift to Wireless Network 13 Chapter 2 Music Player Mode 14 Chapter 3 DAB Mode 16 3 1 Getting Started 16 3 2 Shift to another DAB DAB Station 16 3 3 Update...

Page 4: ...nguage 23 6 7 Factory Reset 23 6 8 Enter Setup Wizard 23 6 9 SW Version and Radio ID or System Info 23 6 10 Network Setup 24 6 11 Software Update 24 6 12 Backlight 24 Chapter 7 Specification 25 Chapte...

Page 5: ...de Long press to go to main menu and other options BACK Press to go to previous page PRESETS Internet DAB DAB and FM mode Press and hold to activate preset stations function and short press to load pr...

Page 6: ...der PRESET Internet DAB DAB and FM mode Press and hold to activate preset stations function and short press to recall preset stations SCAN DAB DAB FM mode Press to autoscan active stations INFO Intern...

Page 7: ...WPA code so you can get the Internet Radio to communicate with the network For security reason you may need enter the Radio s MAC address into your wireless access point To find the Radio s MAC addres...

Page 8: ...g one then press SELECT Note If a password WEP WPA isn t required by your network radio will connect to the network automatically 3 If a WEP WPA key password is required radio will ask you to input th...

Page 9: ...fail to connect to internet please follow a Check your router see it working normally or not b Relocating your radio to a stronger signal position may be necessary c Make sure your password is input...

Page 10: ...to their content such as Classic Rock Sport News etc Note a Some radio stations do not broadcast 24 hours a day and some stations are not always on line b If this station has on demand content that i...

Page 11: ...the various additional features and services offered by the Frontier Internet Radio Portal 5 After above setting is done in order to have your radio access your new settings get your radio power off f...

Page 12: ...tage of the various additional features and services offered by the Frontier Internet Radio Portal 4 After above setting is done in order to have your radio access your new settings get your radio pow...

Page 13: ...to confirm while cursor point to Internet Radio press SELECT to confirm Or press MODE MENU repeatedly until Internet Radio is showing up stop pressing or Step3 Access Network Continue the above steps...

Page 14: ...ommon UPnP server is Windows Media Player 10 or later Alternatively other UPnP platforms and servers may be used To set up WMP for media sharing perform the following steps 1 Ensure that the PC is con...

Page 15: ...press SELECT again shift from On to Off Shuffle Play Mode Long press MODE MENU turn SELECT to Shuffle play Off press SELECT to shift Off to On Clear My Playlist Note sometimes you might be considered...

Page 16: ...to go to station list 2 While cursor point to Station list press SELECT to confirm 3 Turn SELECT to cycle through stations list and then press SELECT to confirm 3 3 Update Station List It s a good id...

Page 17: ...2 Turn SELECT to your preferred option press SELECT to confirm 3 7 To change station order 1 The path is Long press MODE MENU Station order press SELECT to confirm Note There are 3 options Alphanumer...

Page 18: ...o searching the next active station repeat step 3 b The unit will display the frequency changing until it stops on the next station 4 2 Scan Setting By default FM scans stop at any available station T...

Page 19: ...option 1 10 2 Press SELECT to confirm your radio would indicate Preset stored and then your radio will return to its normal working condition and preset icon appeared on display 4 5 Access Preset Sta...

Page 20: ...matically output through the radio 3 Connect one end of the audio cable to the headphone or auxiliary out socket of your source device the other end connect to AUX IN socket on the rear of your radio...

Page 21: ...e press SELECT to confirm Note here turn the SELECT knob a range of time settings is available which include the functionality to set Set Time date Manually set up both Time and Date Auto update Updat...

Page 22: ...active alarms with an icon at the bottom left To check alarms status long press INFO POWER to enter standby mode Turn Alarm off When alarm is coming long press INFO POWER to turn it off Play Snooze Fu...

Page 23: ...presets are lost However the radio s current software version is maintained as is registration with the Internet radio portal Internet radio favourites are kept unless you re register your radio with...

Page 24: ...hat newer software available it asks if you want to go ahead with an update If you agree the new software is then downloaded and installed After a software upgrade all user settings are maintained C A...

Page 25: ...00 240 Vac 50 60 Hz Dimension 157 x 49 x 86mm This symbol on the product or in the instructions means that your electrical and electronic equipment should be disposed at the end of its life separately...

Page 26: ...e sensitive If when attempting to connect to an encrypted network your Radio displays Wireless error followed by a 5 digit number then please ensure that you enter the correct passphrase for the netwo...

Reviews: